
Part 1: Prepare an Inspection Work Pack
In this part you select equipment in the Tag Browser and download an Inspection Work Pack (IWP) — a portable file that carries your selections into the Inspection App.
Open a project
Section titled “Open a project”If you already have a project open, skip to Select equipment. Otherwise, from the Accounts Page, click on the project you want to work with, then click Open.

Your project opens on the EQUIPMENT tab — the master list of all equipment registered in the project.
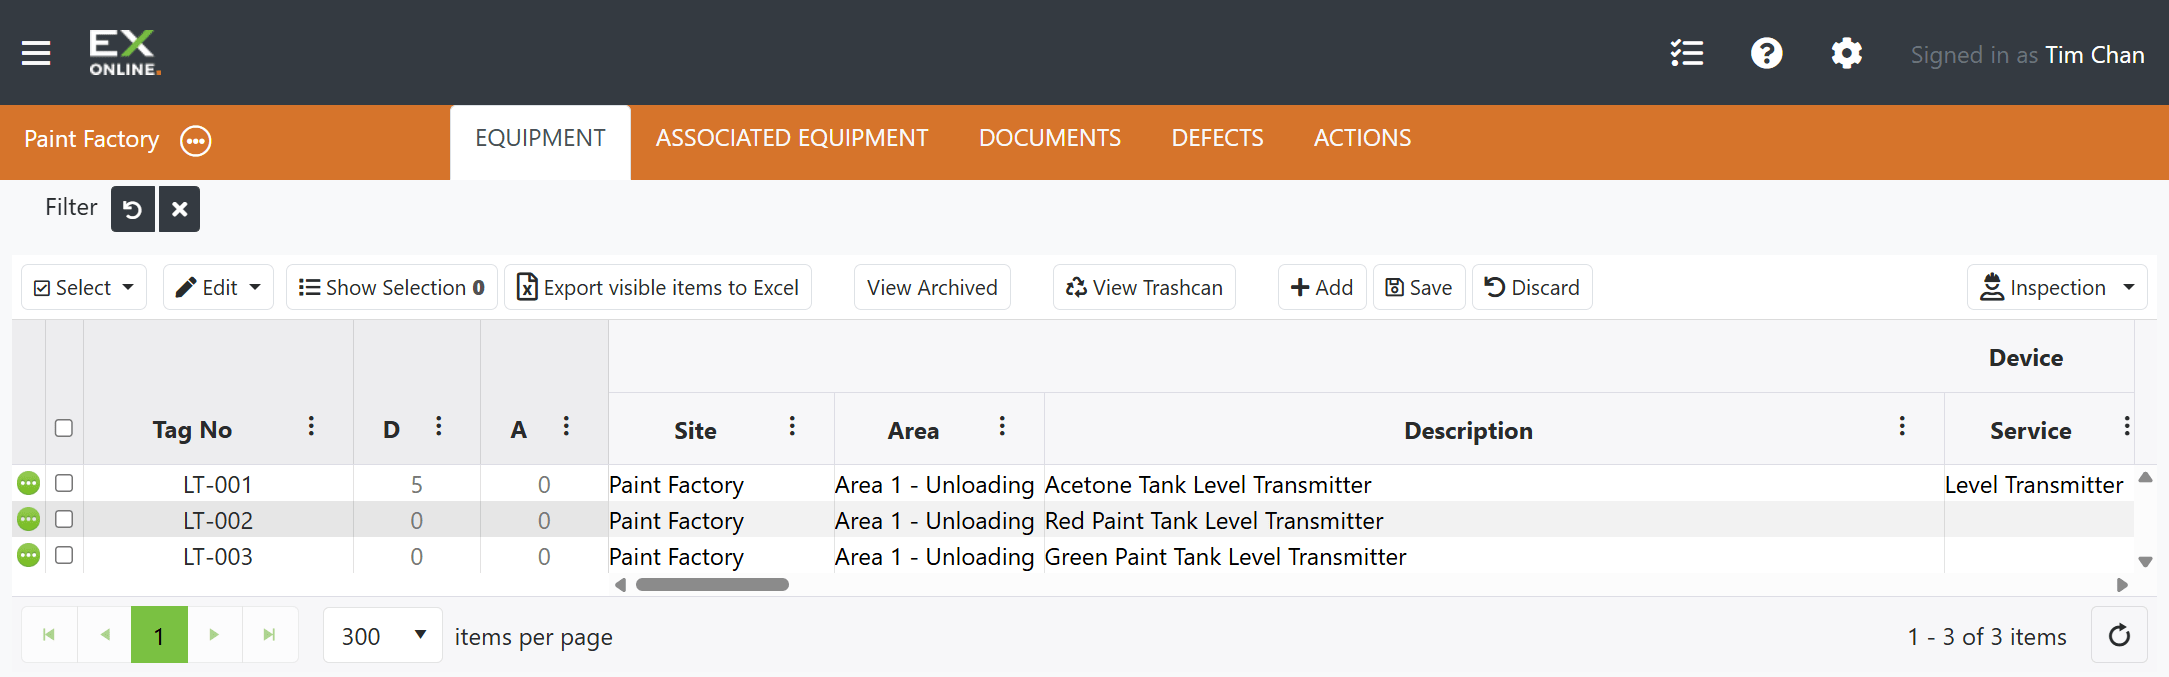
Select equipment
Section titled “Select equipment”Tick the checkboxes next to the items you want to inspect. The toolbar updates with a Show Selection button and a count — for example 2 if you picked two items.
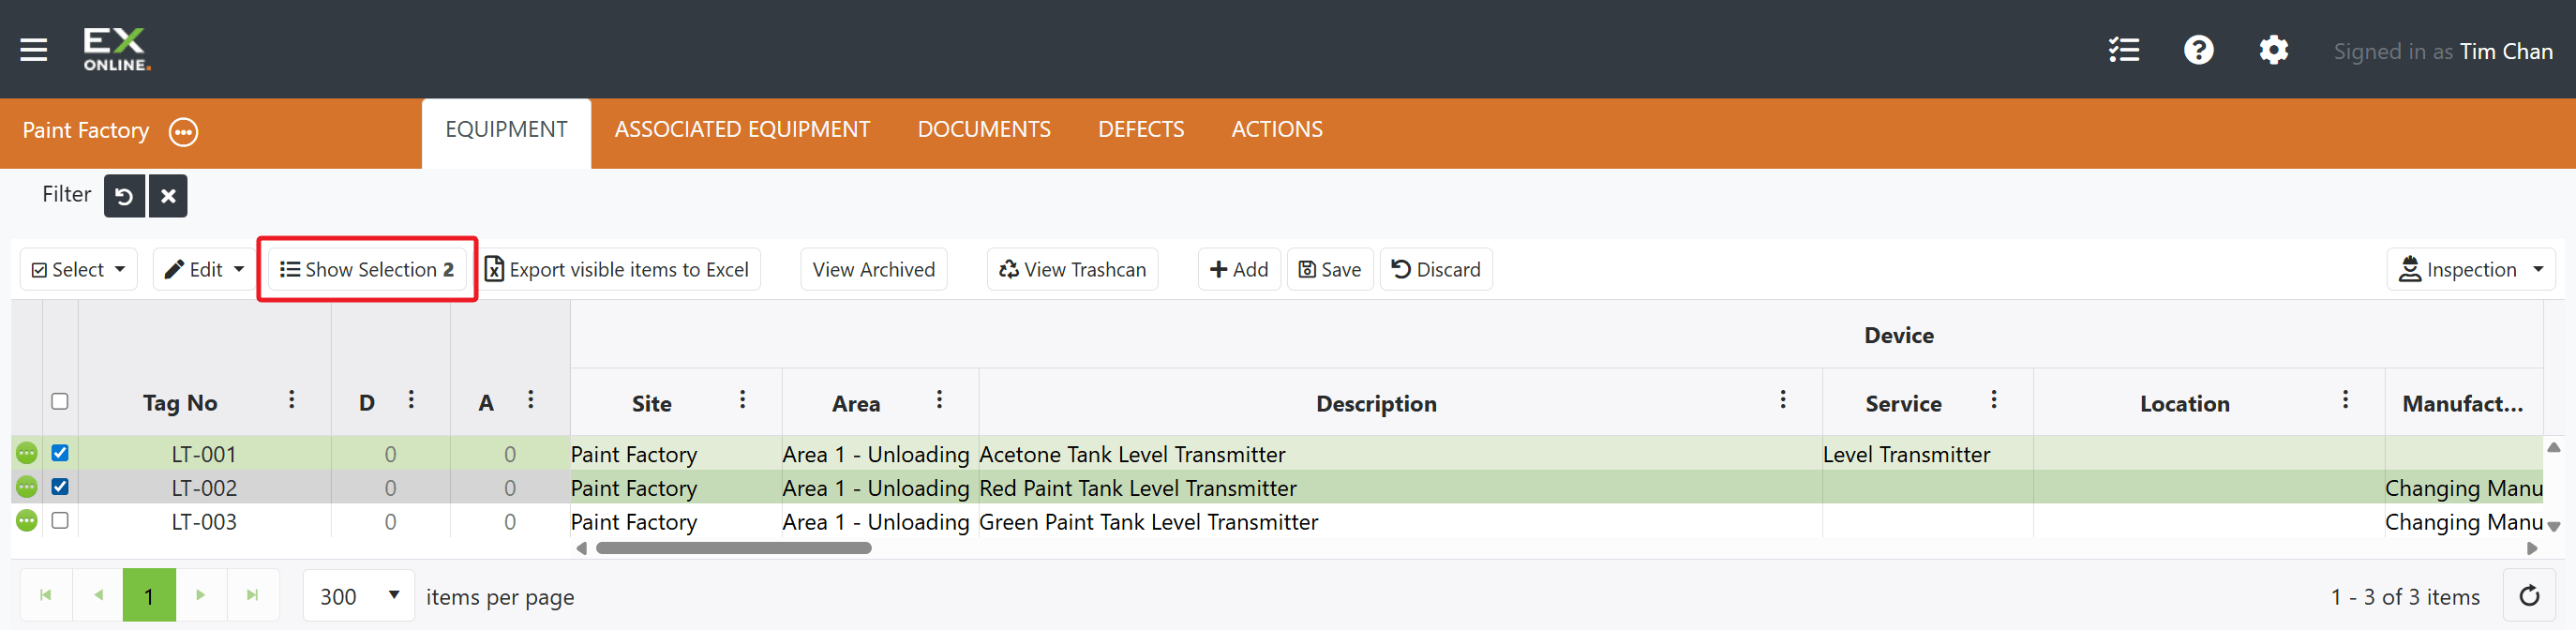
Download the Inspection Work Pack
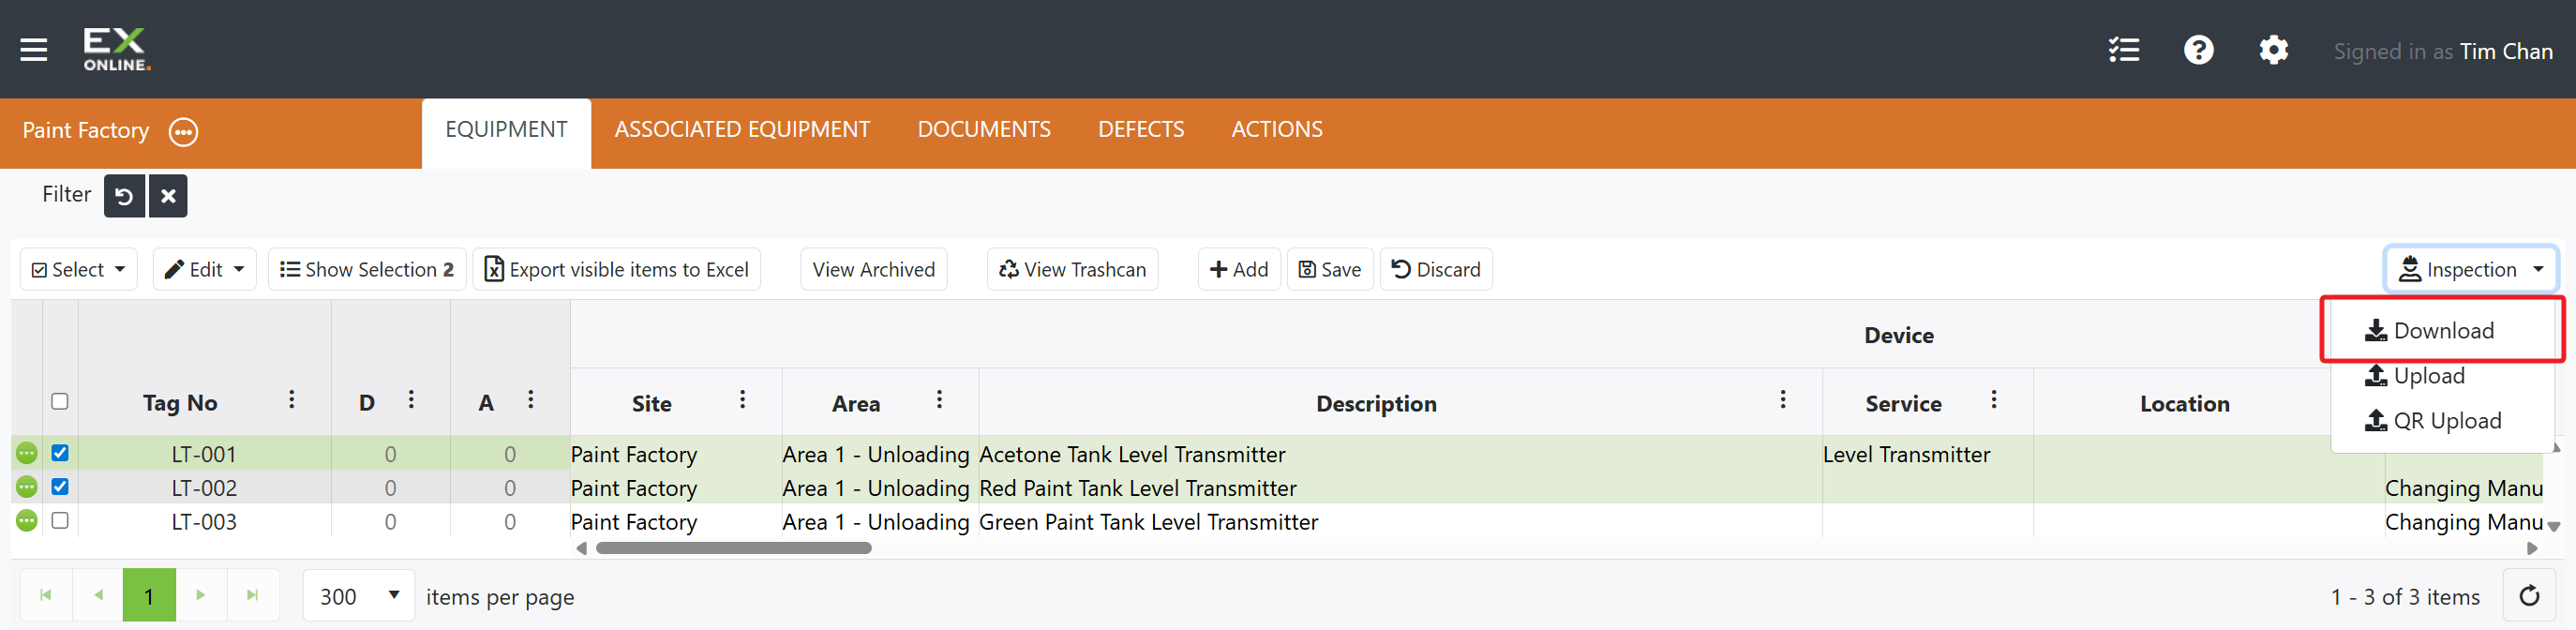
Section titled “Download the Inspection Work Pack”Click the Inspection dropdown on the right side of the toolbar and choose Download.
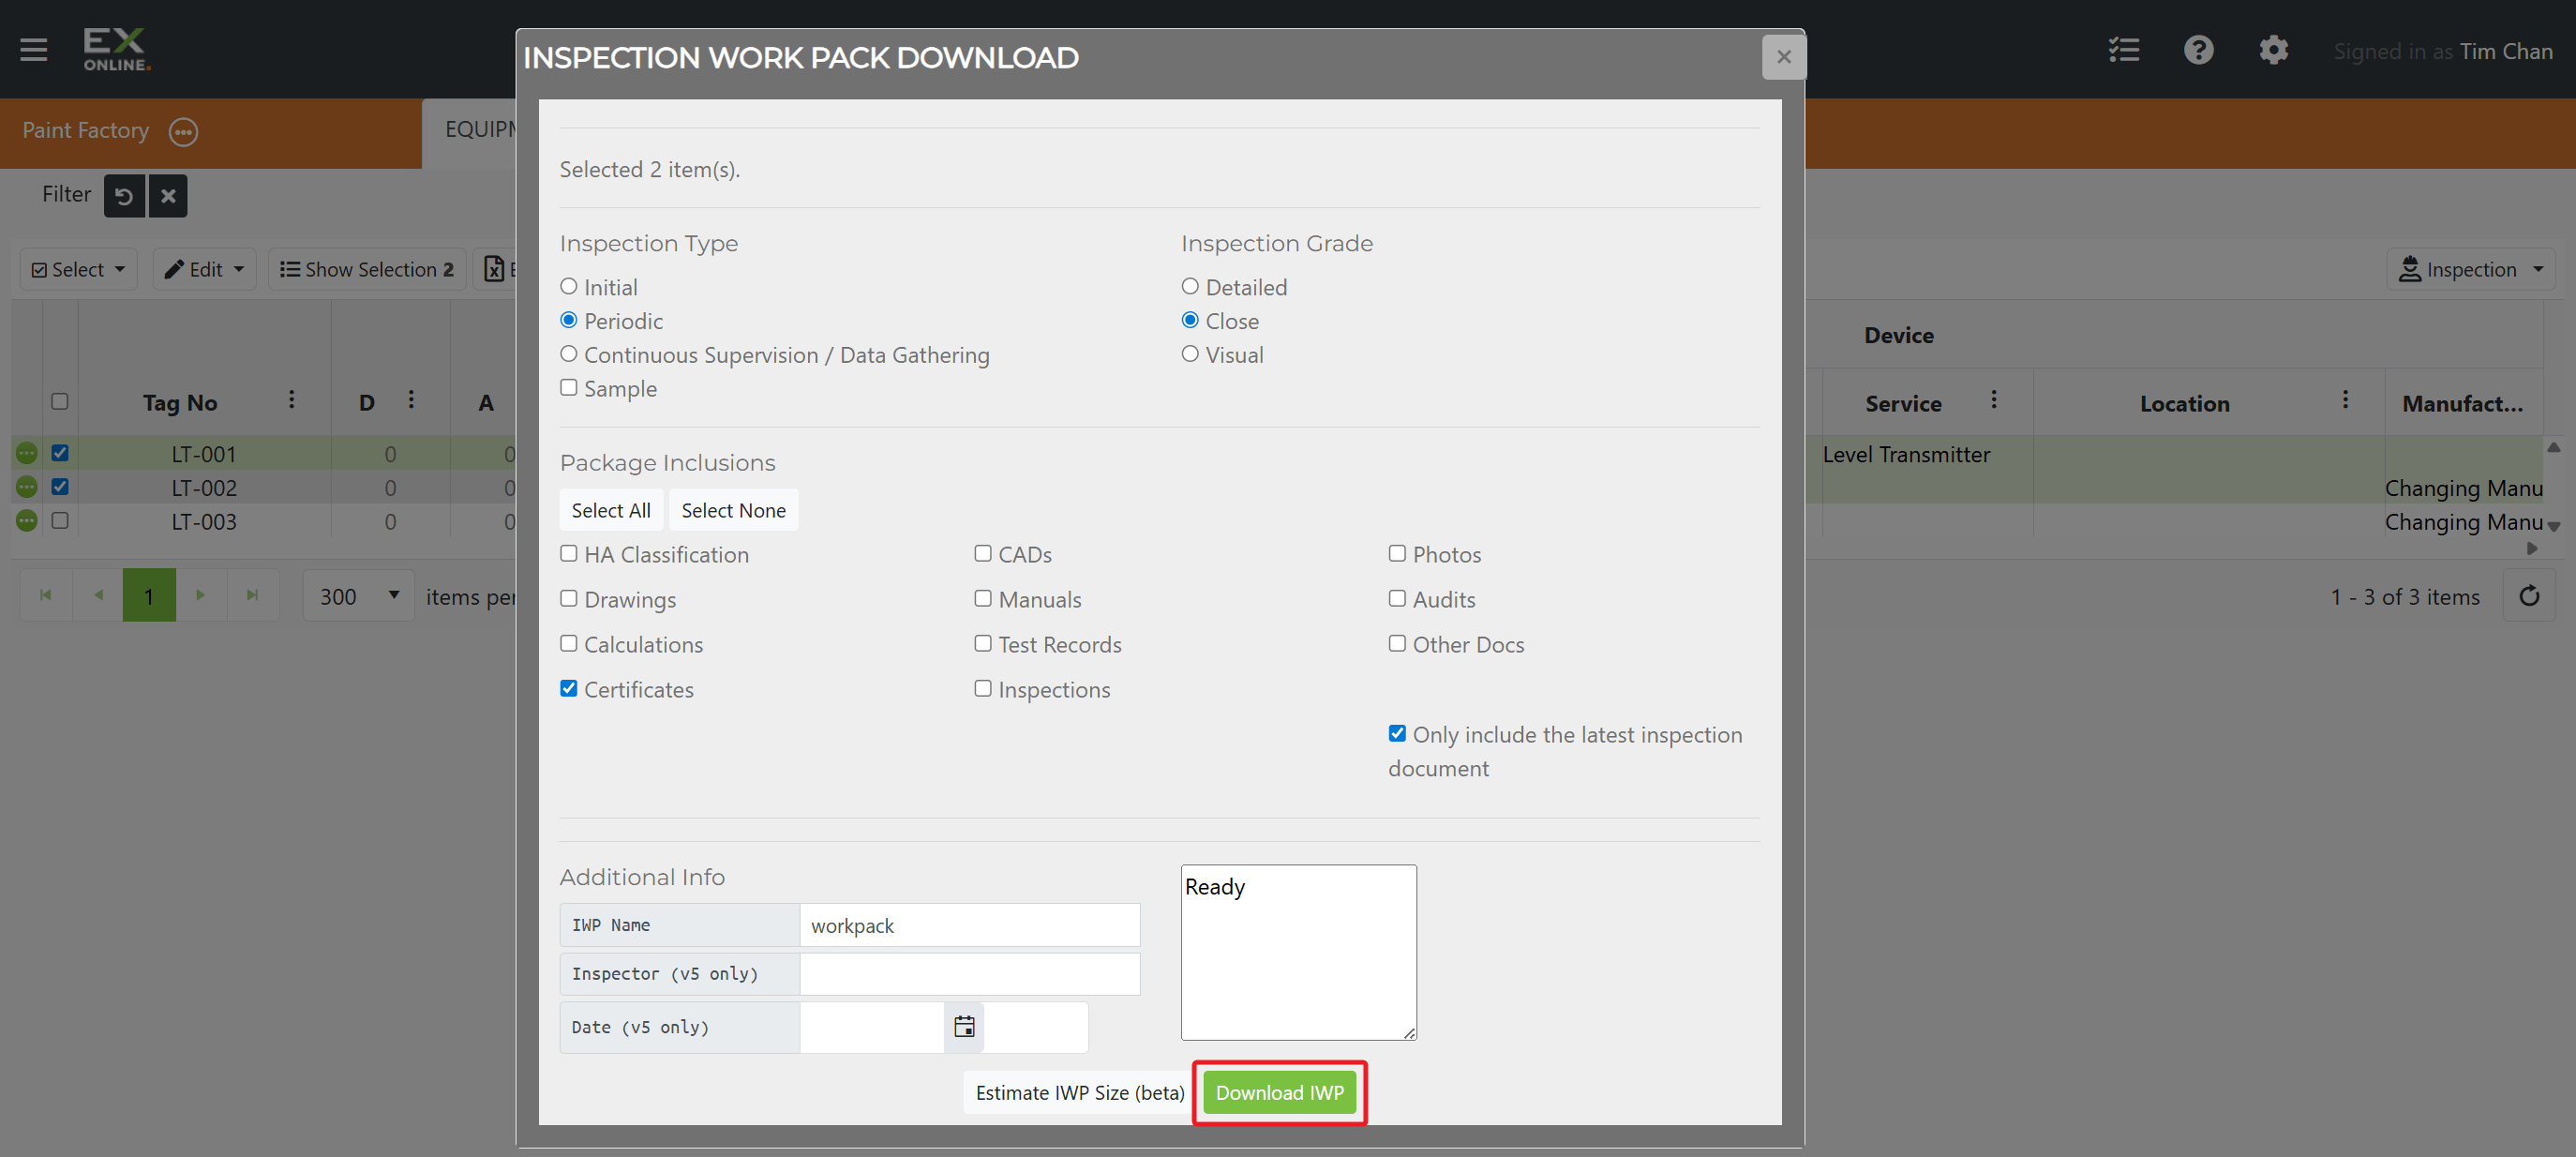
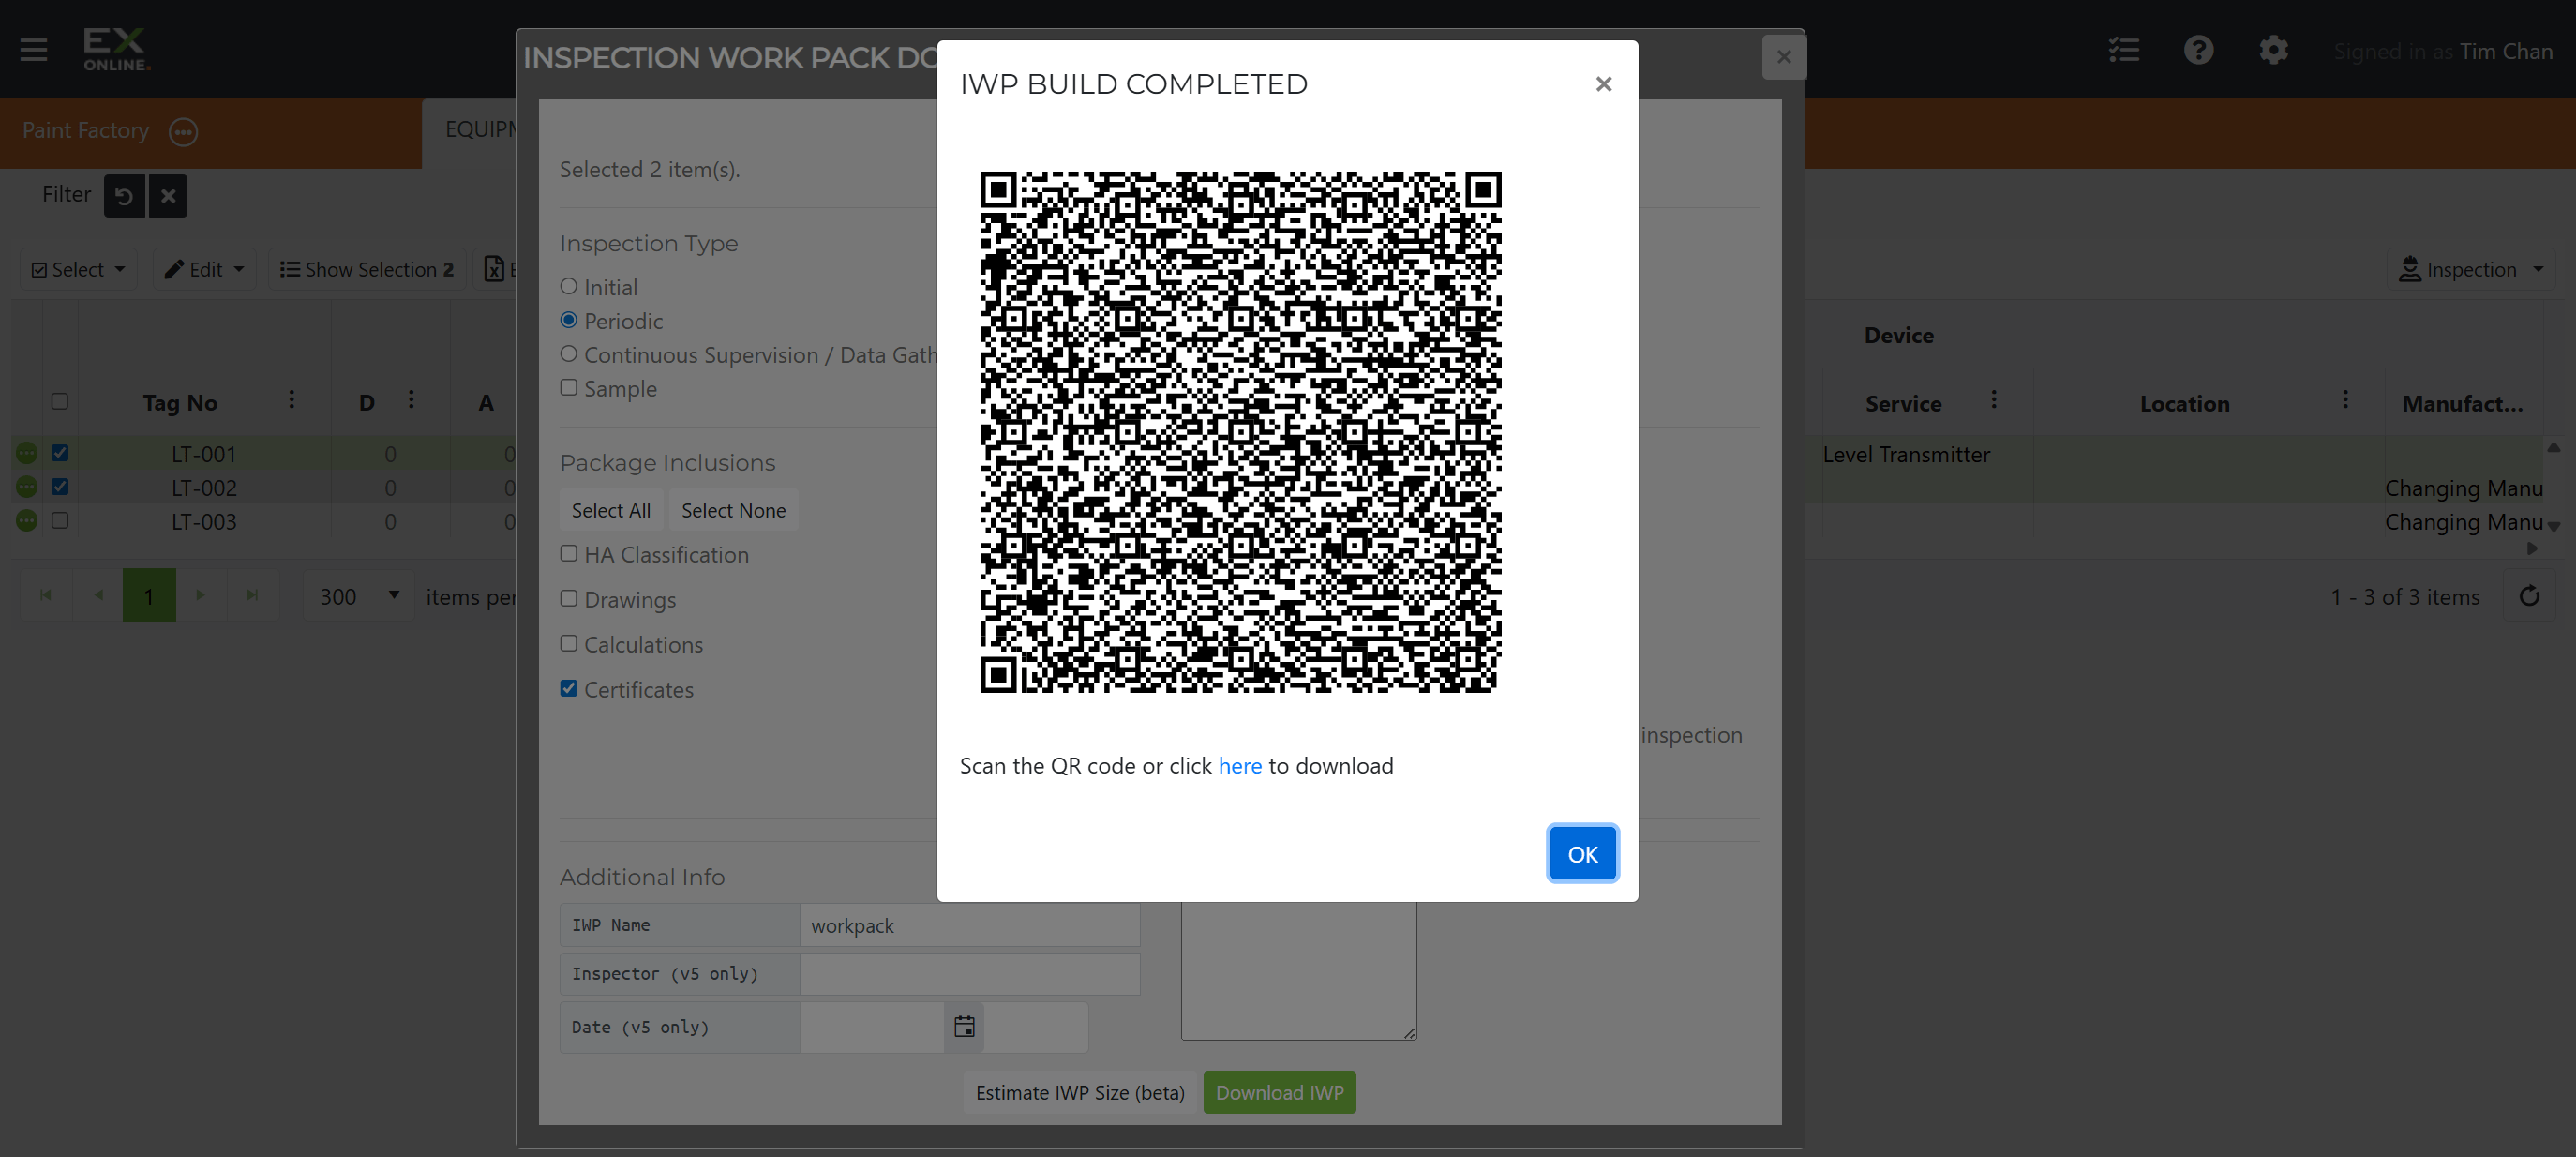
Keep the default options — Periodic, Close, Certificates ticked — and click Download IWP. See Checksheet Options for details on each setting.
The IWP Build Completed dialog shows a QR code and a download link. Scan the QR code with the Inspection App on a phone or tablet, or click the here link to save the .iwp file for the desktop app.
Click OK to close. Continue to Part 2: Complete the Inspection.