
Managing Associated Equipment
This guide covers everyday associated equipment tasks: adding records, editing fields, linking to equipment, copying records to other projects, merging duplicates, and archiving. For a full description of every field and feature, see the Associated Equipment reference.
The Associated Equipment Register is designed to contain one record per Certificate of Conformity and serves as a library of the certificates used in a project. A certificate may cover several models, sizes, or protection types, so multiple equipment items can link to the same certificate record.
Record the model or other details of the component installed with each equipment item, if needed, in the Equipment Register’s Other Associated Equipment Details or IS Barrier/Isolator Model field. For example, two equipment items can link to the same certificate while one specifies “XYZ Cable Glands M20” and the other “ABC Cable Glands M25”.
If your project already has multiple records for the same certificate, we recommend merging them.
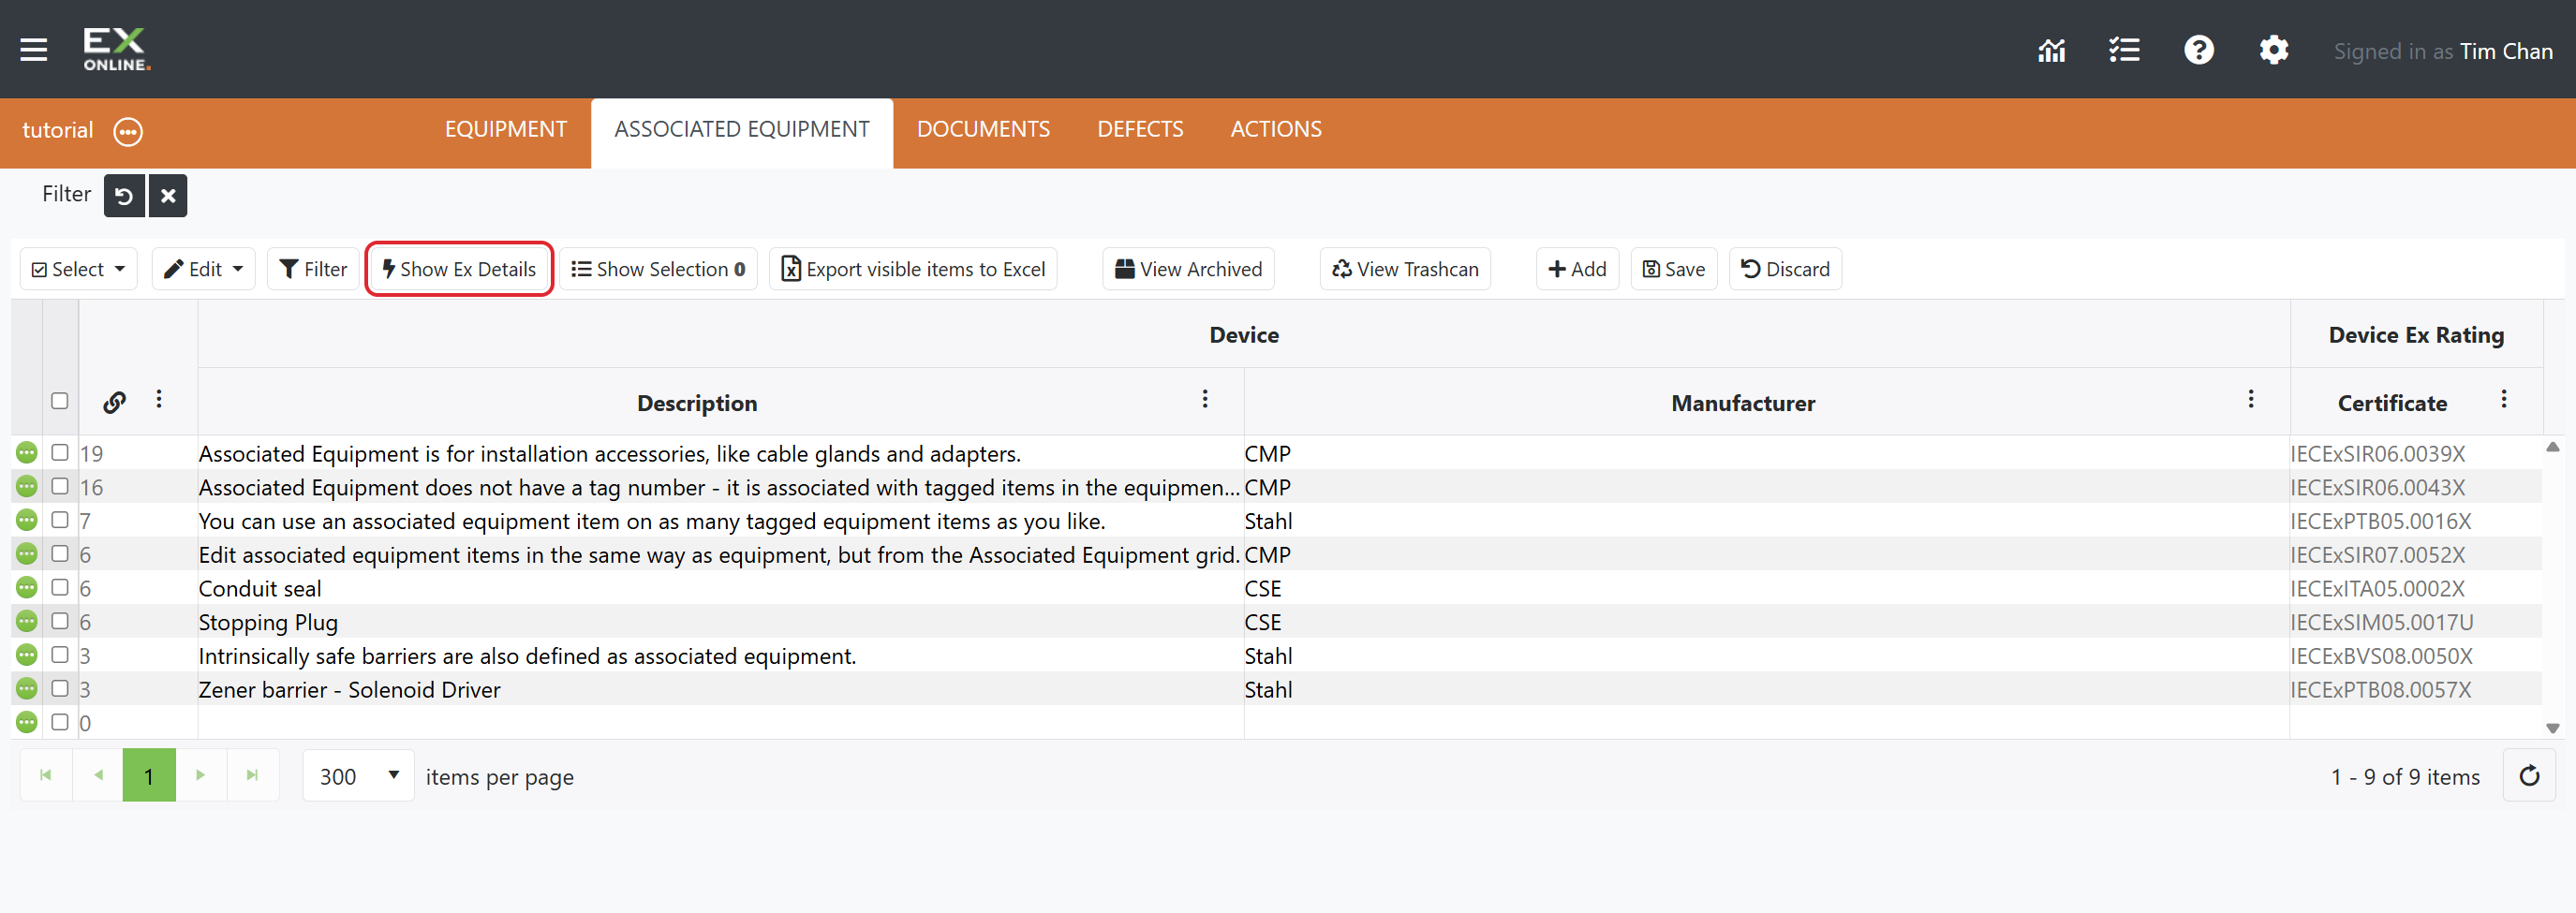
Specific component Ex details do not need to be recorded in the Associated Equipment Register, so the Ex Details fields are hidden by default. Click Show Ex Details at the top of the grid to display them if needed.
Adding Associated Equipment
Section titled “Adding Associated Equipment”To add a new associated equipment item:
-
Go to the ASSOCIATED EQUIPMENT tab in the orange header bar.
-
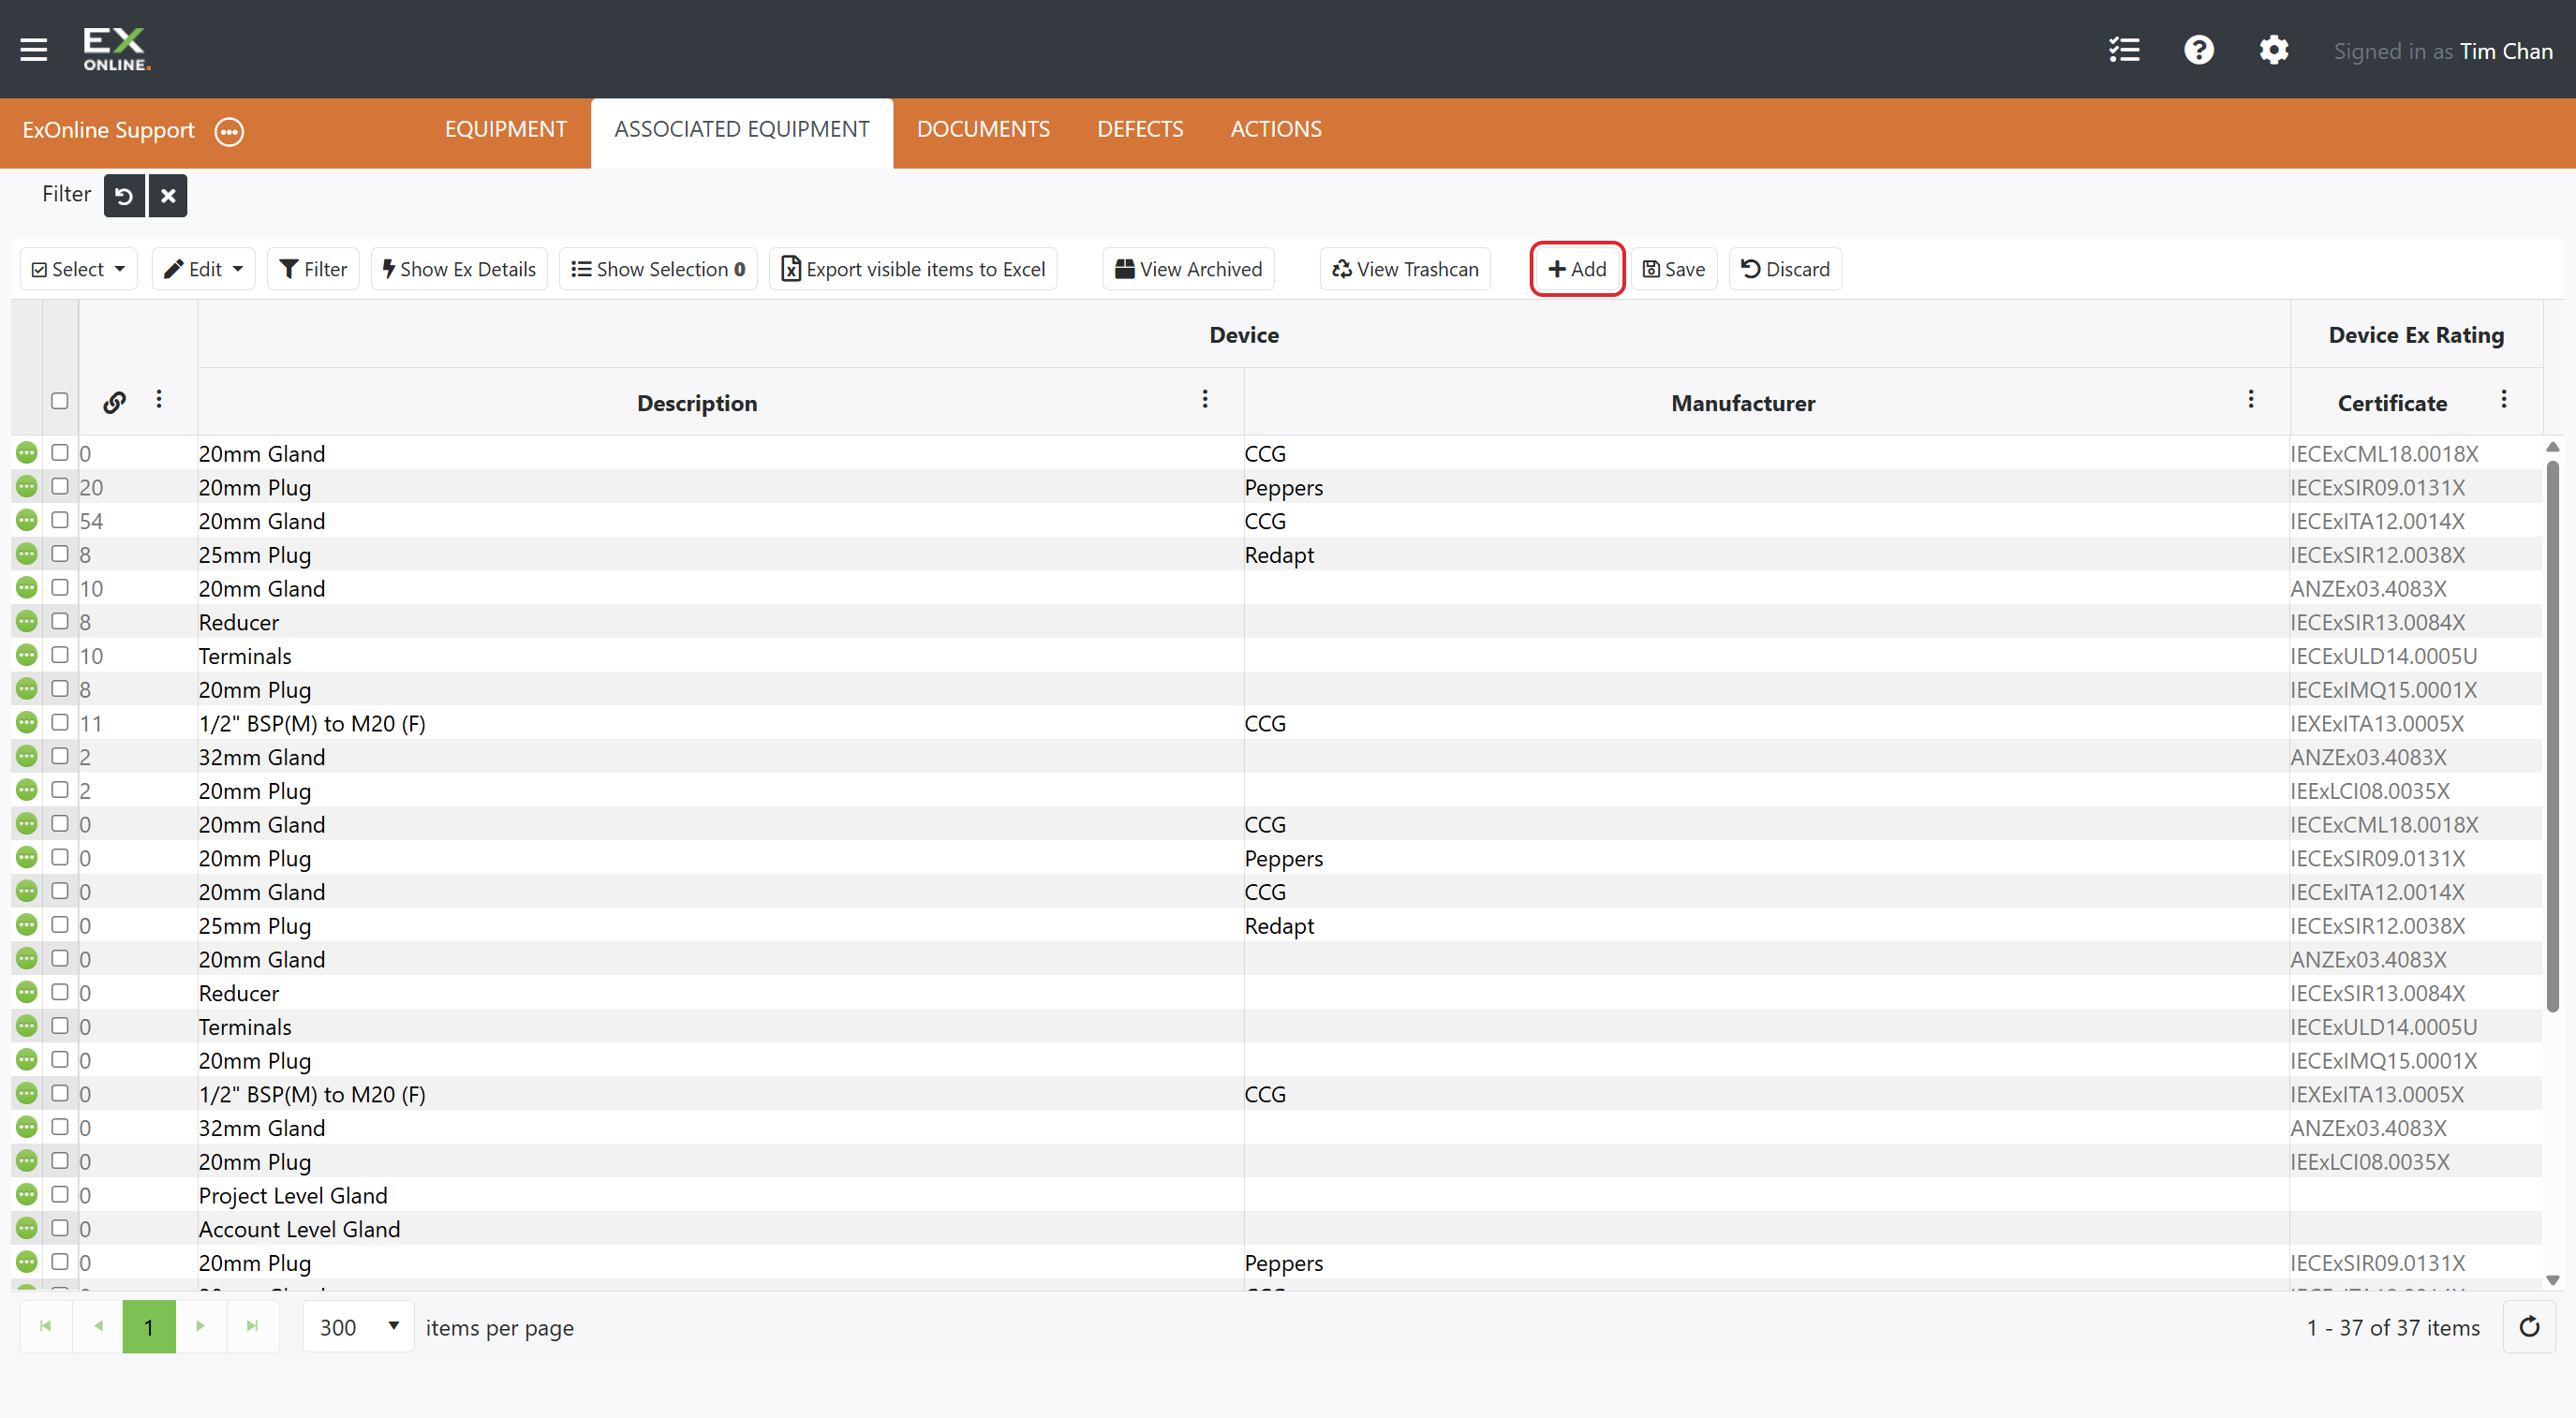
Click the + Add button in the toolbar.
-
In the Add Associated Equipment dialog, enter a Description and Certificate number.
-
Click Add.
Finding Associated Equipment
Section titled “Finding Associated Equipment”Use the column filters to narrow the grid. Click the filter icon next to any column header to filter by that column’s values — for example, filter by Service to see only IS Barriers, or by Manufacturer to review a specific brand. See Filtering and Sorting Data for step-by-step instructions.
Editing in the Grid
Section titled “Editing in the Grid”To update fields directly in the grid:
-
Go to the ASSOCIATED EQUIPMENT tab in the orange header bar.
-
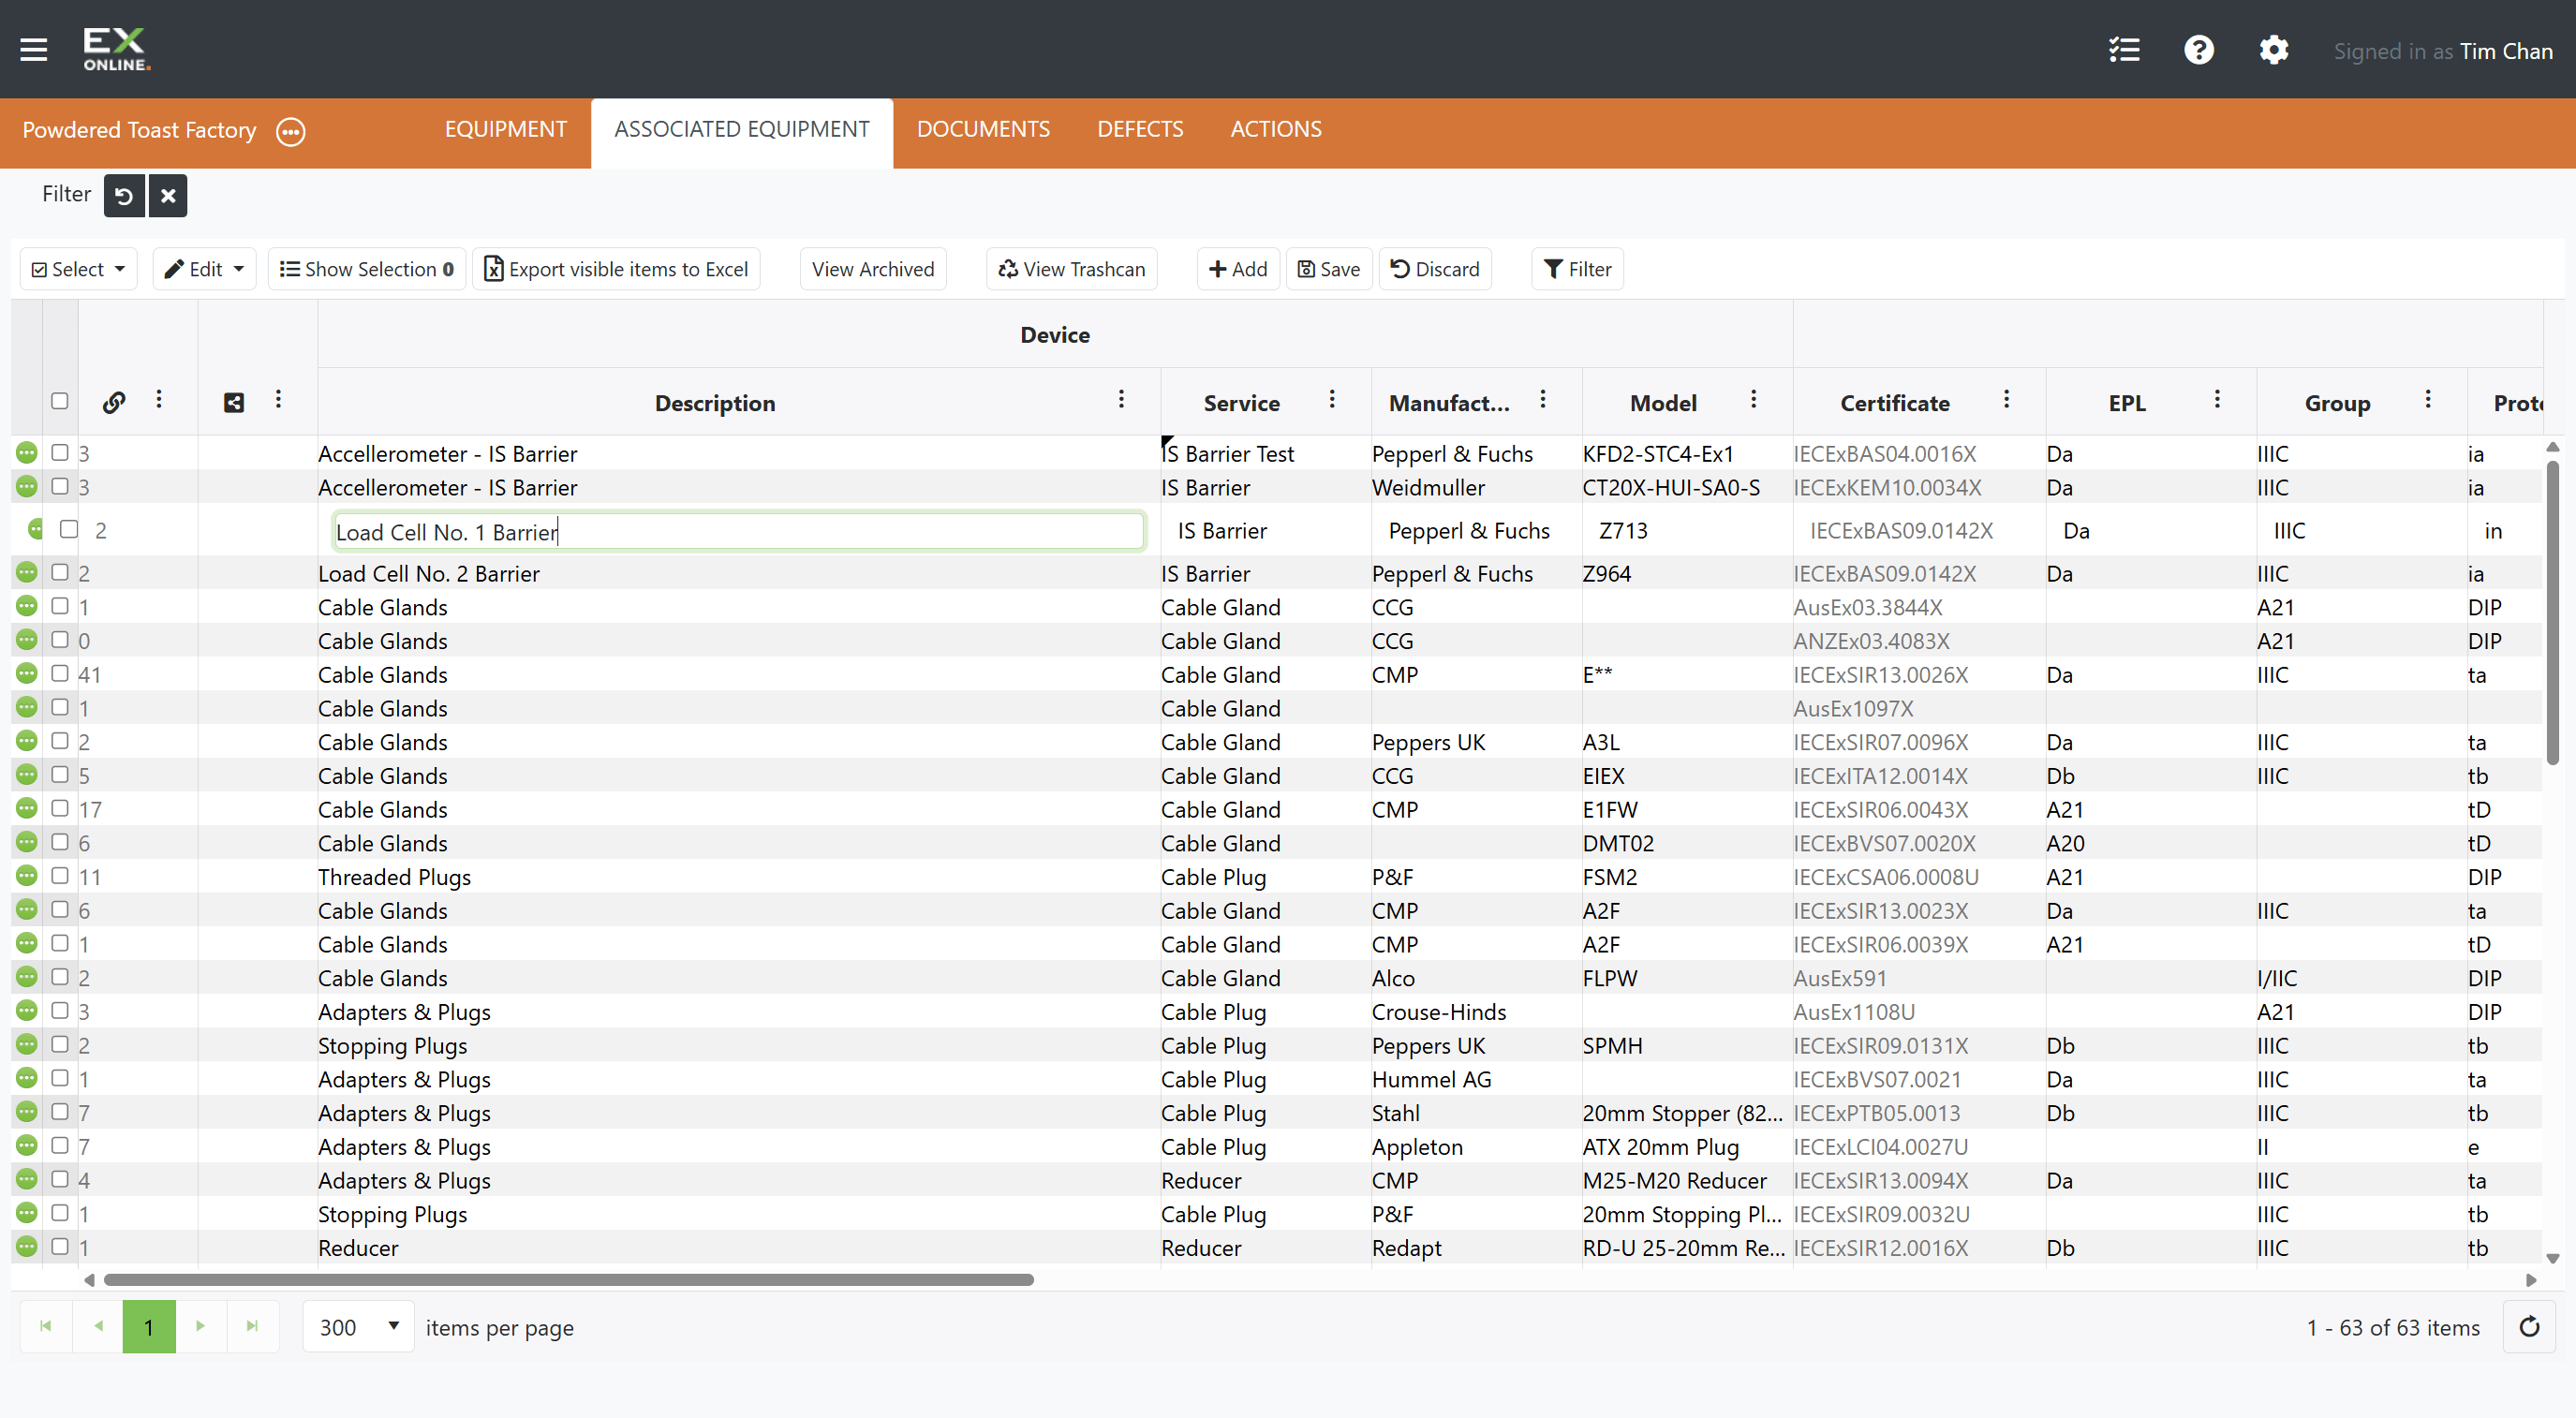
Click on any editable cell in the row.
-
Modify the value — changed cells are marked with a red triangle in the corner.
-
Click Save in the toolbar to commit, or Discard to cancel.
Editing in the Associated Equipment Window
Section titled “Editing in the Associated Equipment Window”The Associated Equipment Window provides access to all fields and tabs for a single item.
-
Go to the ASSOCIATED EQUIPMENT tab in the orange header bar.
-
Click the green expand icon on the left of any row.
-
The Associated Equipment Window opens showing the Item Details tab.
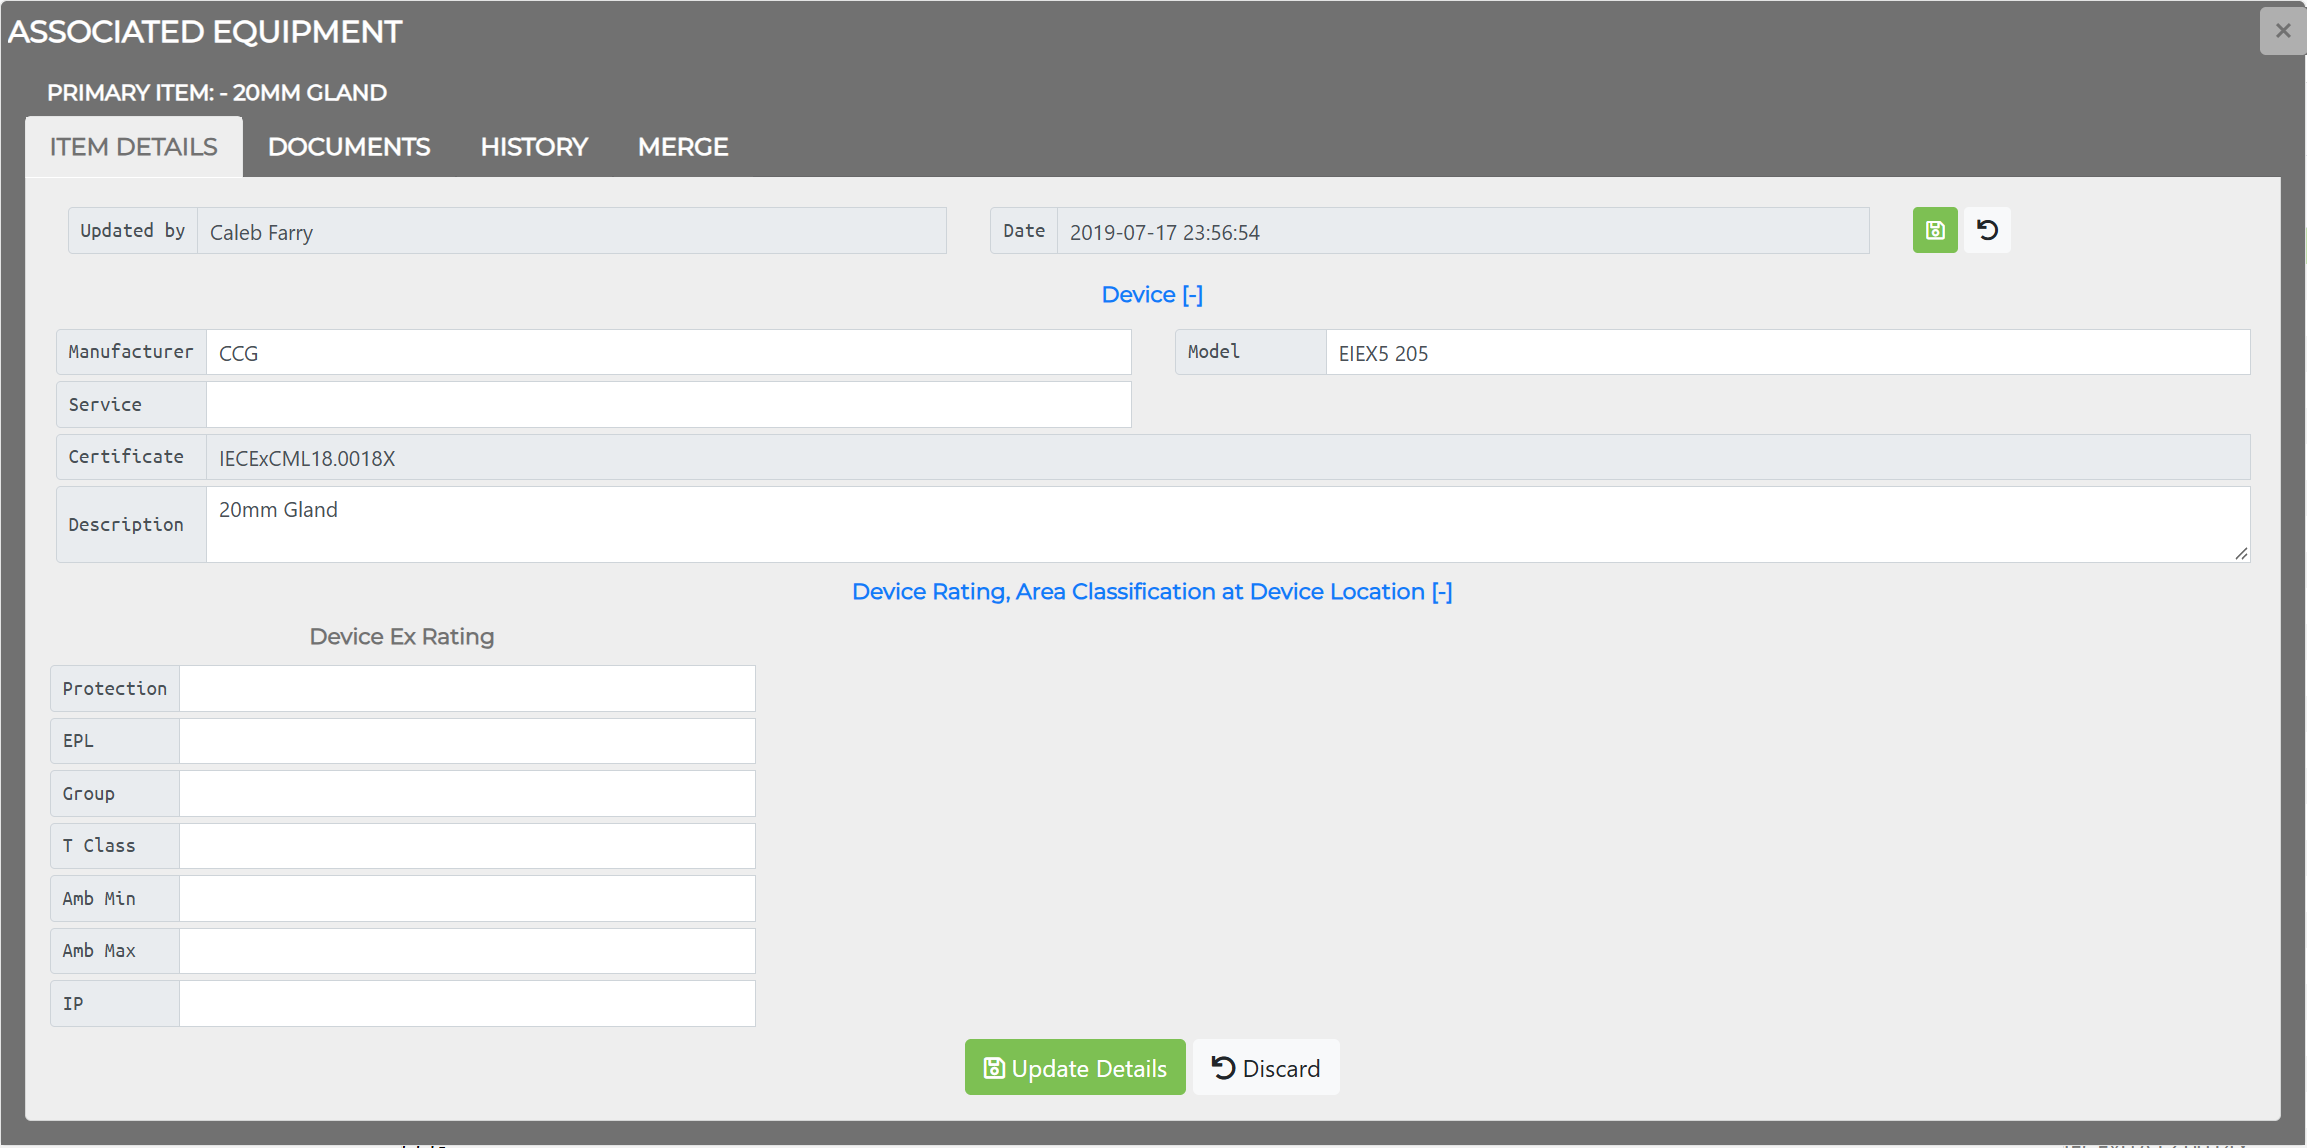
From here you can:
- Edit the available fields in the Item Details tab, then click Update Details. The certificate number is read-only.
- Switch to Documents to manage linked files
- Review the History tab for all changes
- Use the Merge tab to combine duplicates
Linking Associated Equipment to Primary Equipment
Section titled “Linking Associated Equipment to Primary Equipment”Associated equipment is linked to primary equipment through the Equipment Window’s Assoc. Eq. tab.
Linking to a Single Item
Section titled “Linking to a Single Item”-
Go to the EQUIPMENT tab and click the green expand icon on the equipment row.
-
Switch to the ASSOC. EQ. tab in the Equipment Window.
-
Select items from the Available Devices grid.
-
Click Link to attach them to this equipment item.
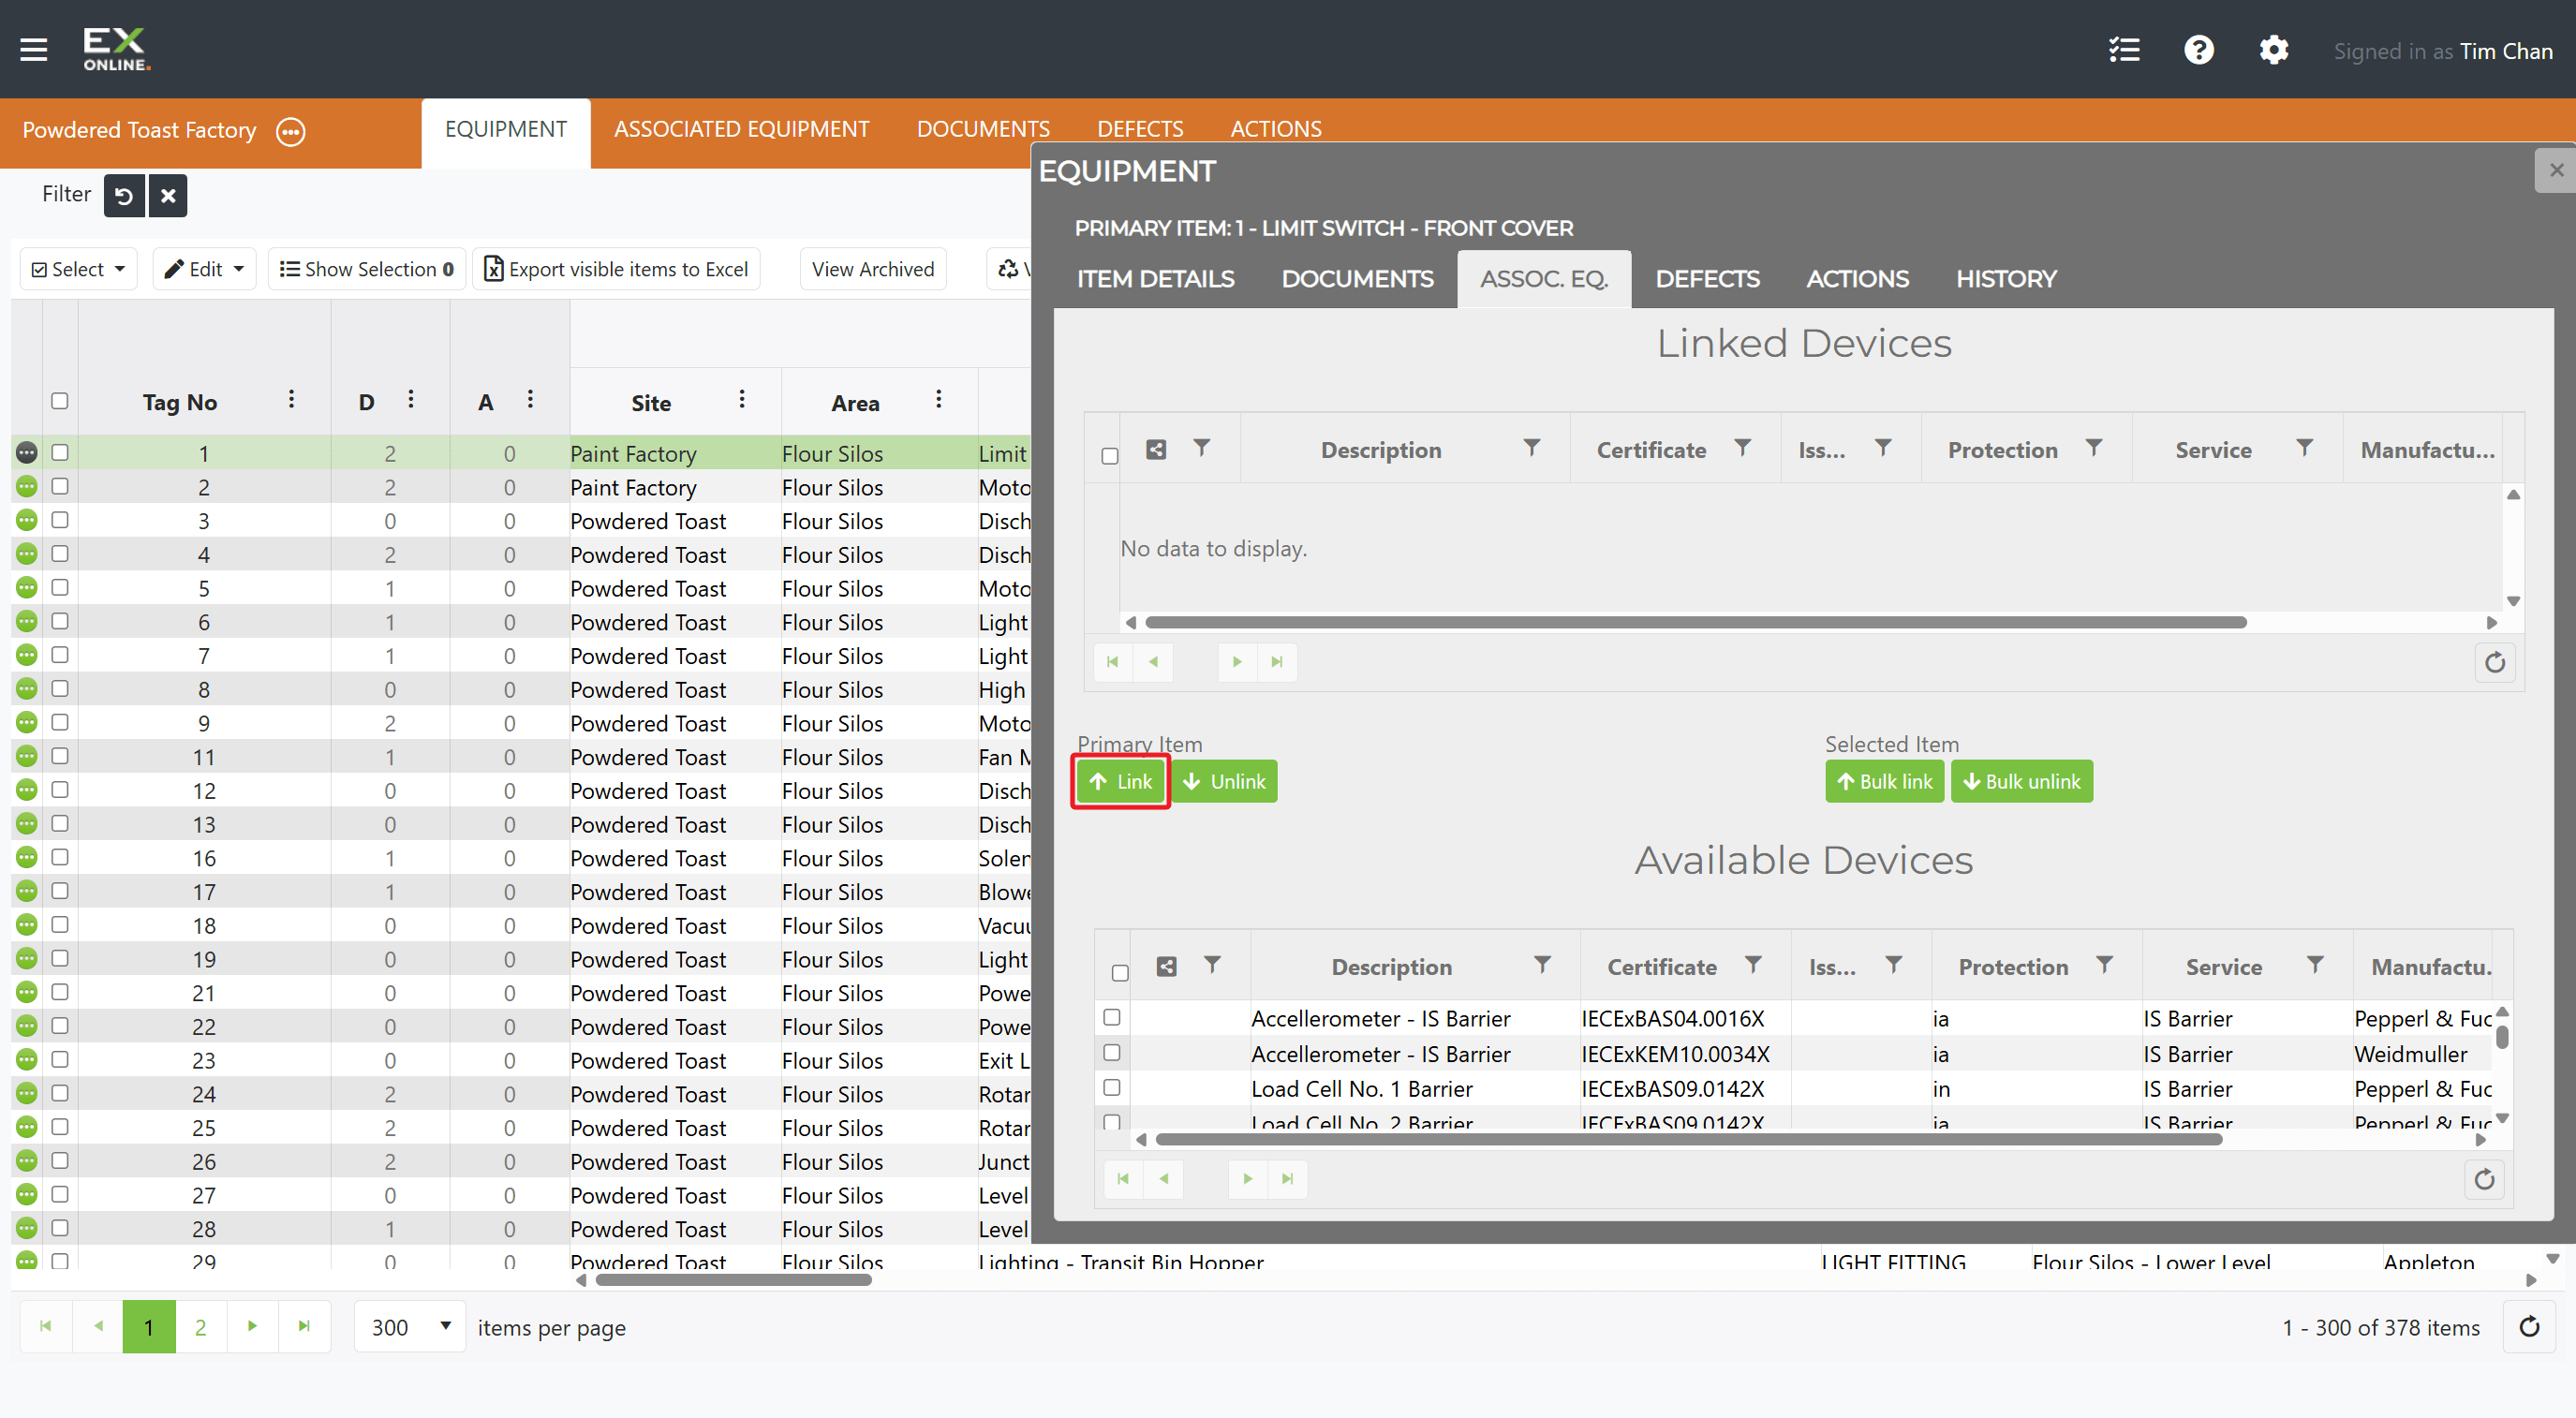
To remove a link, select items in the Linked Devices grid and click Unlink. This removes the link only — the associated equipment item remains in the project.
Linking to Multiple Items at Once
Section titled “Linking to Multiple Items at Once”To attach the same associated equipment to several primary items:
-
Select multiple equipment items using the checkboxes on the EQUIPMENT tab.
-
Open the Equipment Window on any selected row.
-
Switch to the ASSOC. EQ. tab in the Equipment Window.
-
Select items from Available Devices and click Bulk link.
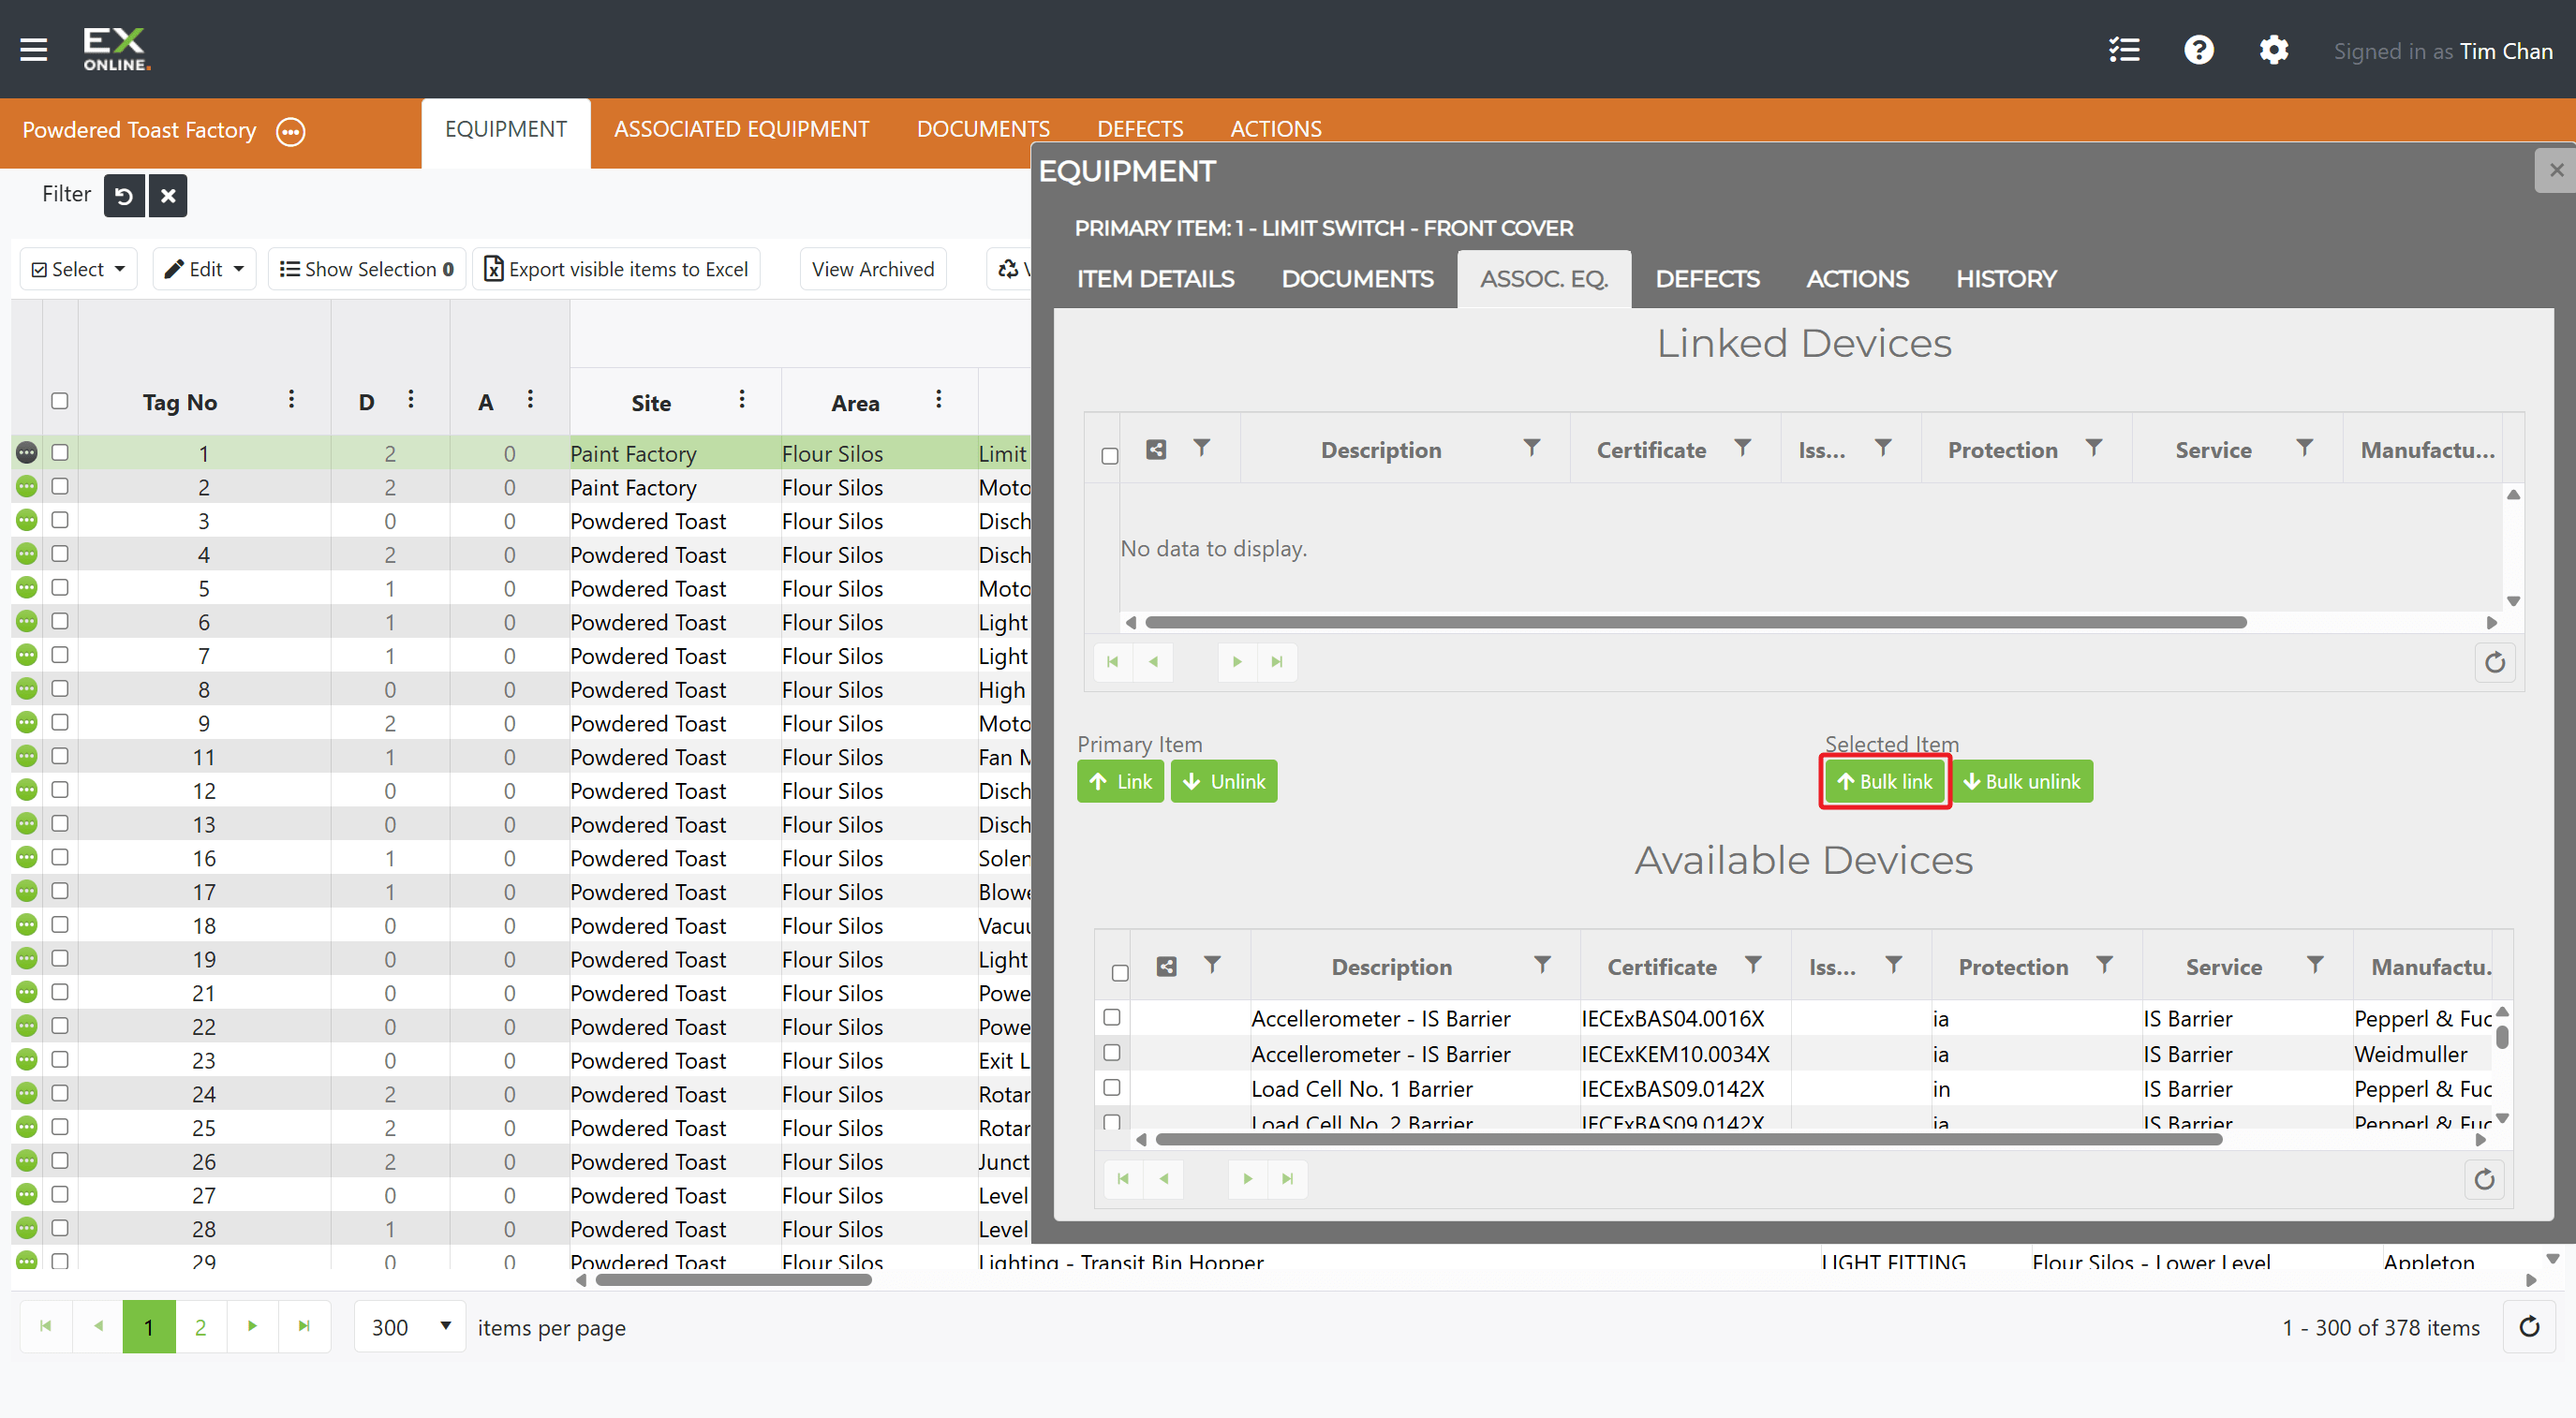
This links the selected devices to every selected equipment item (skipping items already linked). Bulk unlink works the same way in reverse.
Attaching Documents to Associated Equipment
Section titled “Attaching Documents to Associated Equipment”Each associated equipment item can have its own documents:
-
Click the green expand icon on the item to open the Associated Equipment Window.
-
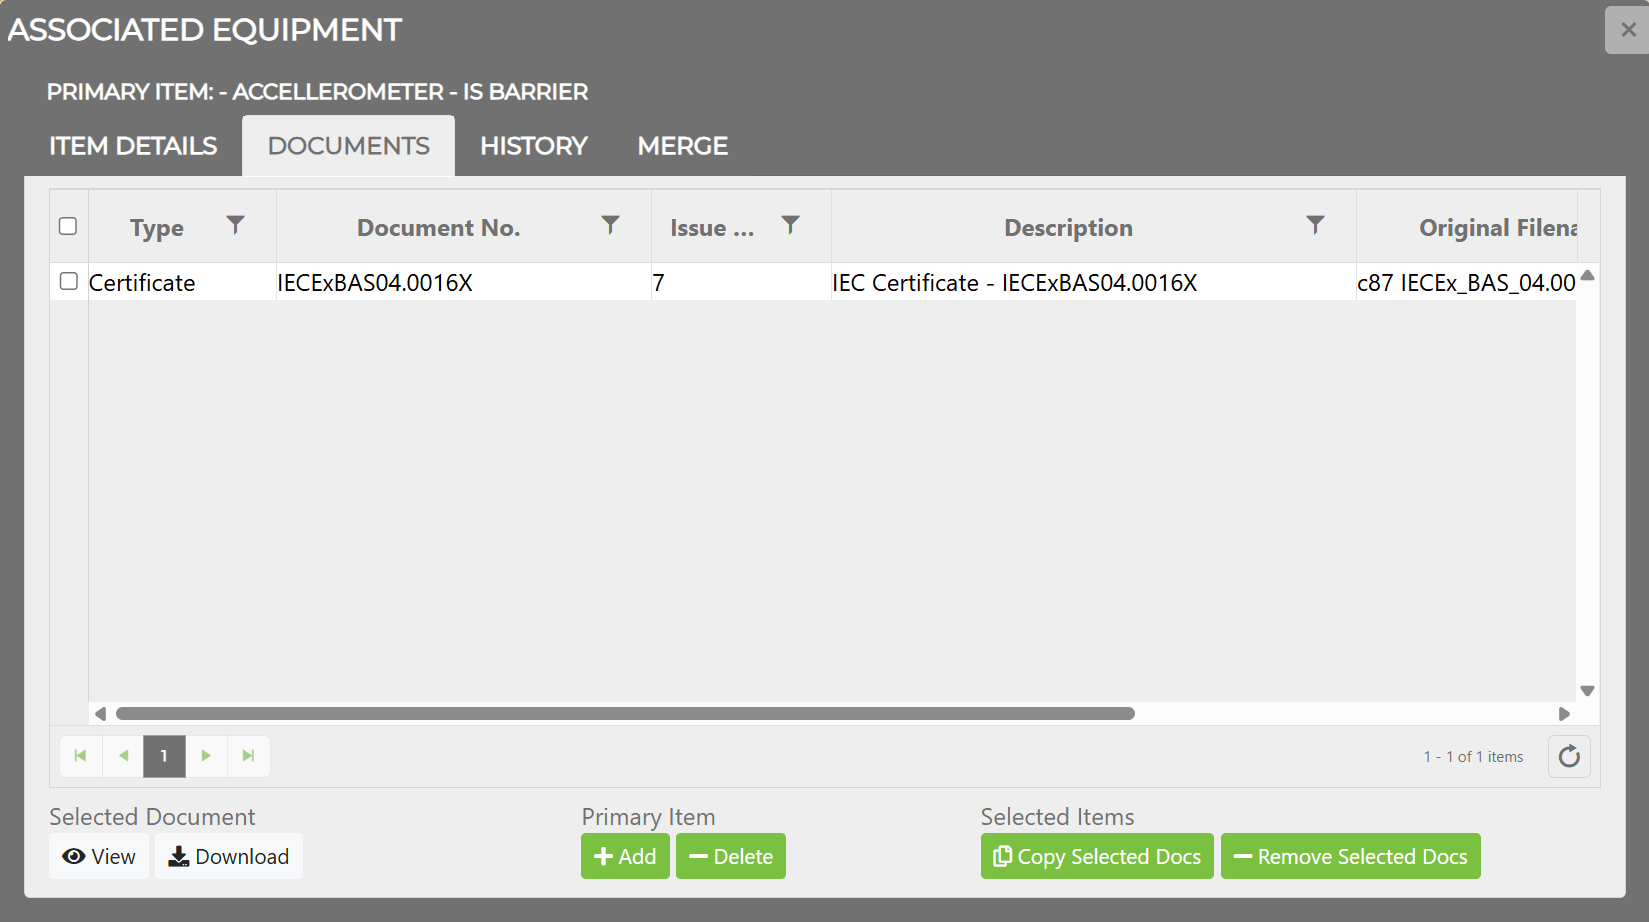
Switch to the DOCUMENTS tab.
-
Click Add to upload or link a document.
-
Use View or Download to access existing documents.
-
Use Delete to remove a document from this item.
-
Use Copy Selected Docs to copy documents to other selected associated equipment items.
-
Use Remove Selected Docs to unlink documents from all selected associated equipment items.
Merging Duplicates
Section titled “Merging Duplicates”If your project has multiple associated equipment records for the same Certificate of Conformity, use the Merge tab to combine them:
-
Click the green expand icon on the item you want to keep — this becomes the primary item.
-
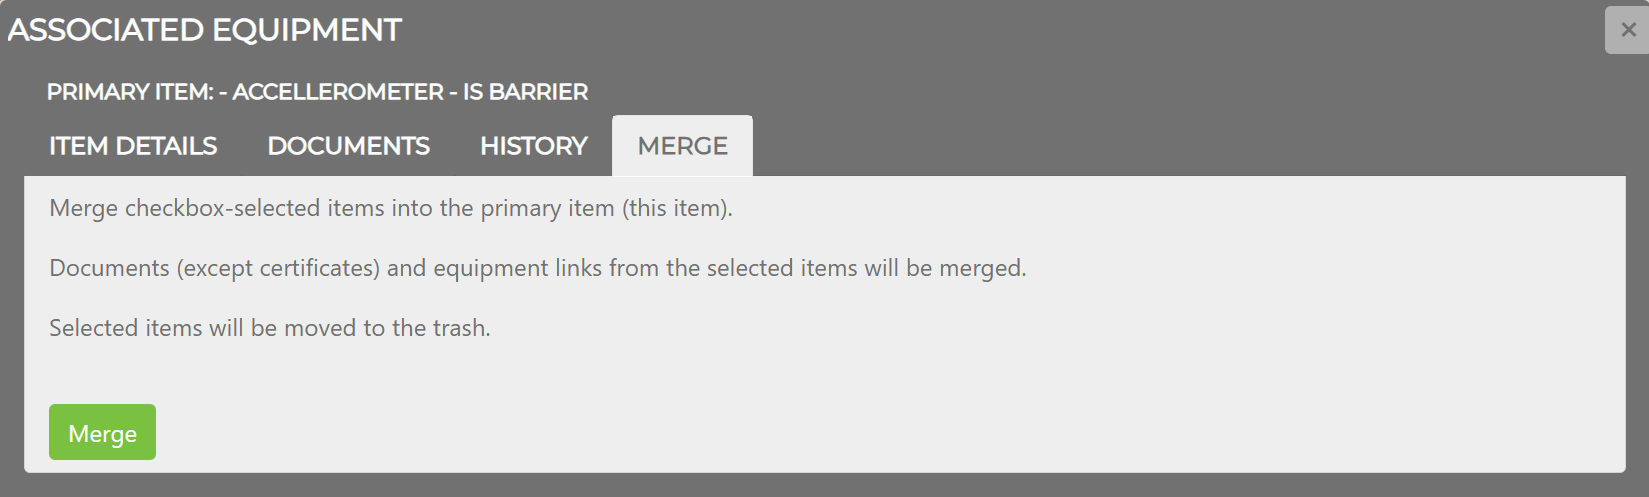
Switch to the MERGE tab.
-
Select the duplicate items using the checkboxes in the grid.
-
Click Merge to combine the checked items into the primary item.
Documents (except certificates) and equipment links from the checked items are merged into the primary item. The checked items are moved to the trash.
Copying Associated Equipment to Other Projects
Section titled “Copying Associated Equipment to Other Projects”To copy associated equipment records to other projects in your account:
-
Go to the ASSOCIATED EQUIPMENT tab in the orange header bar.
-
Select the records to copy using the checkboxes.
-
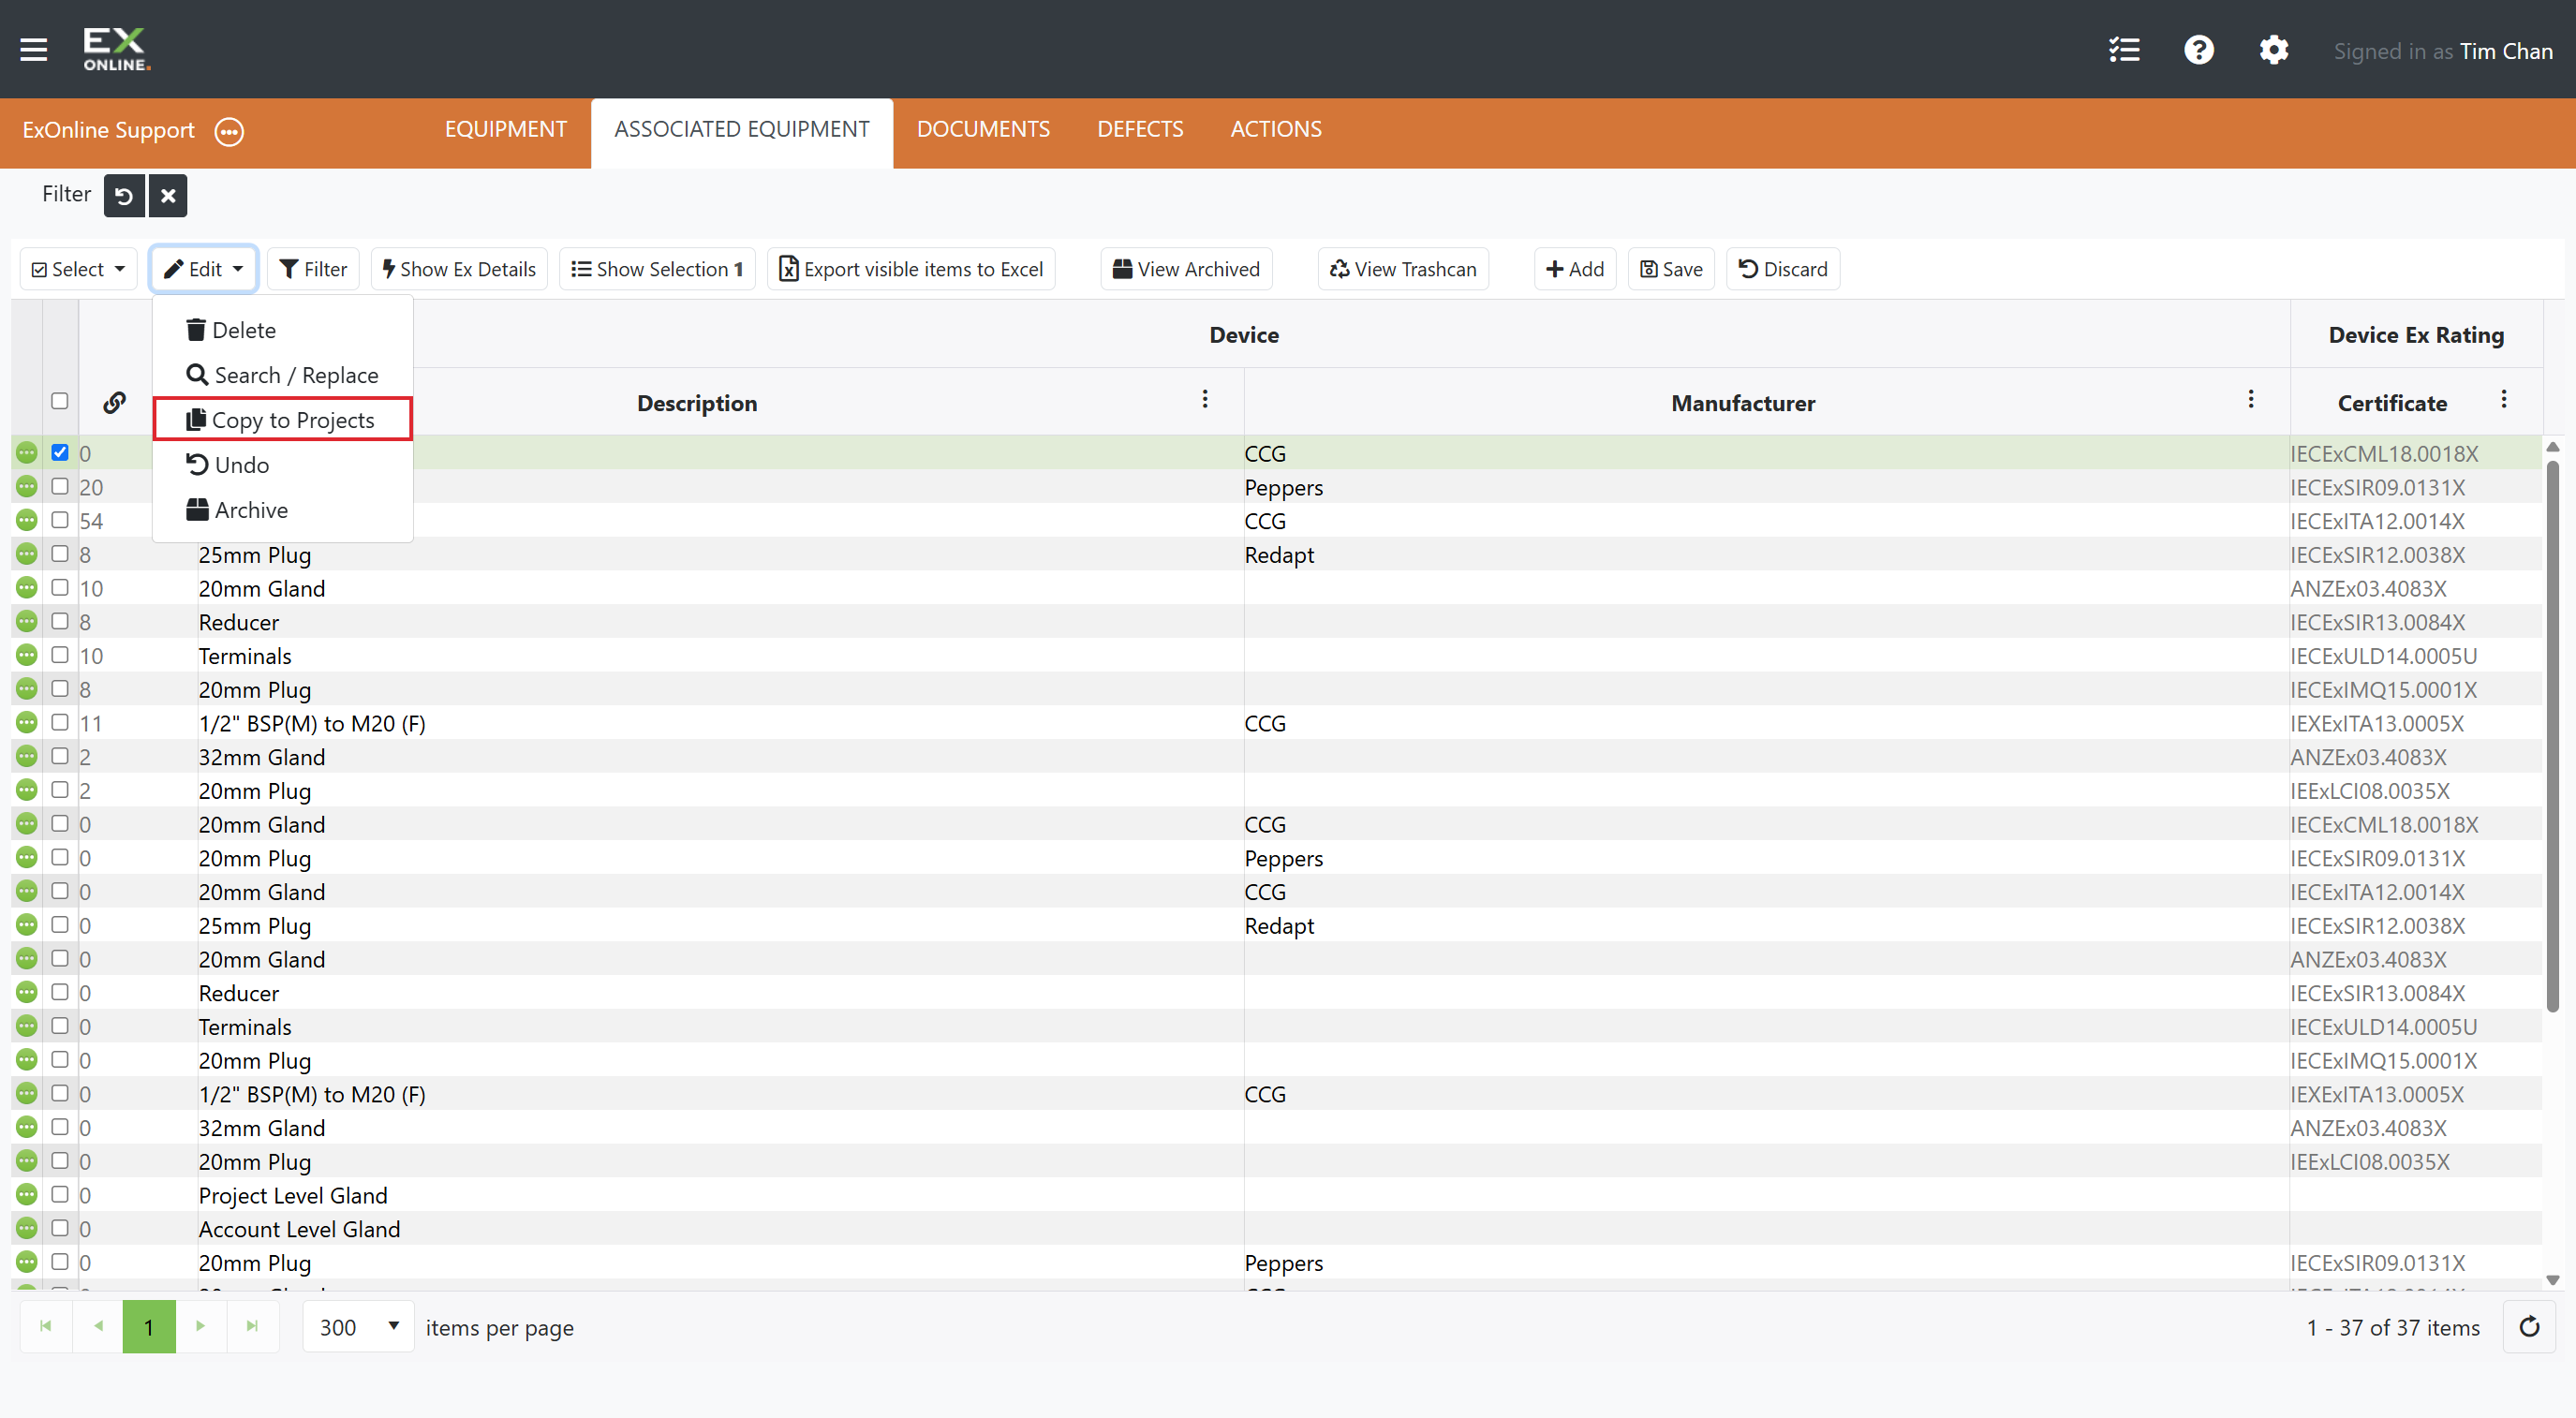
Click Edit in the toolbar > Copy to Projects.
-
In the popup, select the target projects.
-
Click Copy to selected projects to confirm.
Archiving Associated Equipment
Section titled “Archiving Associated Equipment”To move items out of the active grid without deleting them:
-
Go to the ASSOCIATED EQUIPMENT tab in the orange header bar.
-
Select the items to archive using the checkboxes.
-
Click Edit in the toolbar > Archive.
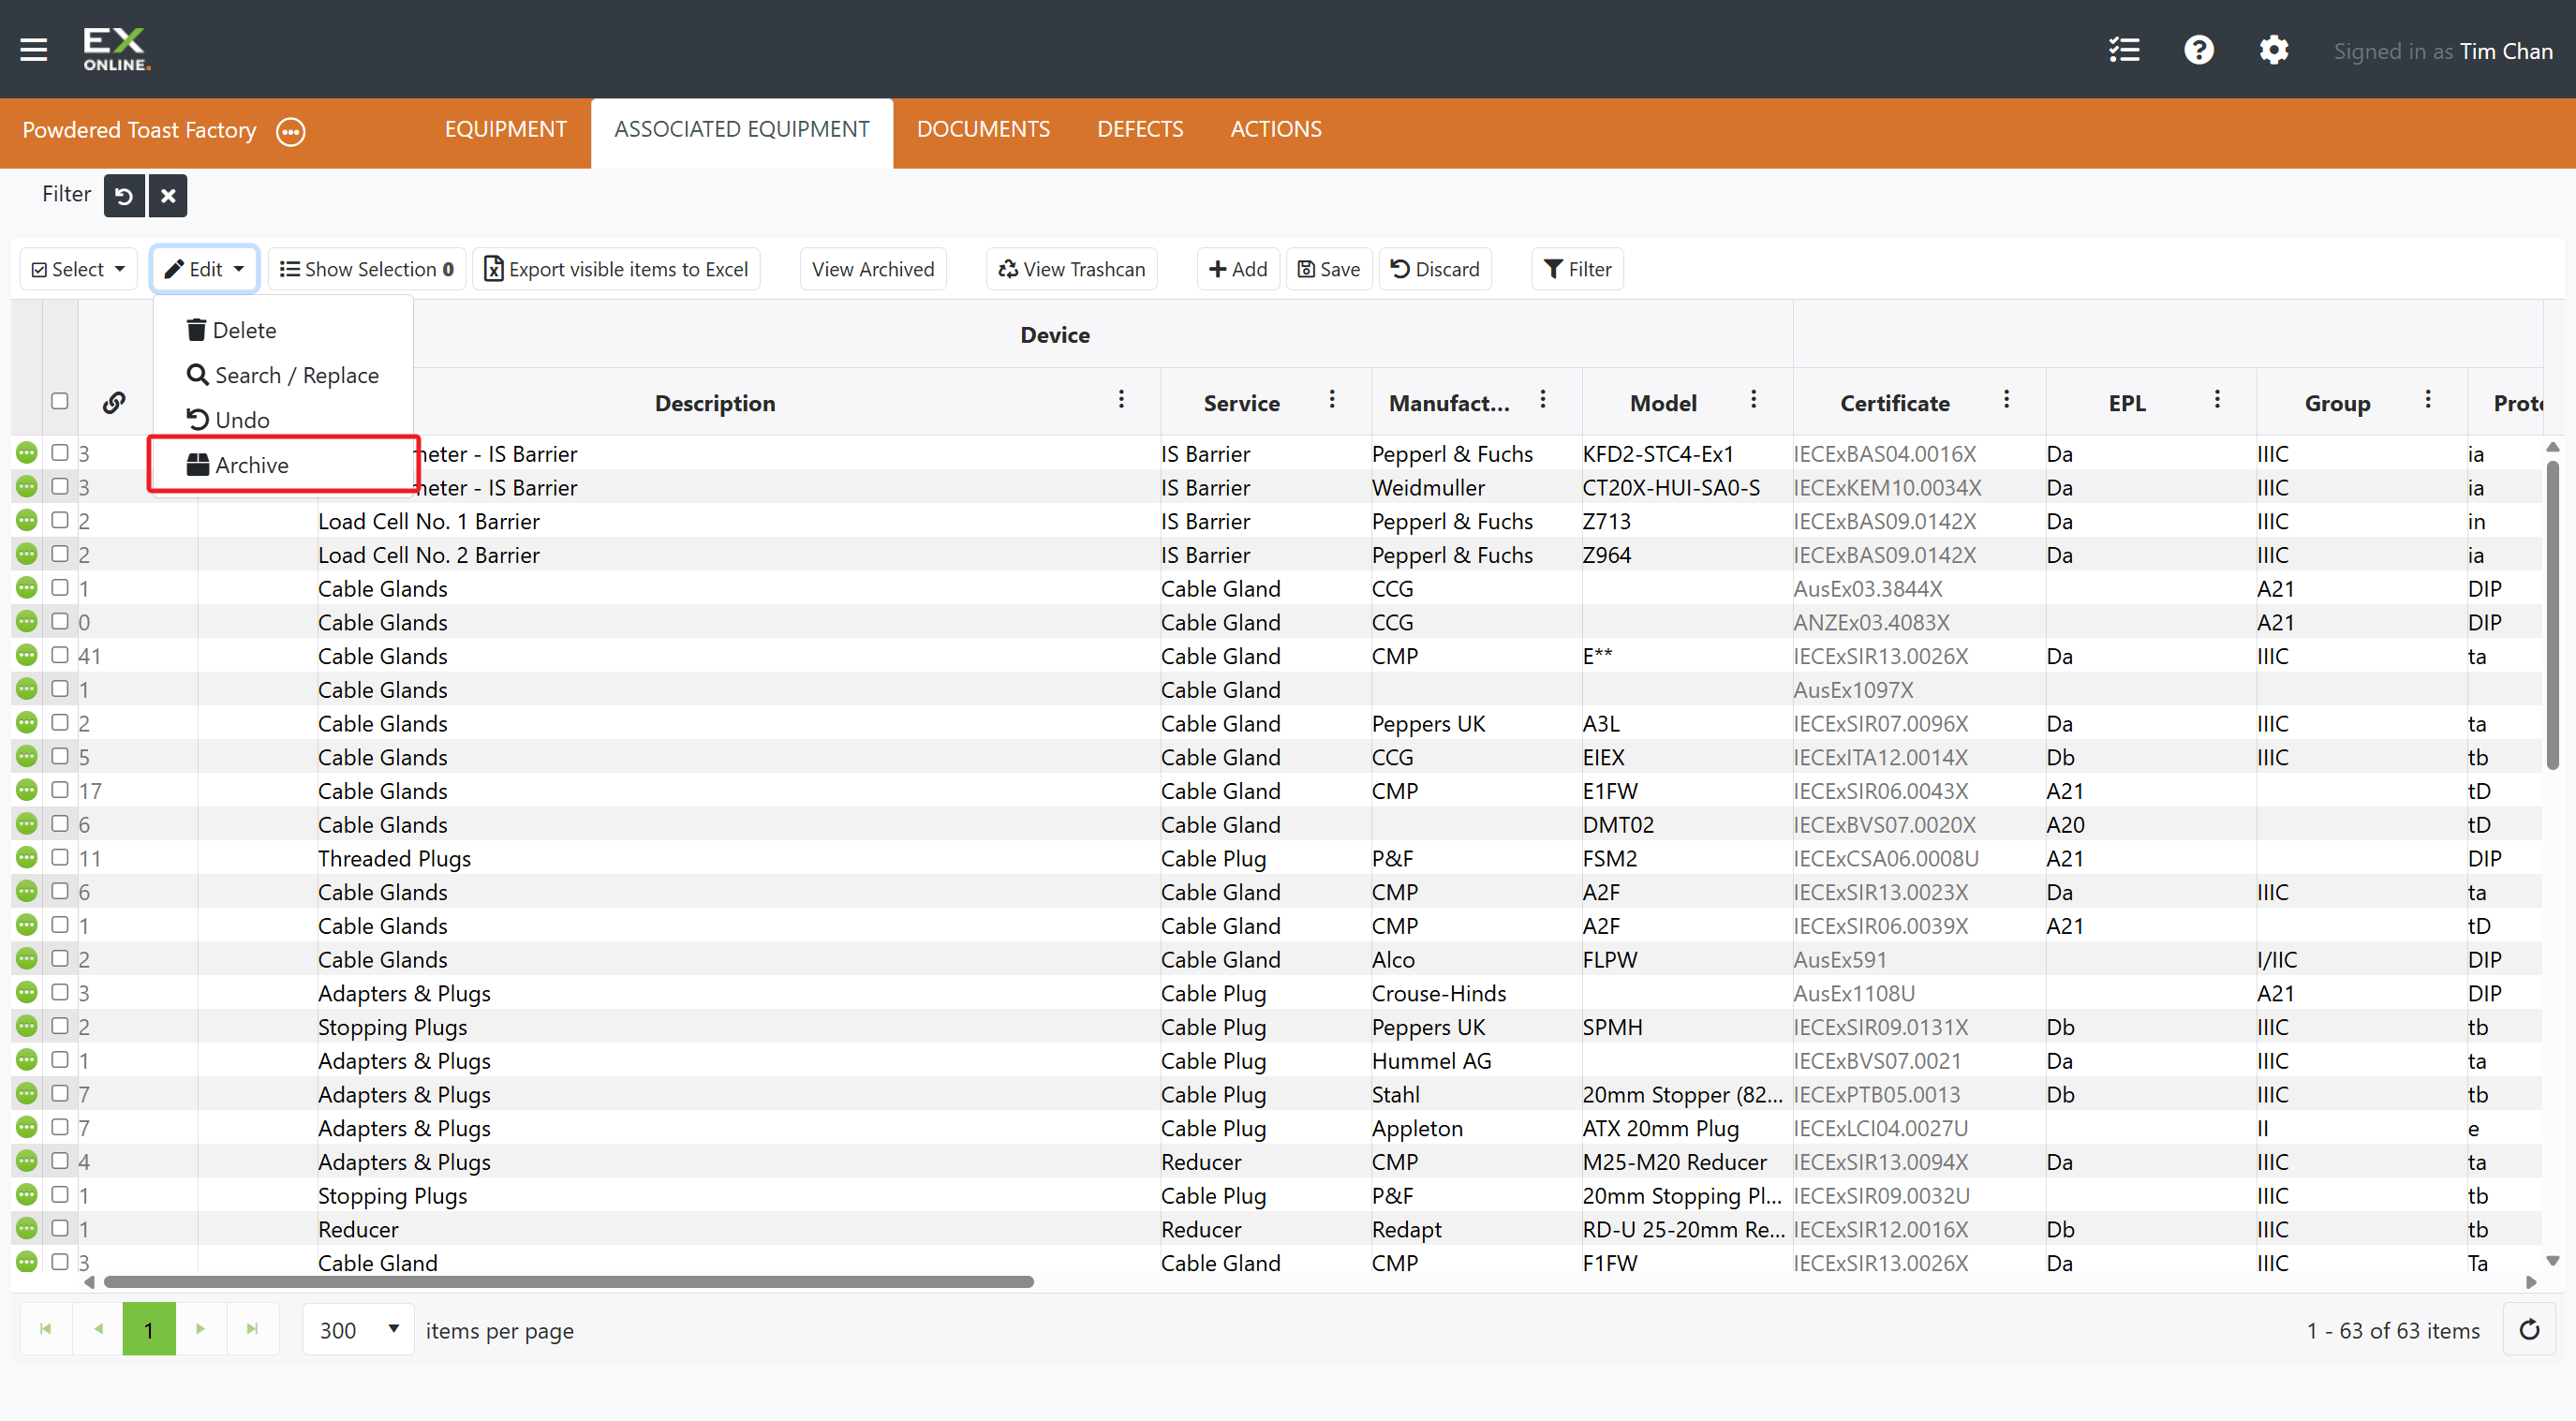
Archived items are hidden from the default view. Click View Archived in the toolbar to see them and restore if needed.
Deleting Associated Equipment
Section titled “Deleting Associated Equipment”To remove associated equipment from your project:
-
Go to the ASSOCIATED EQUIPMENT tab in the orange header bar.
-
Select the items you want to delete using the checkboxes.
-
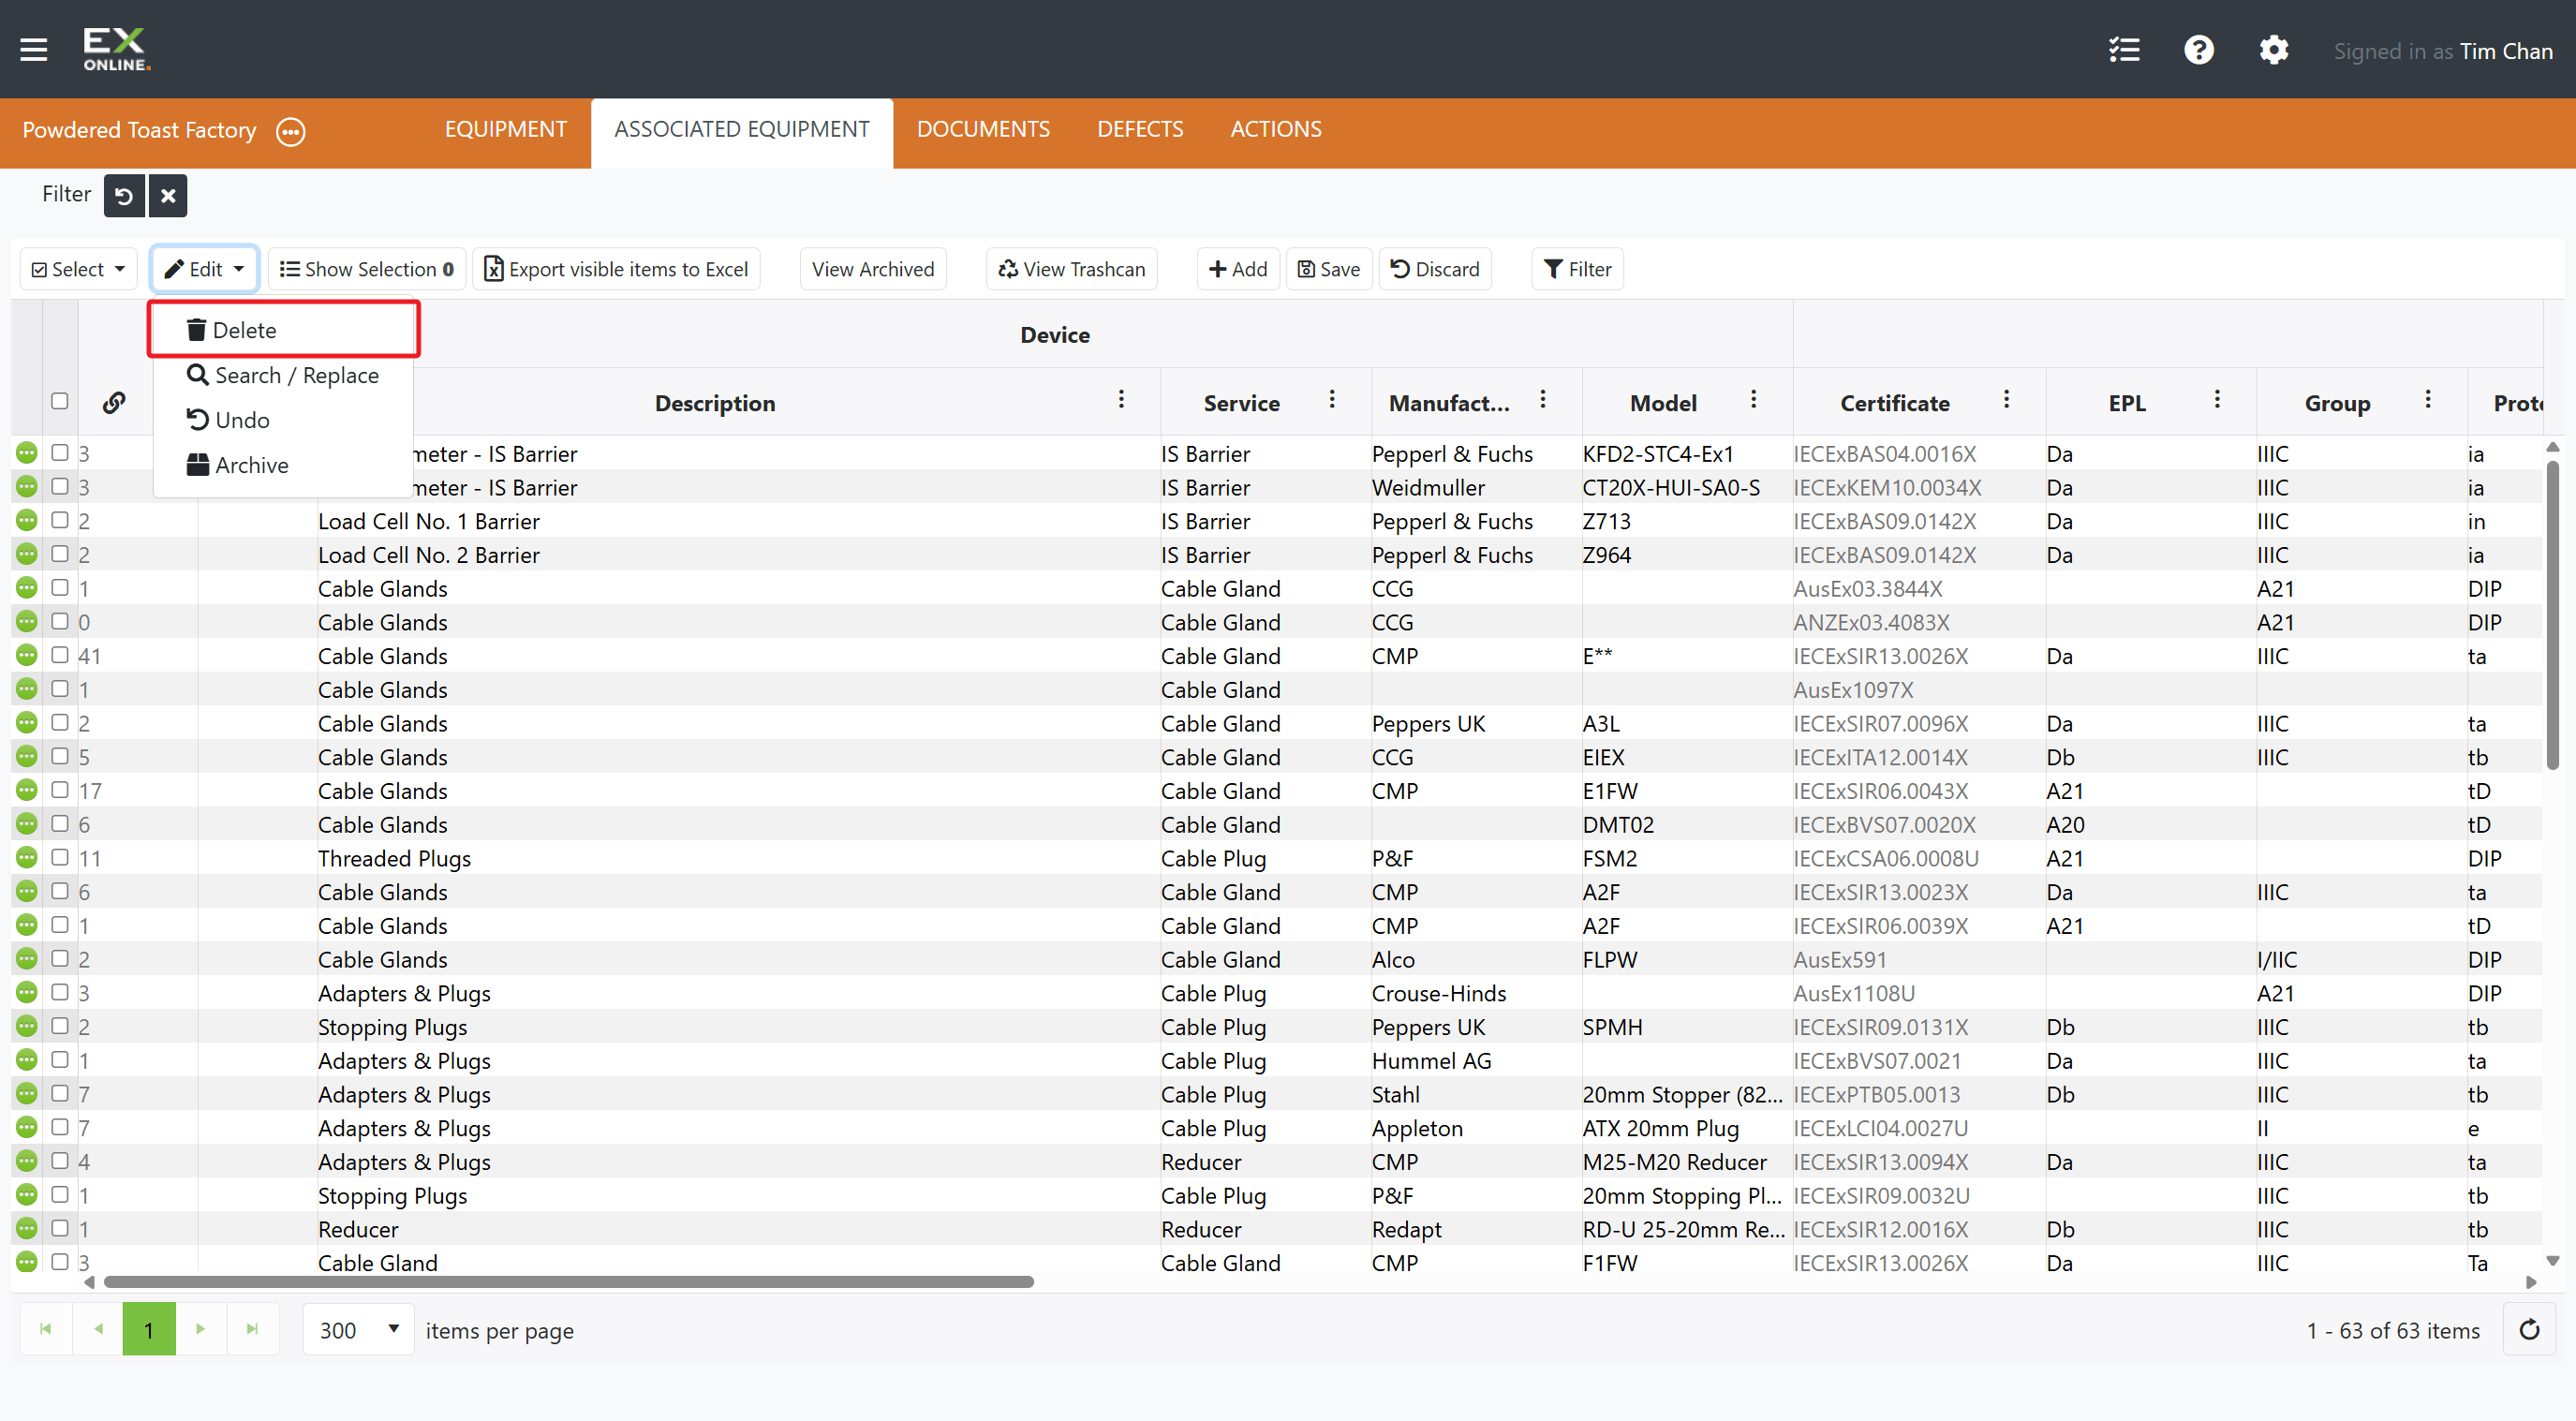
Click Edit in the toolbar > Delete.
-
Confirm the deletion.
Deleted associated equipment can be recovered from the View Trashcan button in the toolbar.
Troubleshooting
Section titled “Troubleshooting”| Issue | Solution |
|---|---|
| Can’t find an associated equipment item | Check filters and the archived view — use View Archived to toggle archived items into the grid |
| Link / Unlink buttons not working | These are on the Equipment Window’s ASSOC. EQ. tab, not the Associated Equipment tab on the dashboard |
| Duplicate items in the list | Use the Merge tab in the Associated Equipment Window to combine them |
Related Topics
Section titled “Related Topics”- Associated Equipment Reference — Grid columns, toolbar options, and filtering
- Associated Equipment Window — Item Details, Documents, History, and Merge tabs