
Filling In the Inspection Check Sheet
Complete an inspection check sheet — review equipment data, answer questions, attach photos, and sign off.
Before you start
Section titled “Before you start”These tasks assume you have already:
- Downloaded an IWP file from Tag Browser (see Downloading an IWP if you haven’t done this yet)
- Loaded an IWP file in the Inspection App using the + button or QR Scan button
- Opened an equipment item’s check sheet by double-clicking the row in the Equipment Browser
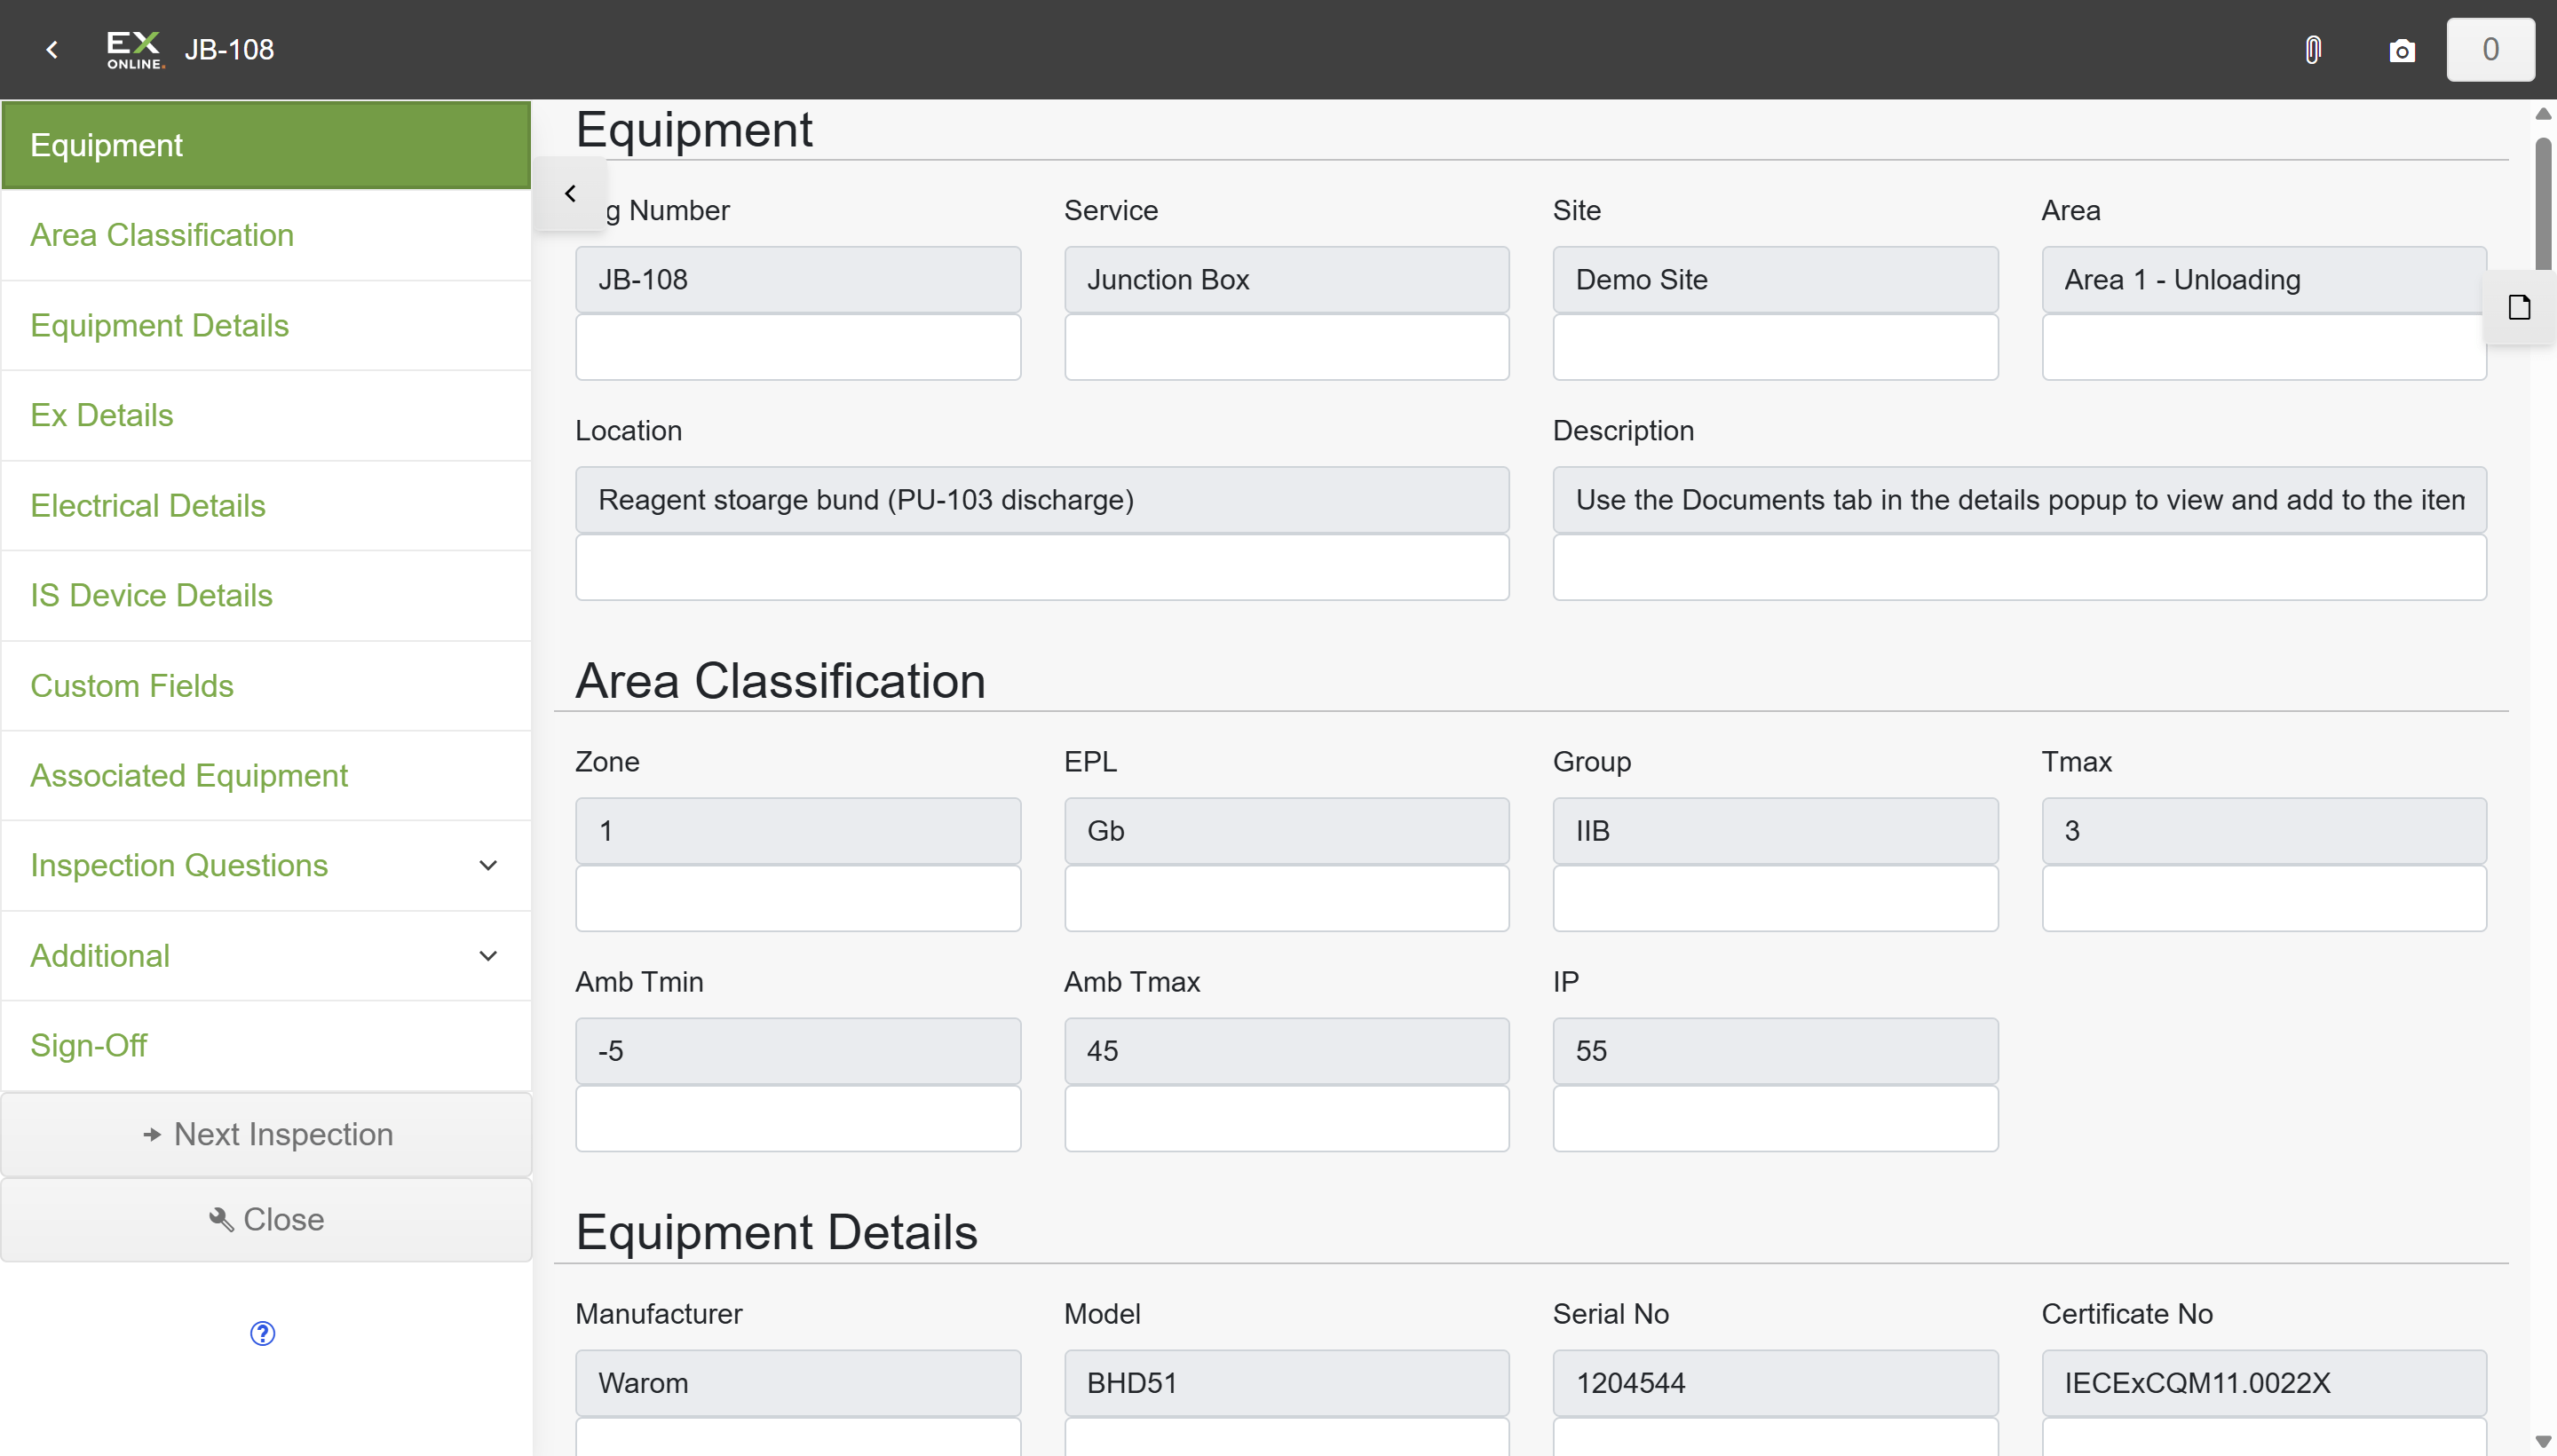
The sidebar on the left lists every section of the check sheet. Click a section name to jump to it.
Editing equipment data
Section titled “Editing equipment data”Each field in the check sheet has two rows: a blue-gray read-only row showing the current value from Ex-Online, and a white editable row below it where you can enter a new value. This pattern repeats across every section — Equipment, Area Classification, Equipment Details, Ex Details, and so on.
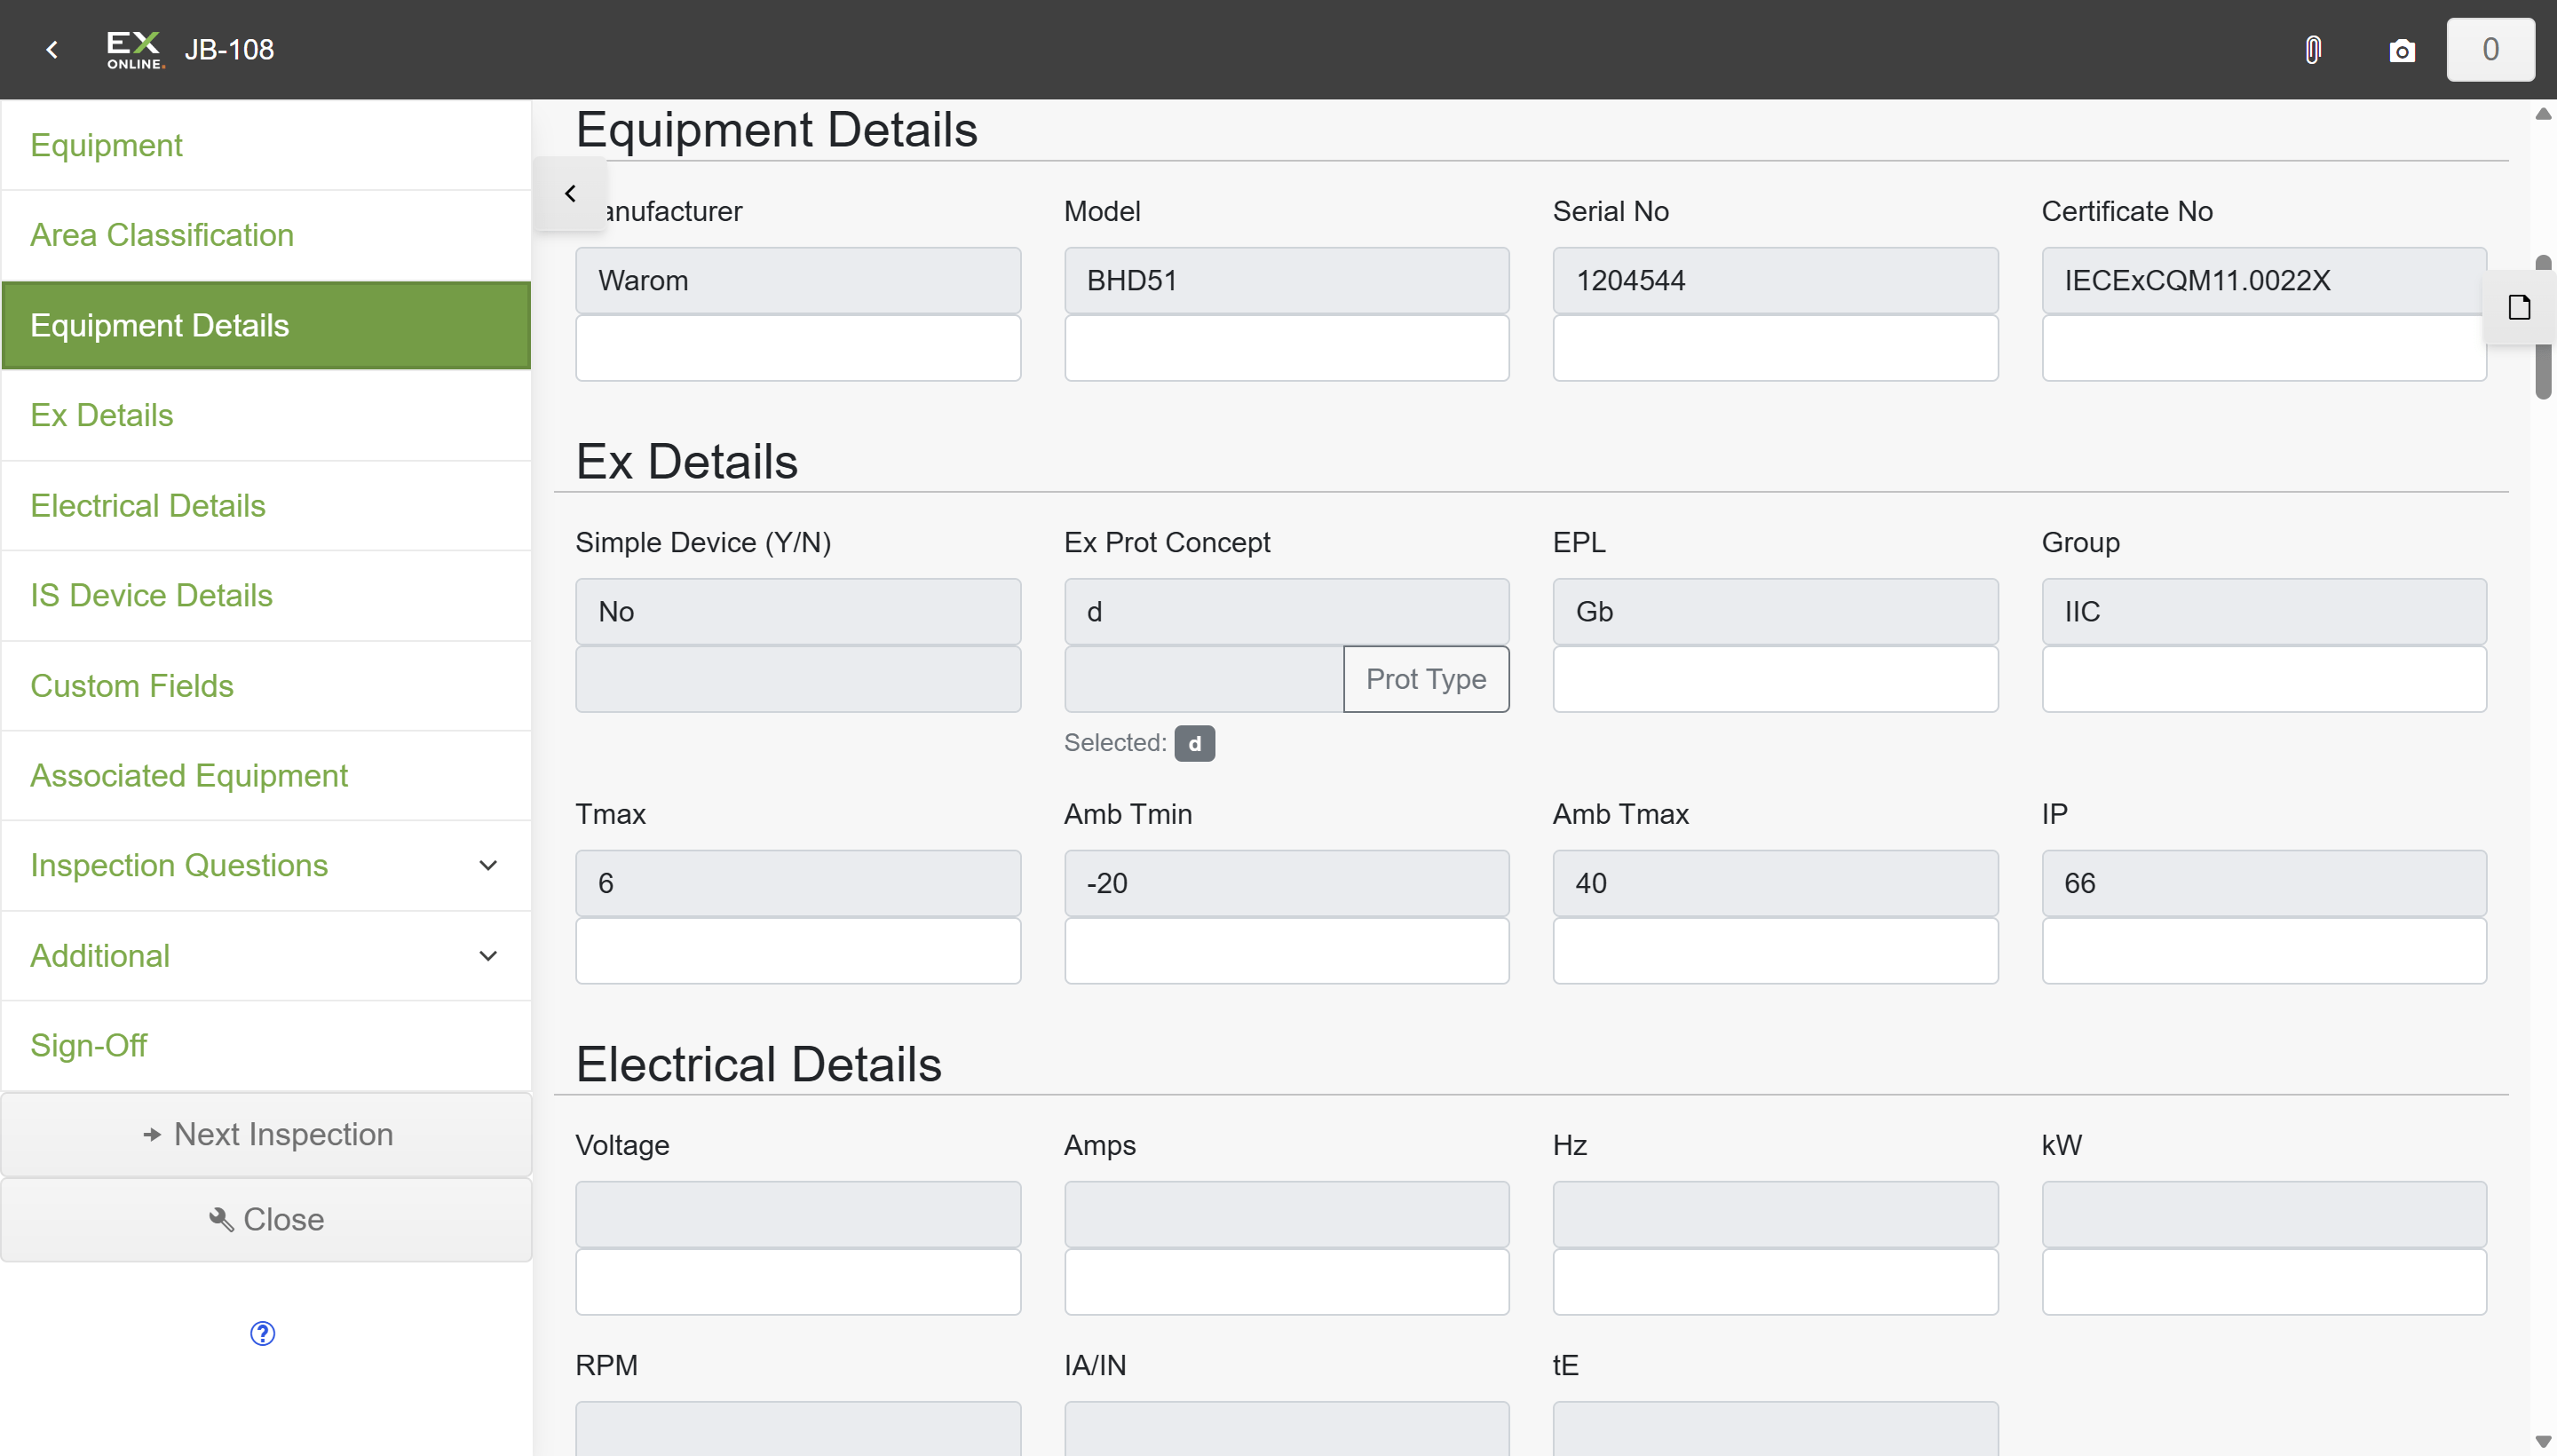
To update a field, type the new value into the white row. You do not need to clear the blue-gray row — the white field takes priority. Leave the white field empty if the existing value is correct.
Changing the protection type
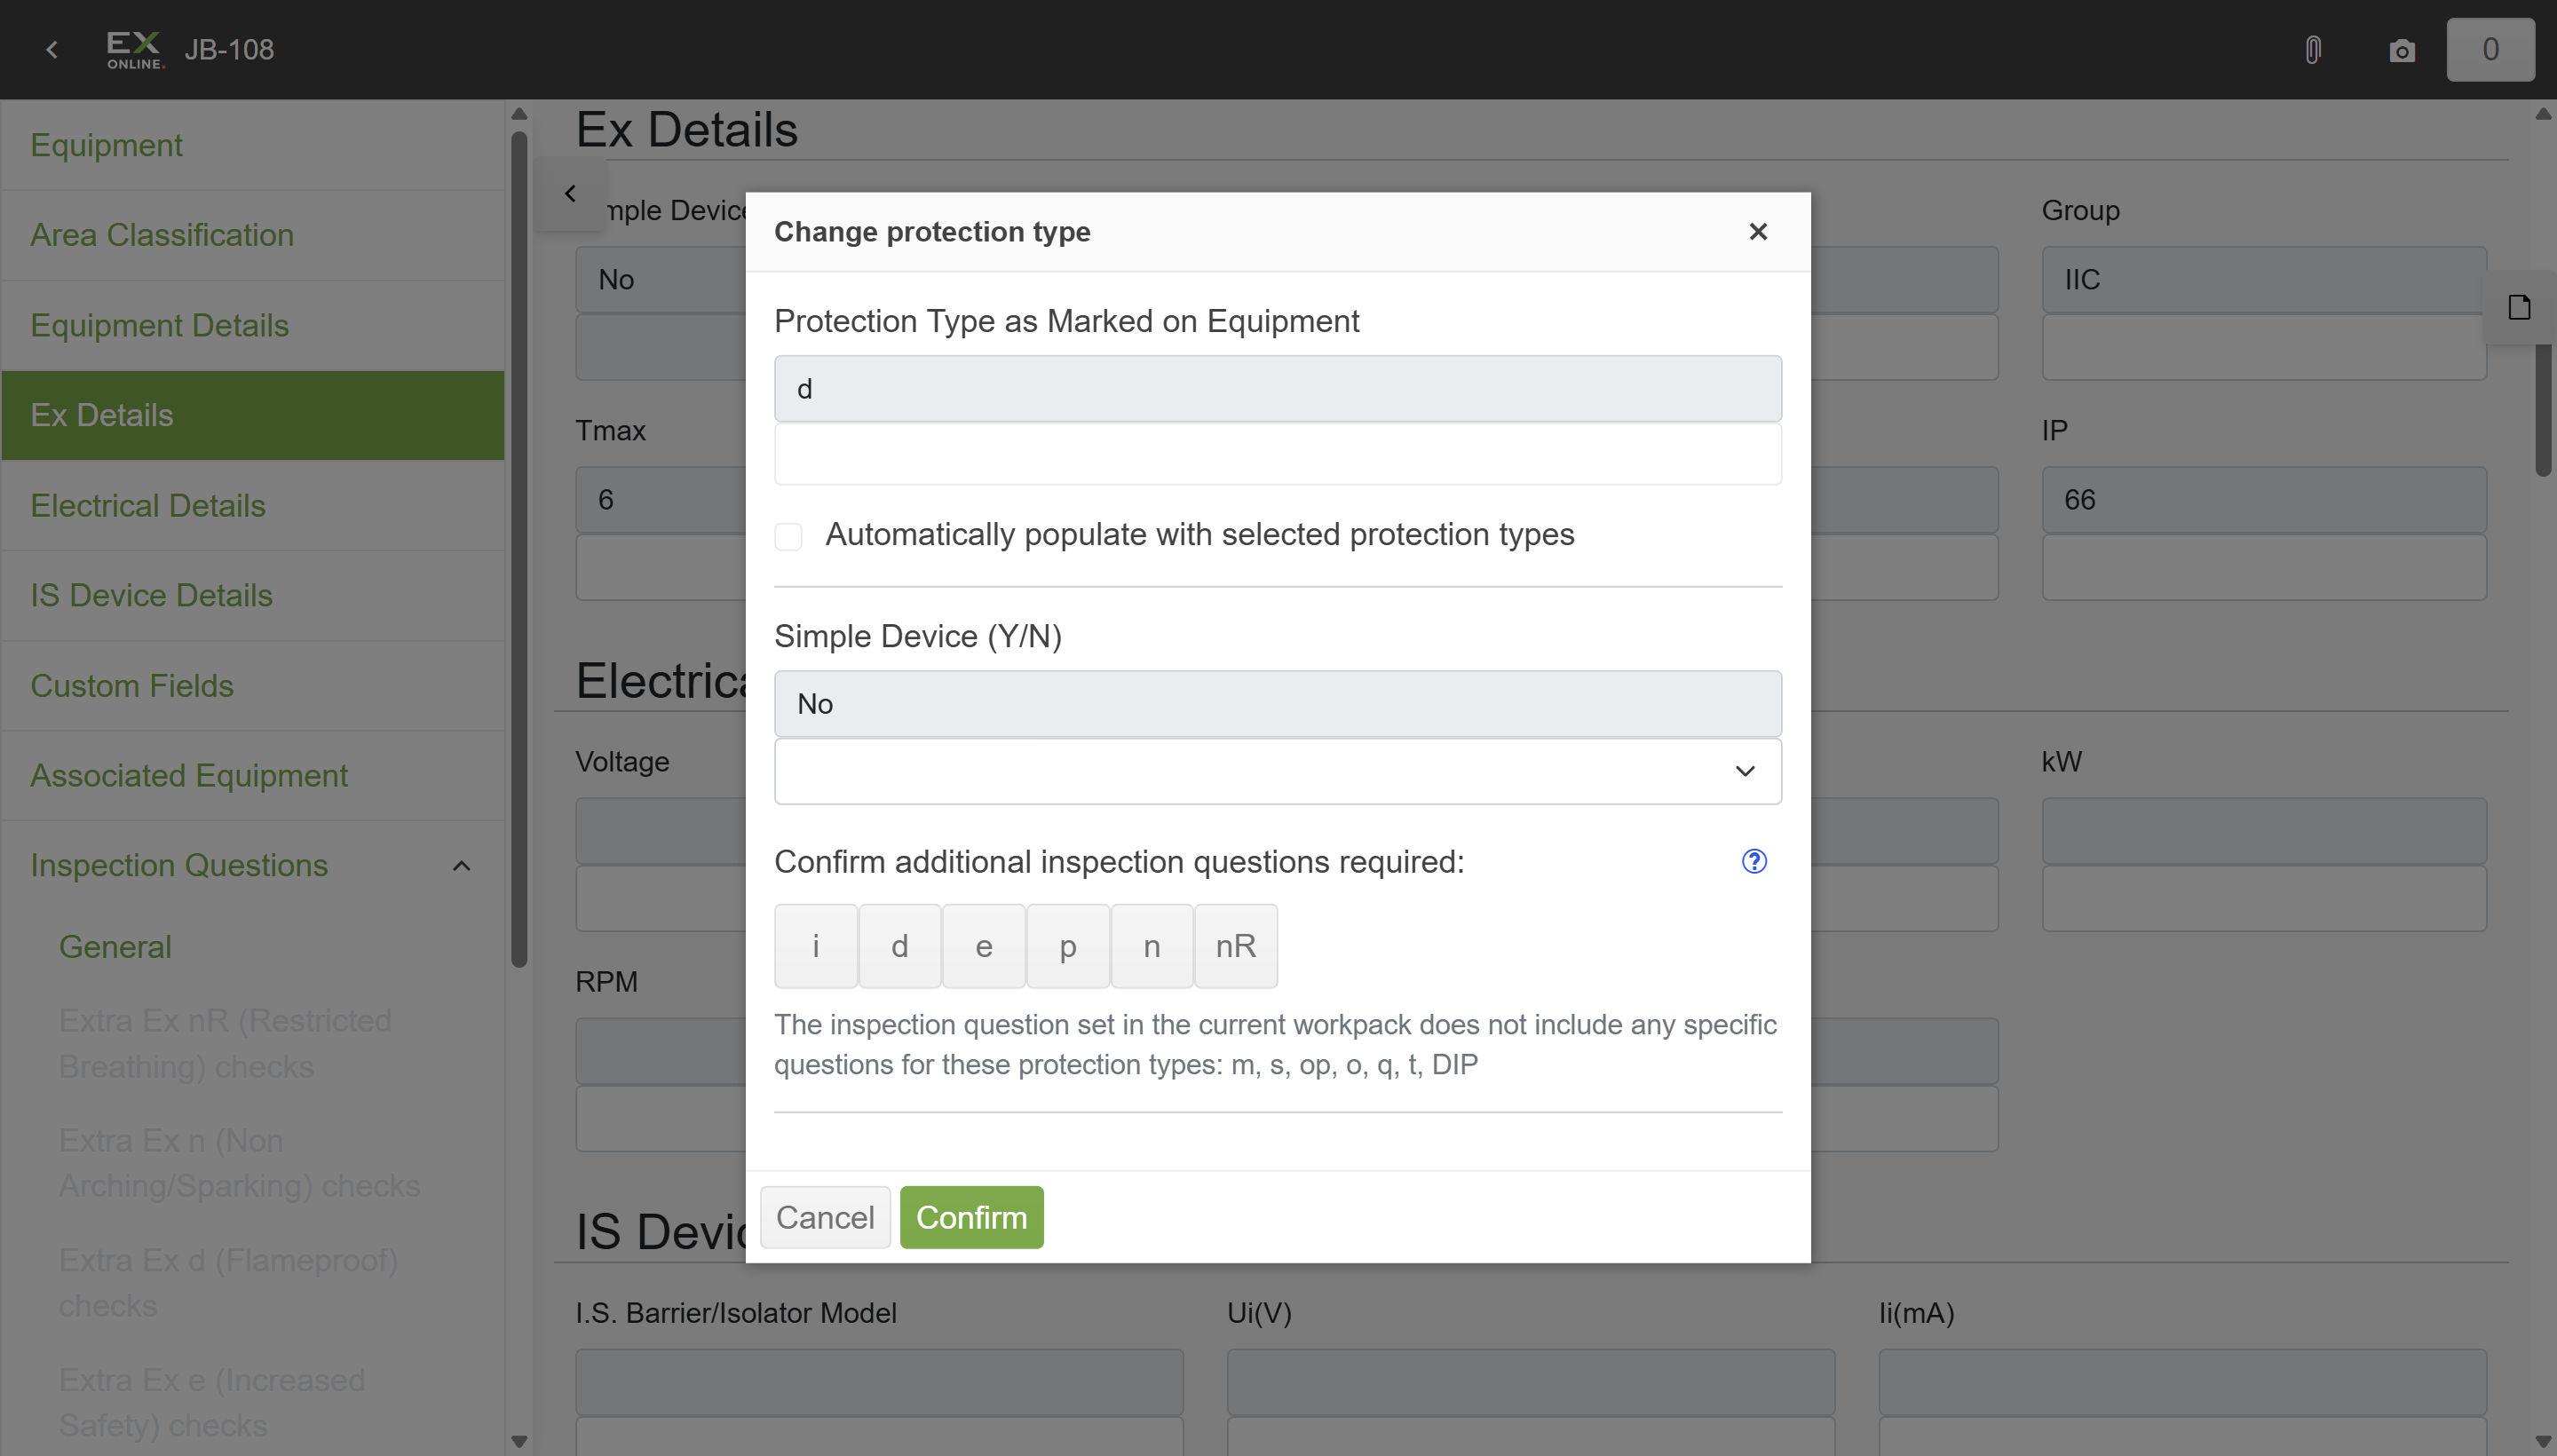
Section titled “Changing the protection type”The protection type (e.g. Ex d, Ex e, Ex i) can be updated from within the check sheet using the Prot Type dialog. Changes made here travel back with the transfer file and update the equipment record in Ex-Online after upload.
-
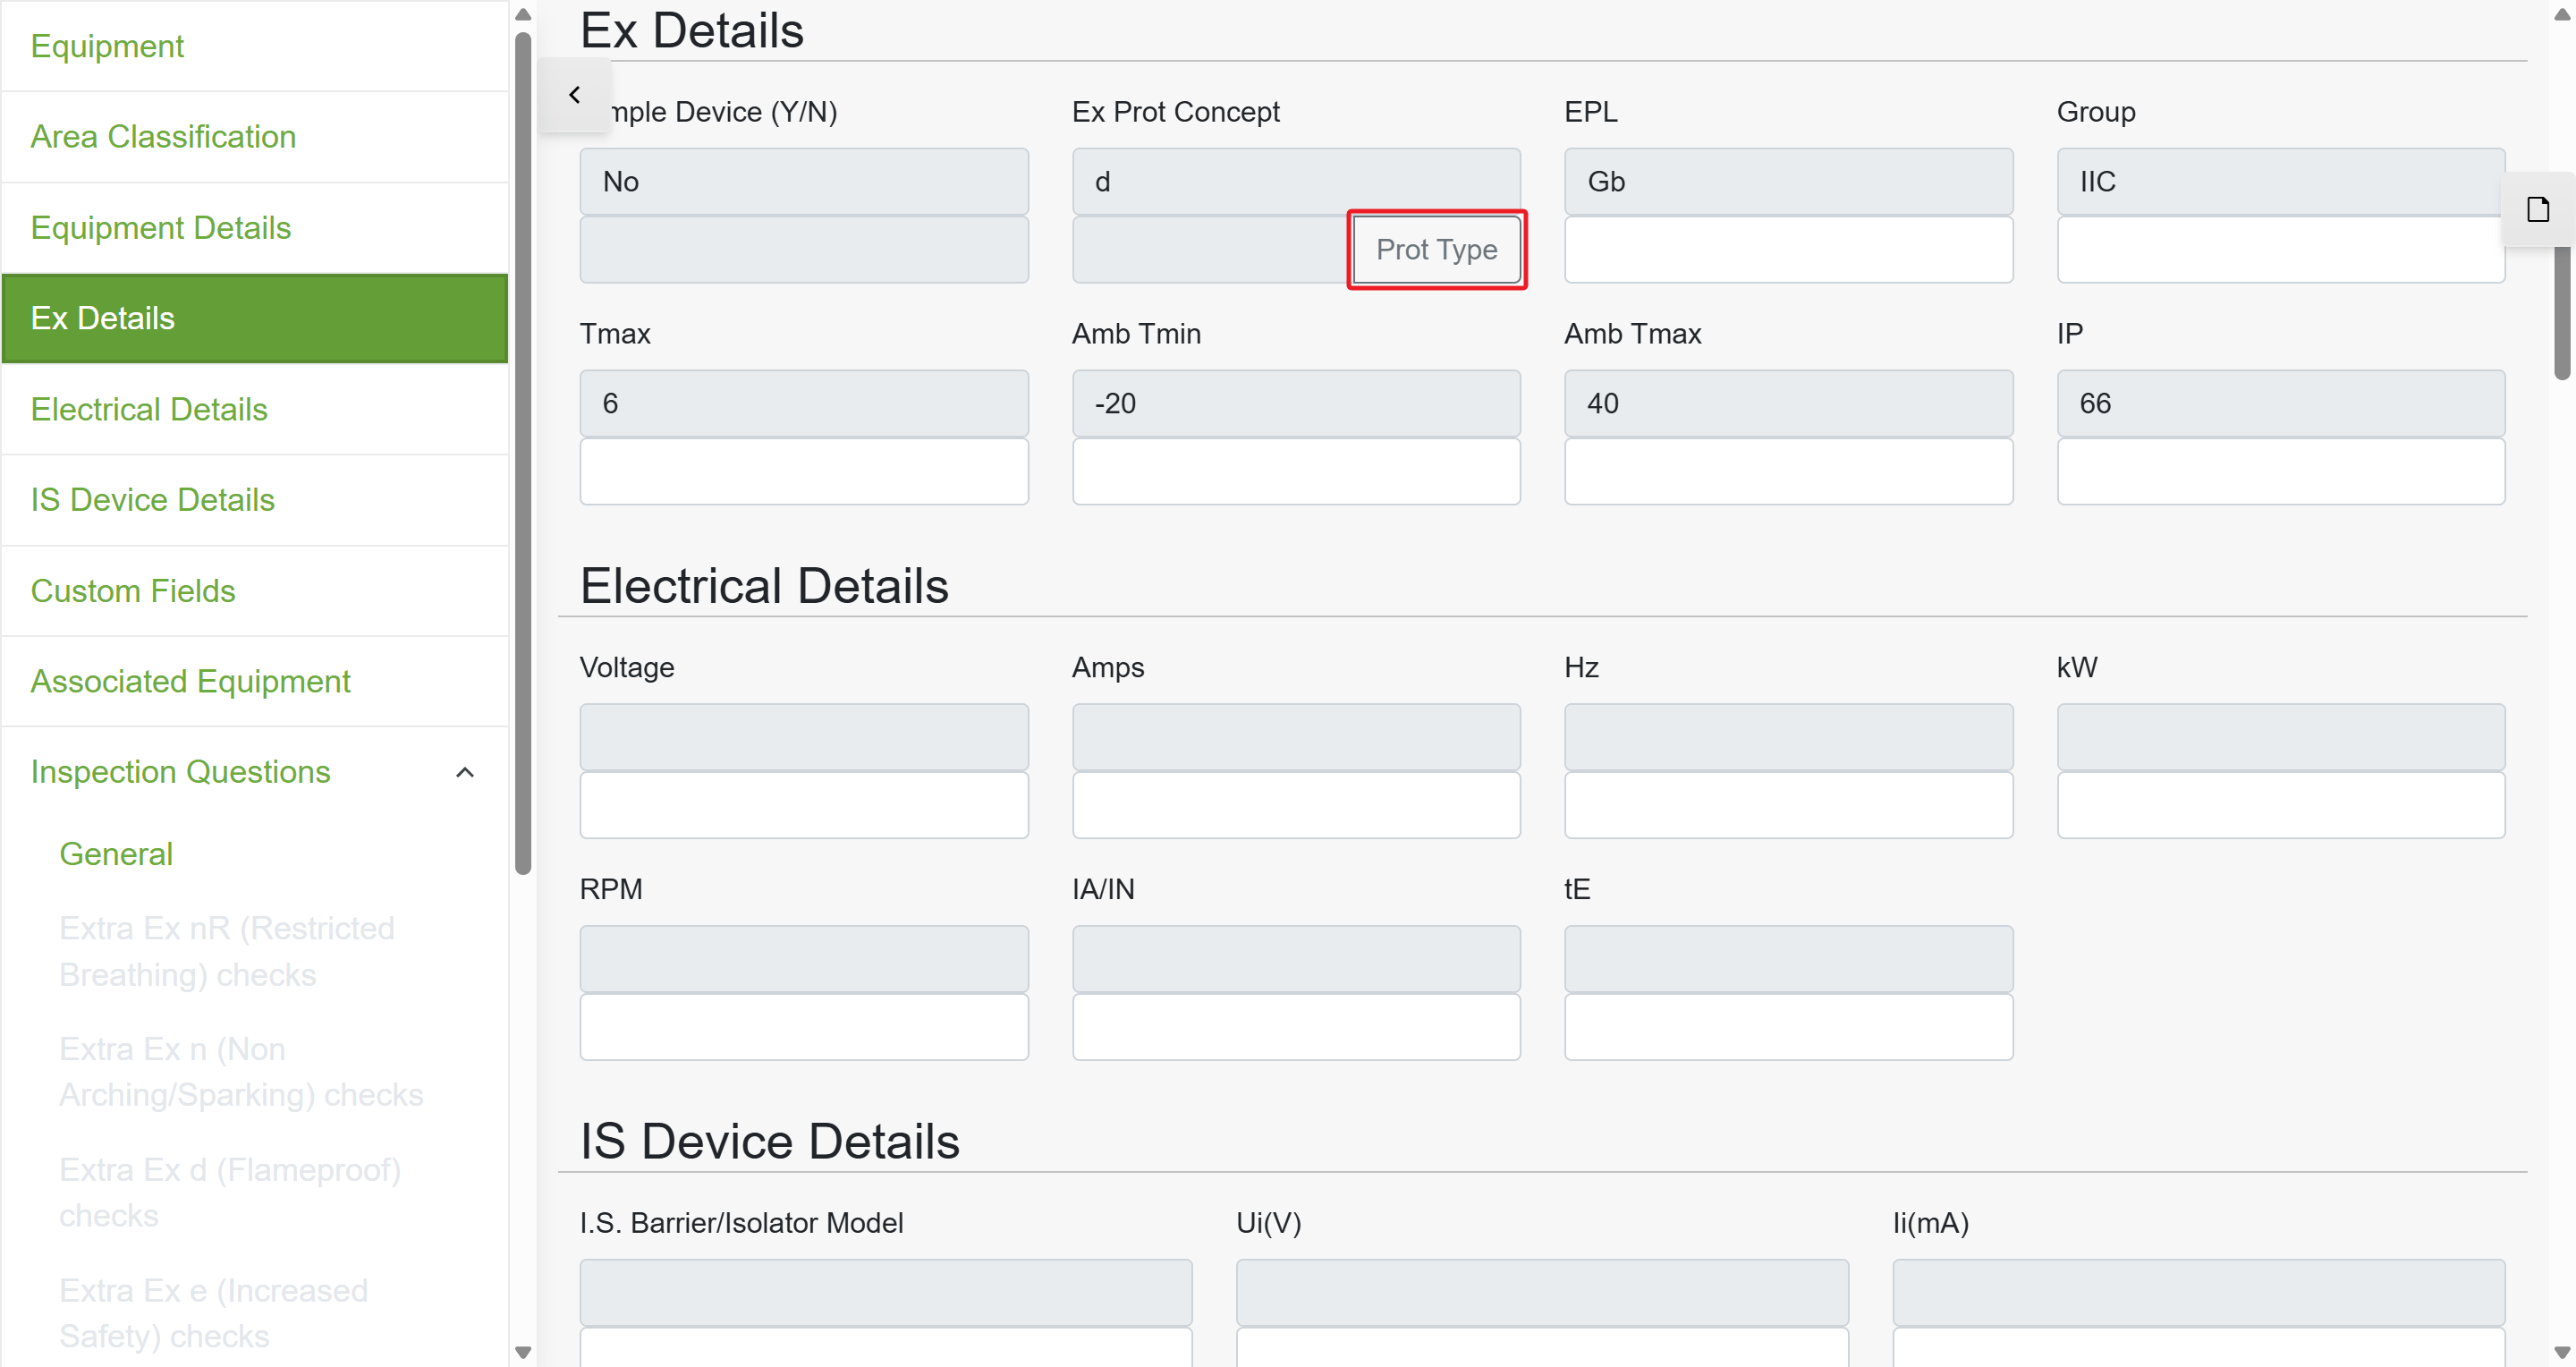
In the sidebar on the left, click Ex Details to navigate to the Ex protection fields.
-
Click the Prot Type button.
-
Use the type buttons (i, d, e, p, n, nR) to select or deselect protection types.
-
If needed, change the Simple Device (Y/N) dropdown.
-
Click Confirm to apply the change, or Cancel to discard.
Answering inspection questions
Section titled “Answering inspection questions”The inspection questions are the core of the check sheet. Click Inspection Questions in the sidebar, or click Next Inspection at the bottom of the sidebar to jump straight there.
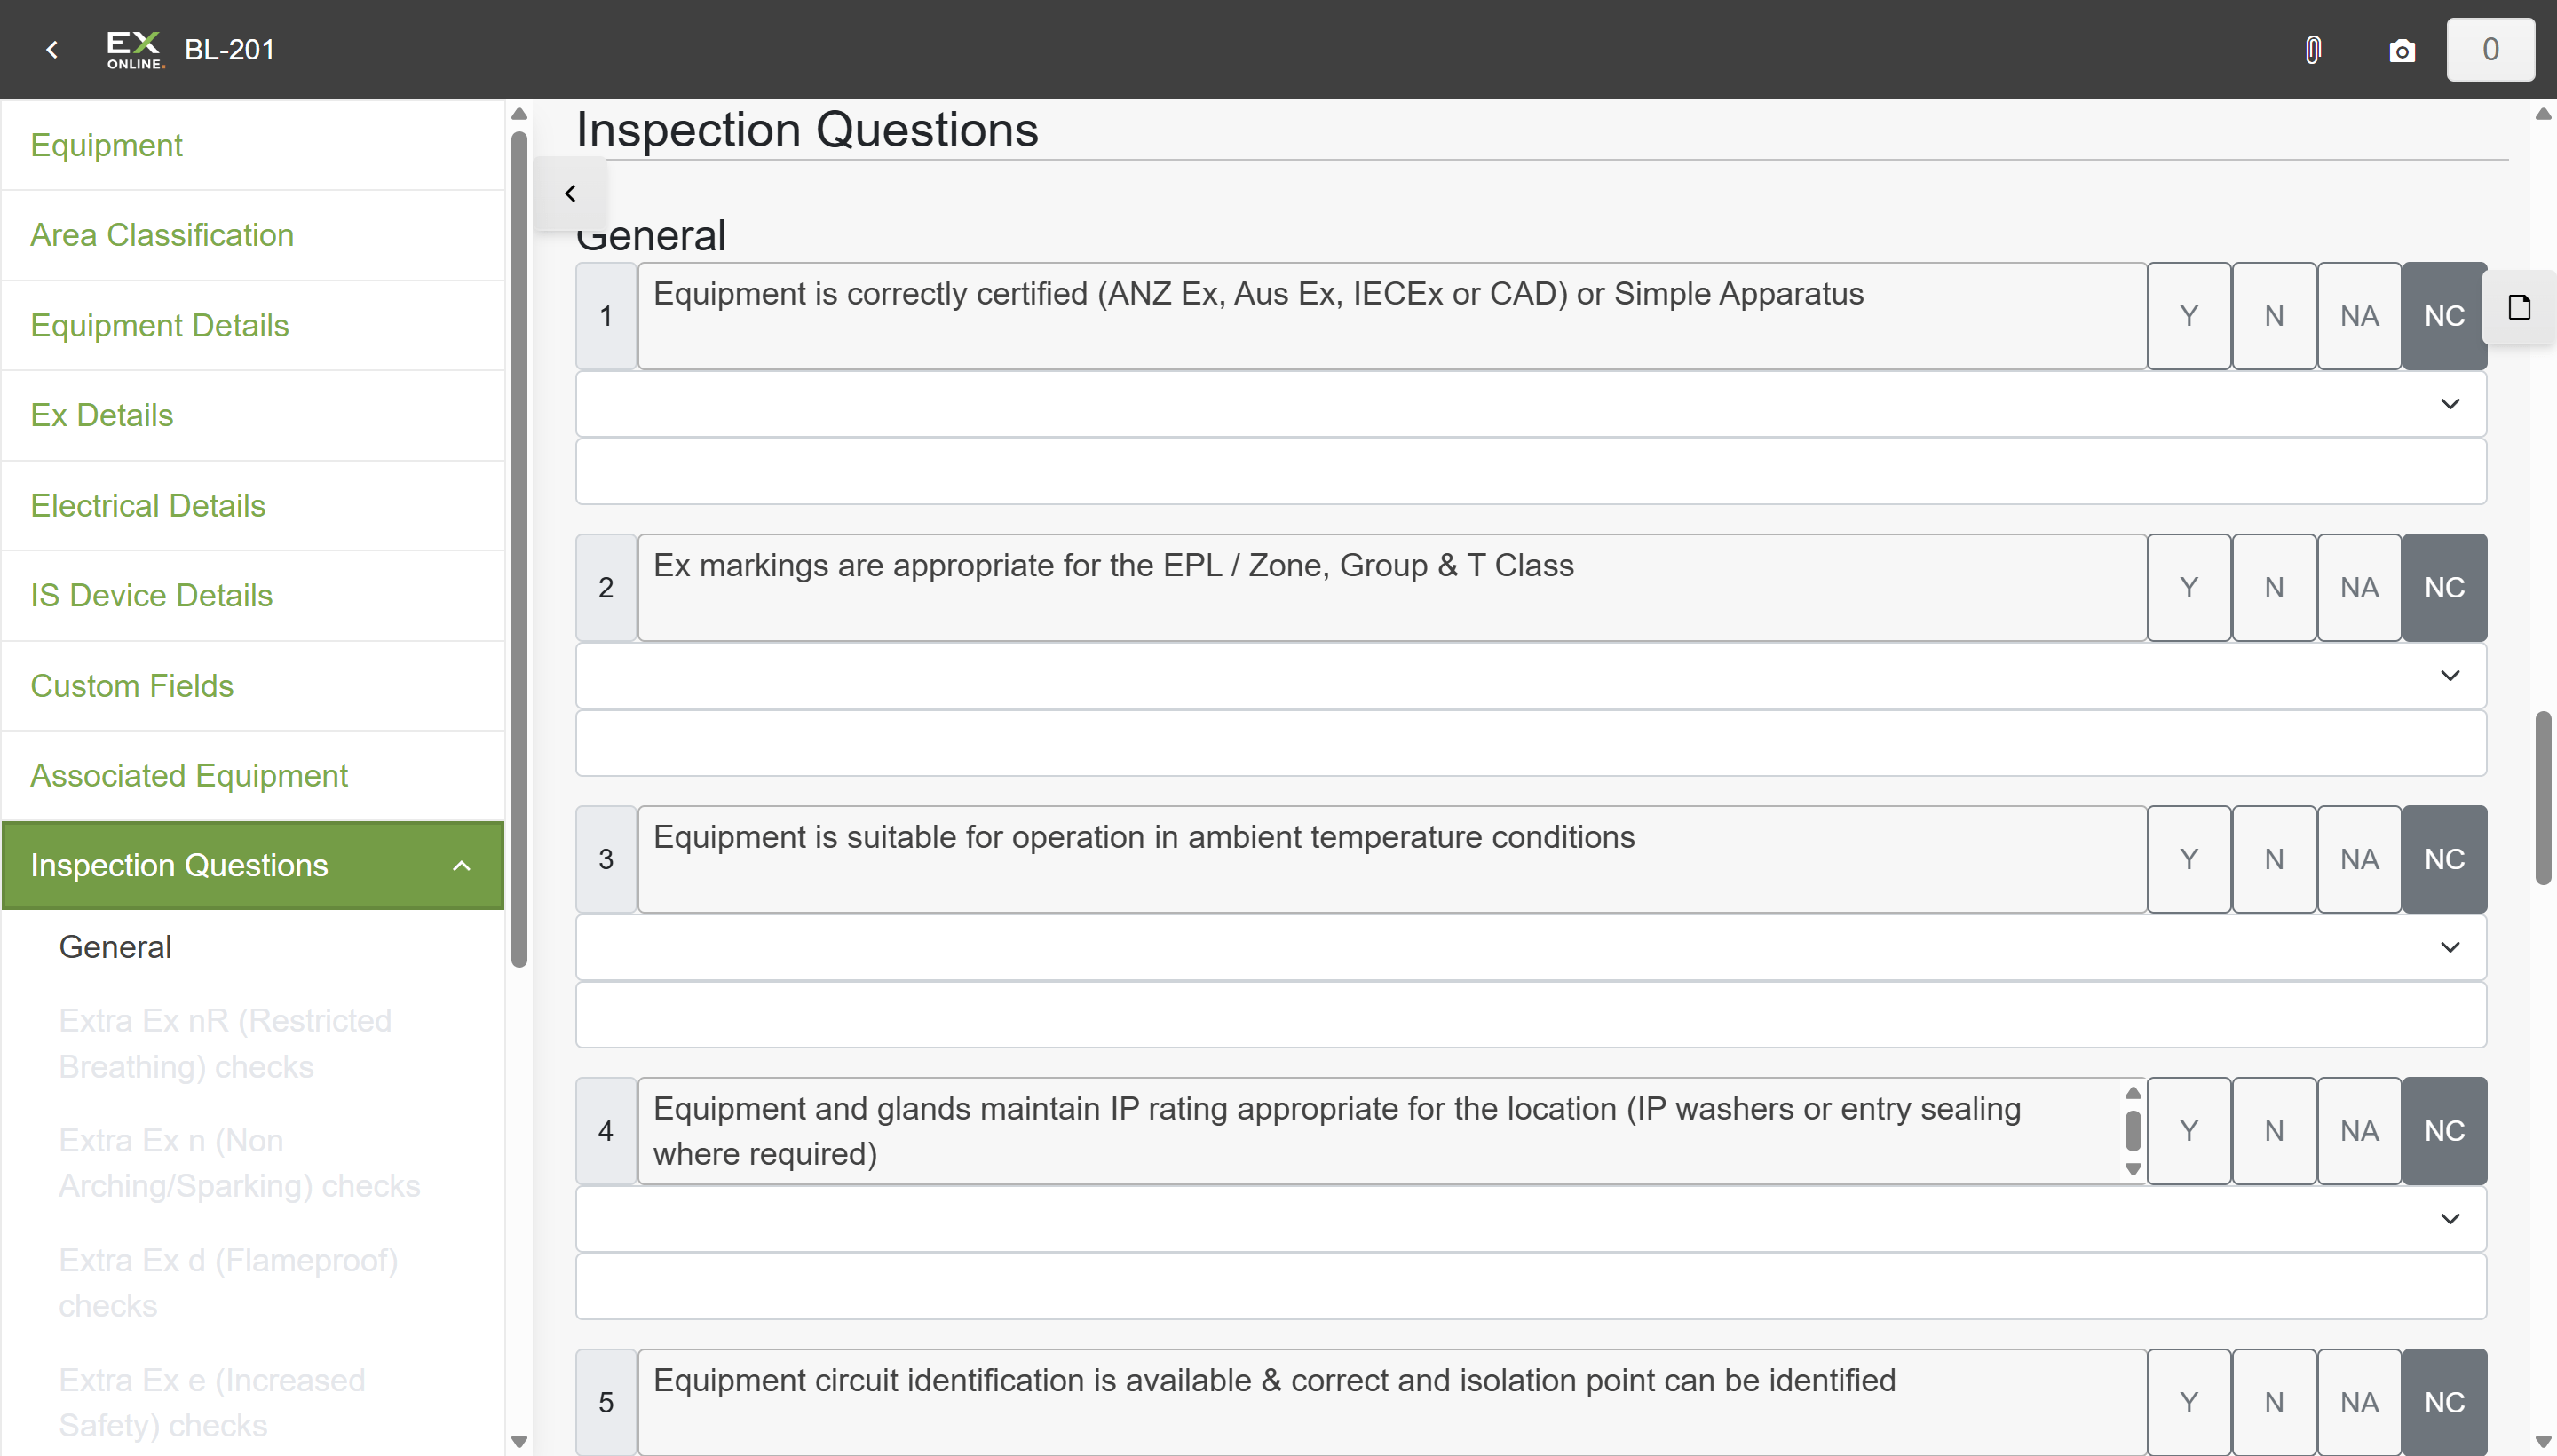
Each question has four response buttons:
| Button | Meaning |
|---|---|
| Y | Yes / Compliant |
| N | No / Non-Conformity |
| NA | Not Applicable |
| NC | Not Checked (default) |
When you select N, use the dropdown to select a common non-conformity reason, and the text field to add detail.
The Additional section (below the questions in the sidebar) provides space for non-conformities that don’t fit a specific question, follow-up actions, and remarks.
Previous defects
Section titled “Previous defects”If the IWP contains inspection history, defects from previous inspections appear inline below the relevant question. Each row shows the defect severity, status, inspector name, and date.
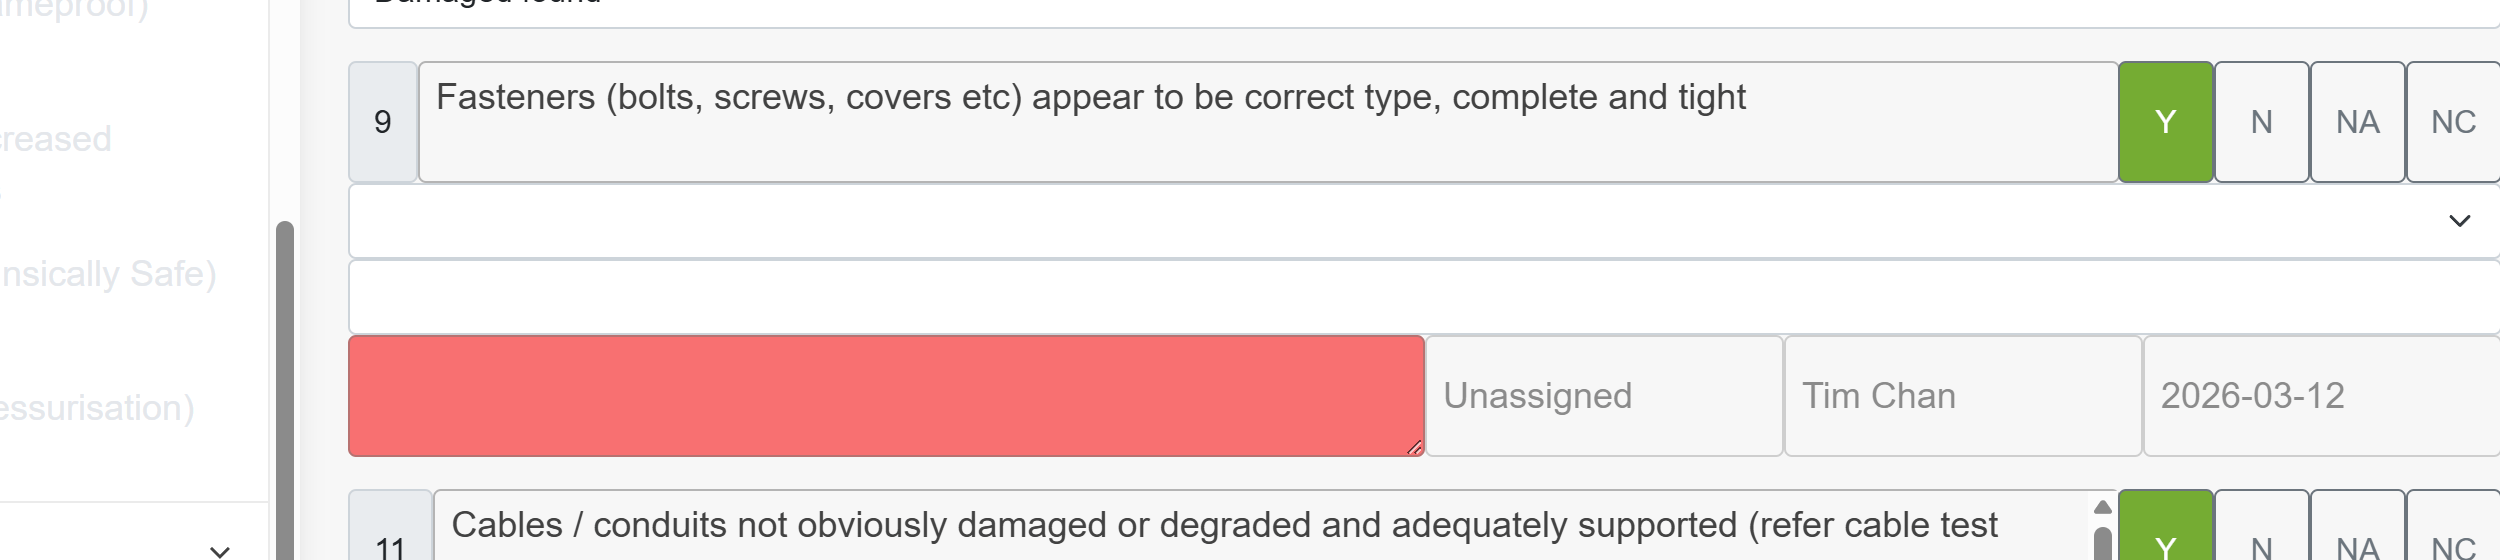
These rows are read-only — use them to check outstanding issues before answering the current inspection.
Attaching a photo
Section titled “Attaching a photo”Photos are linked to the current equipment item and included in the transfer file.
-
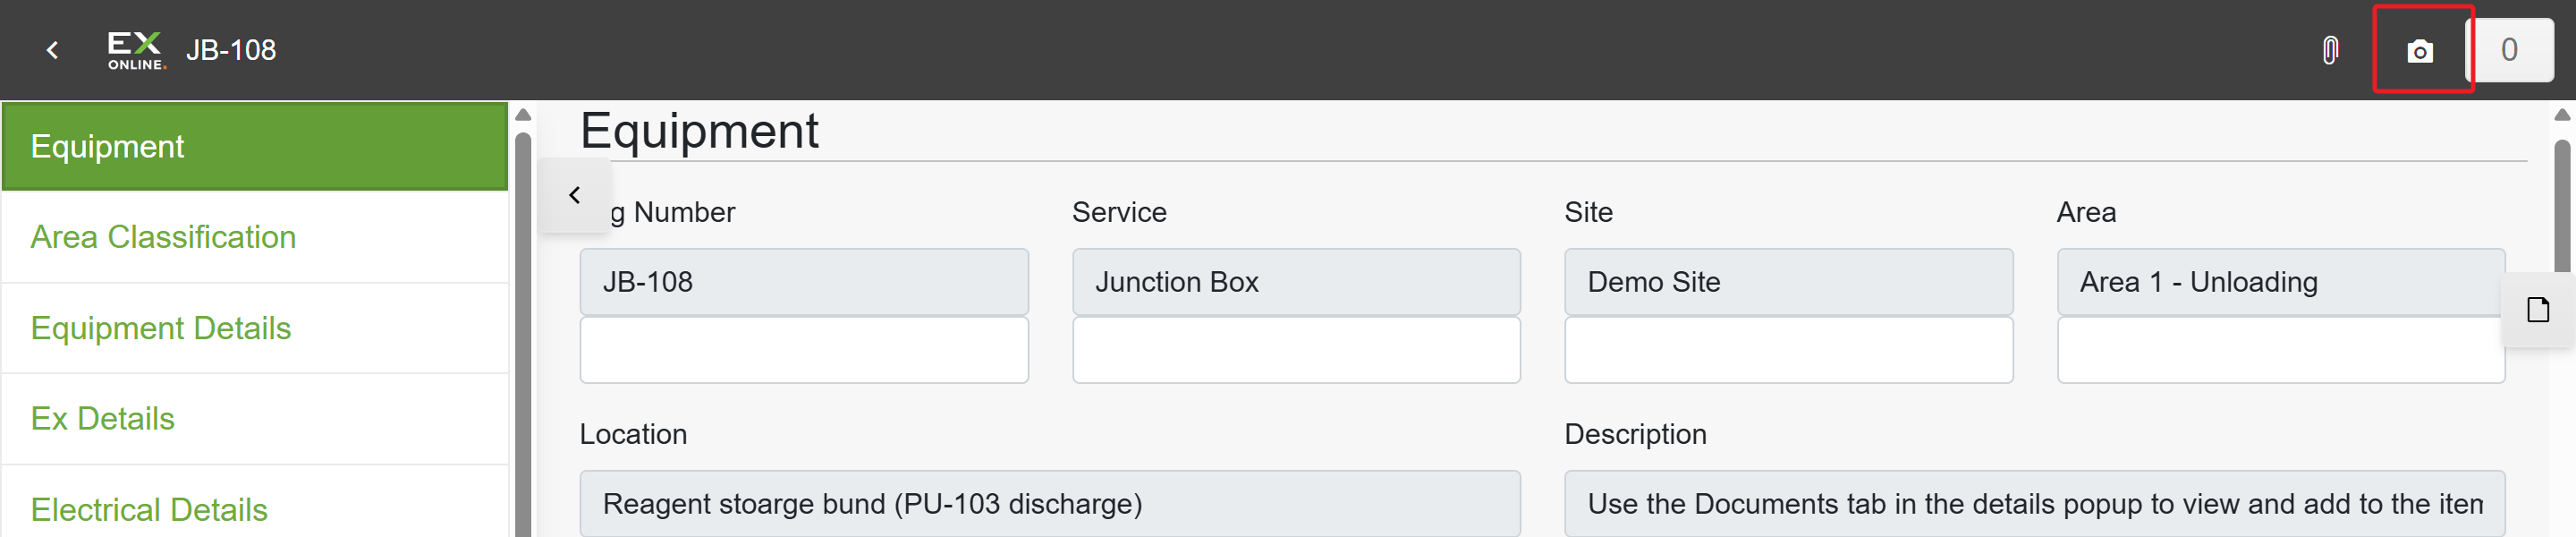
Click the camera icon in the top-right toolbar to capture a photo.
-
The number badge next to the camera shows how many photos are attached to this item.
-
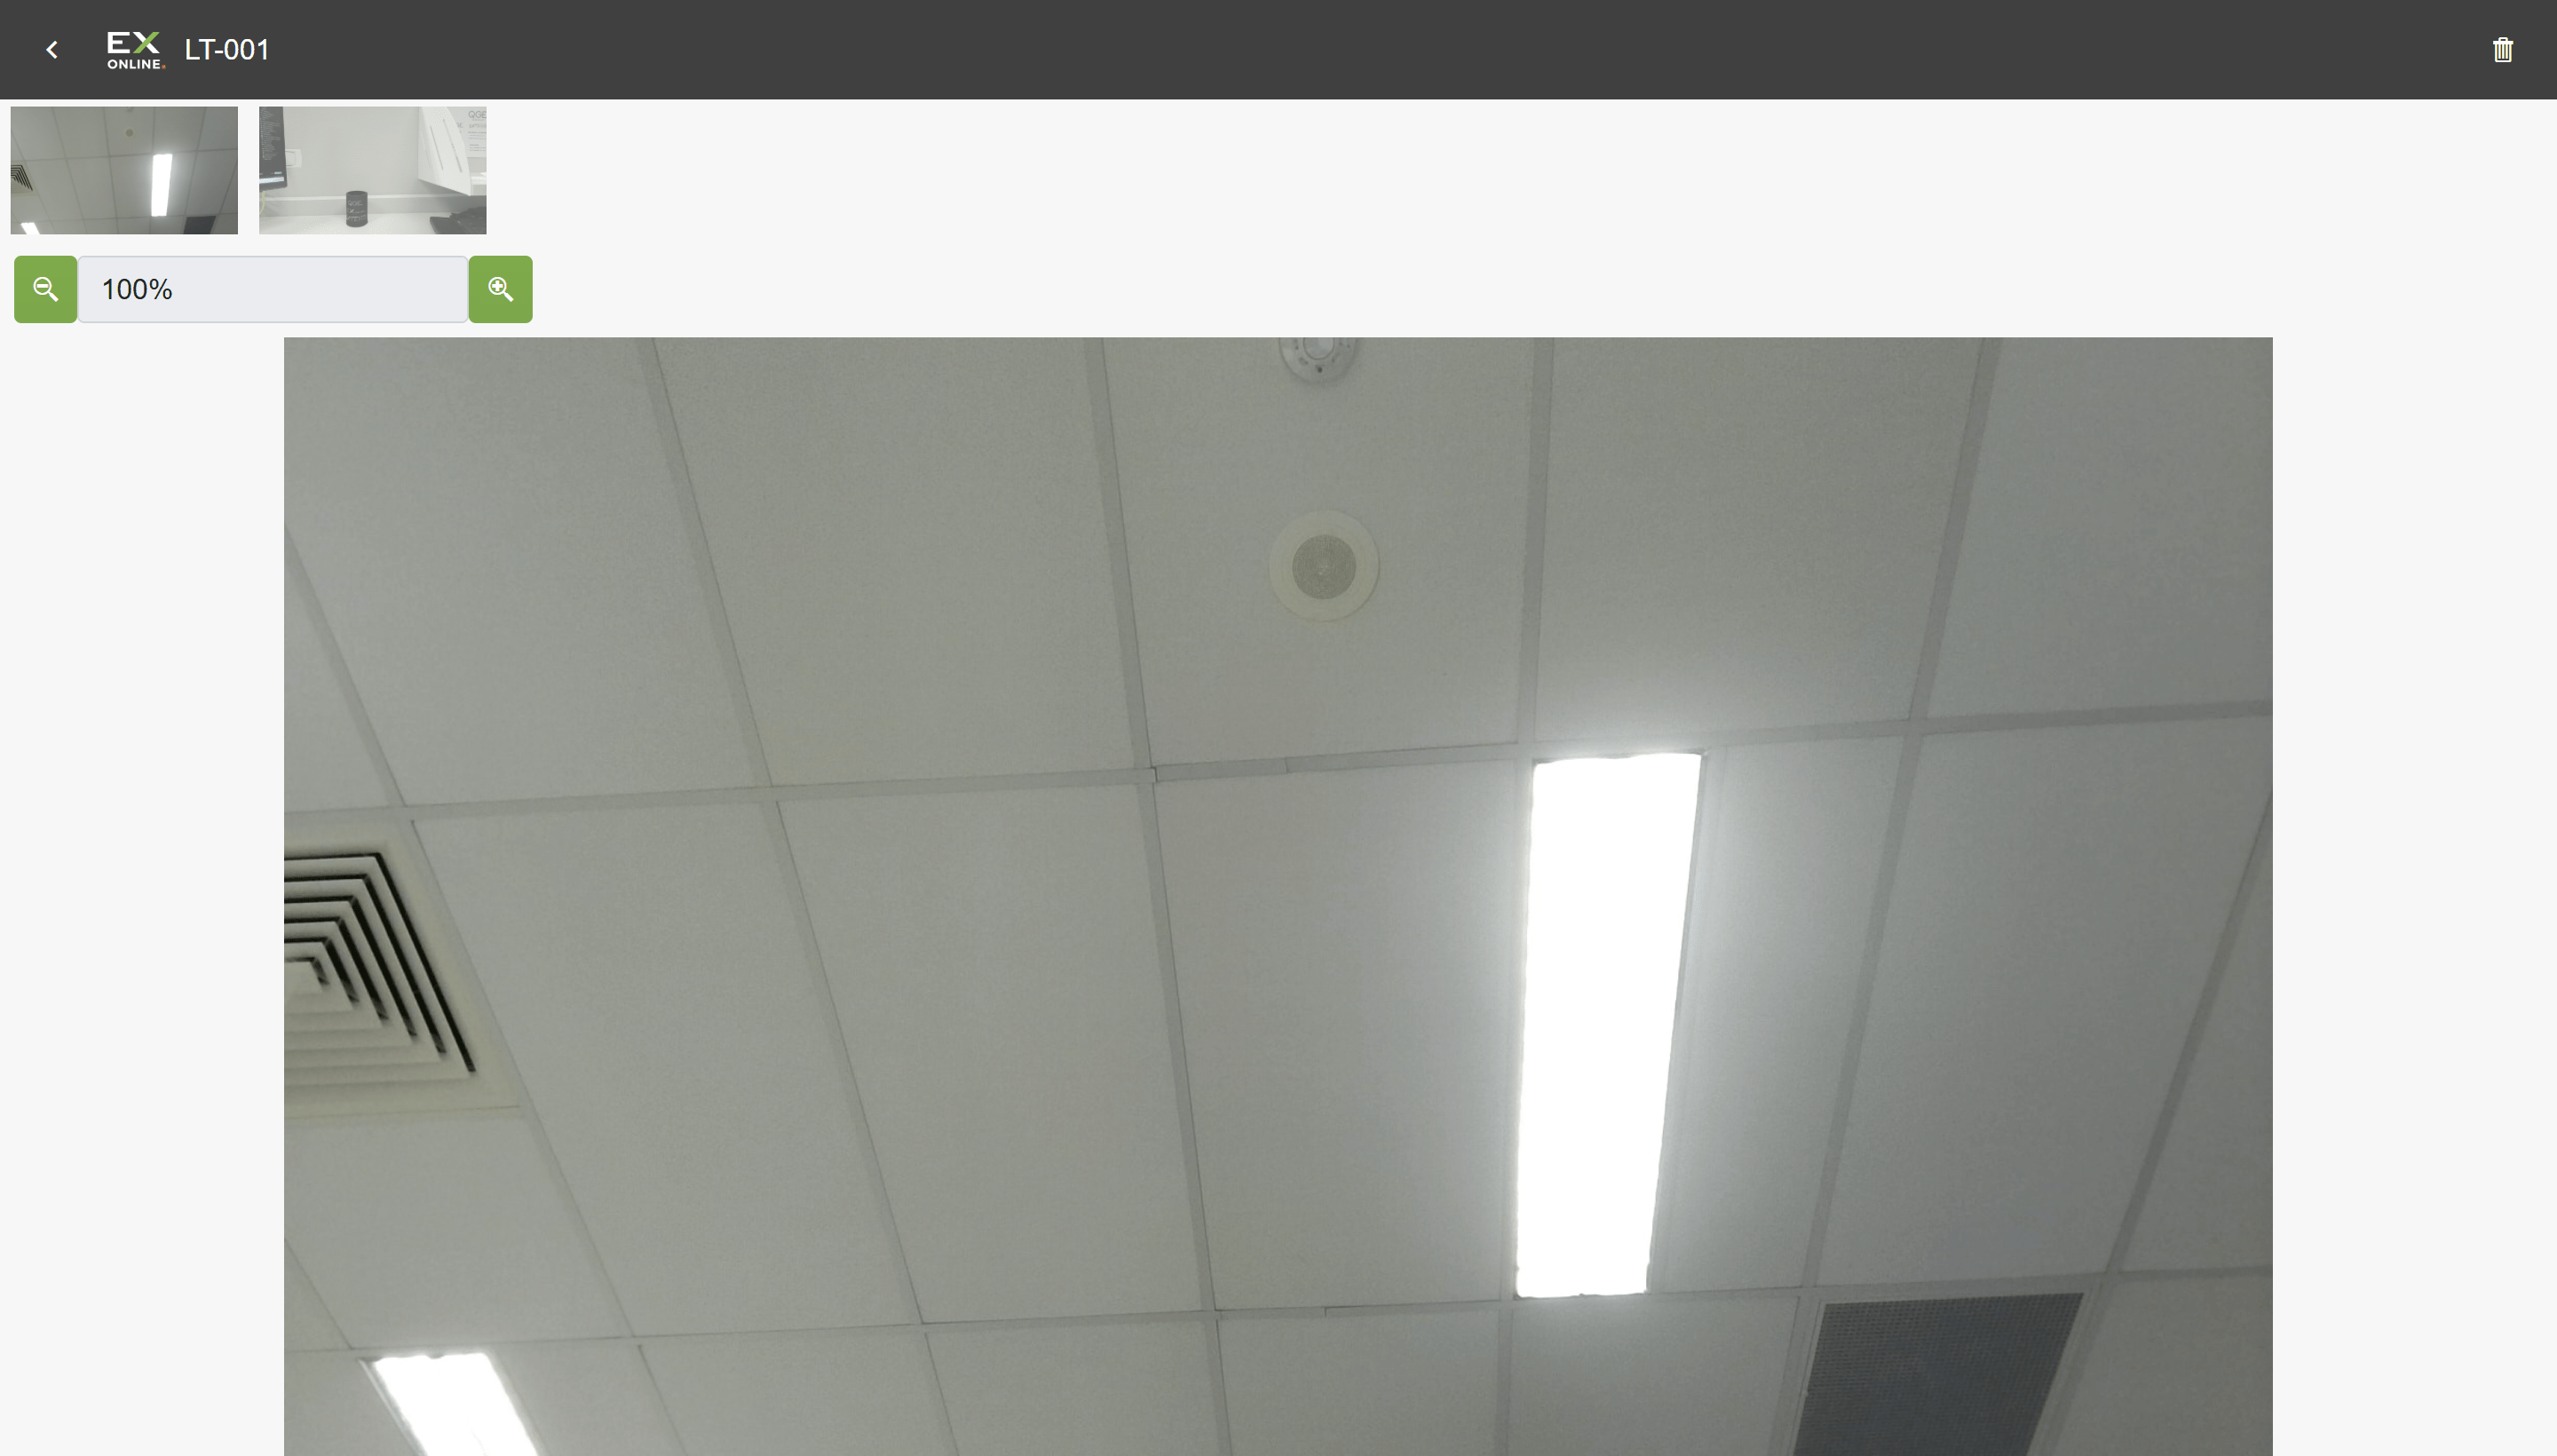
Click the badge to open the Photo Manager, where you can browse your photos and tap the delete icon (top-right) to remove any you don’t need.
Attaching a document
Section titled “Attaching a document”Documents such as PDFs, certificates, or drawings can be attached to the current equipment item from the check sheet. Attached documents travel with the transfer file when you upload results.
-
Click the paperclip icon in the top-right toolbar to open the document menu bar.
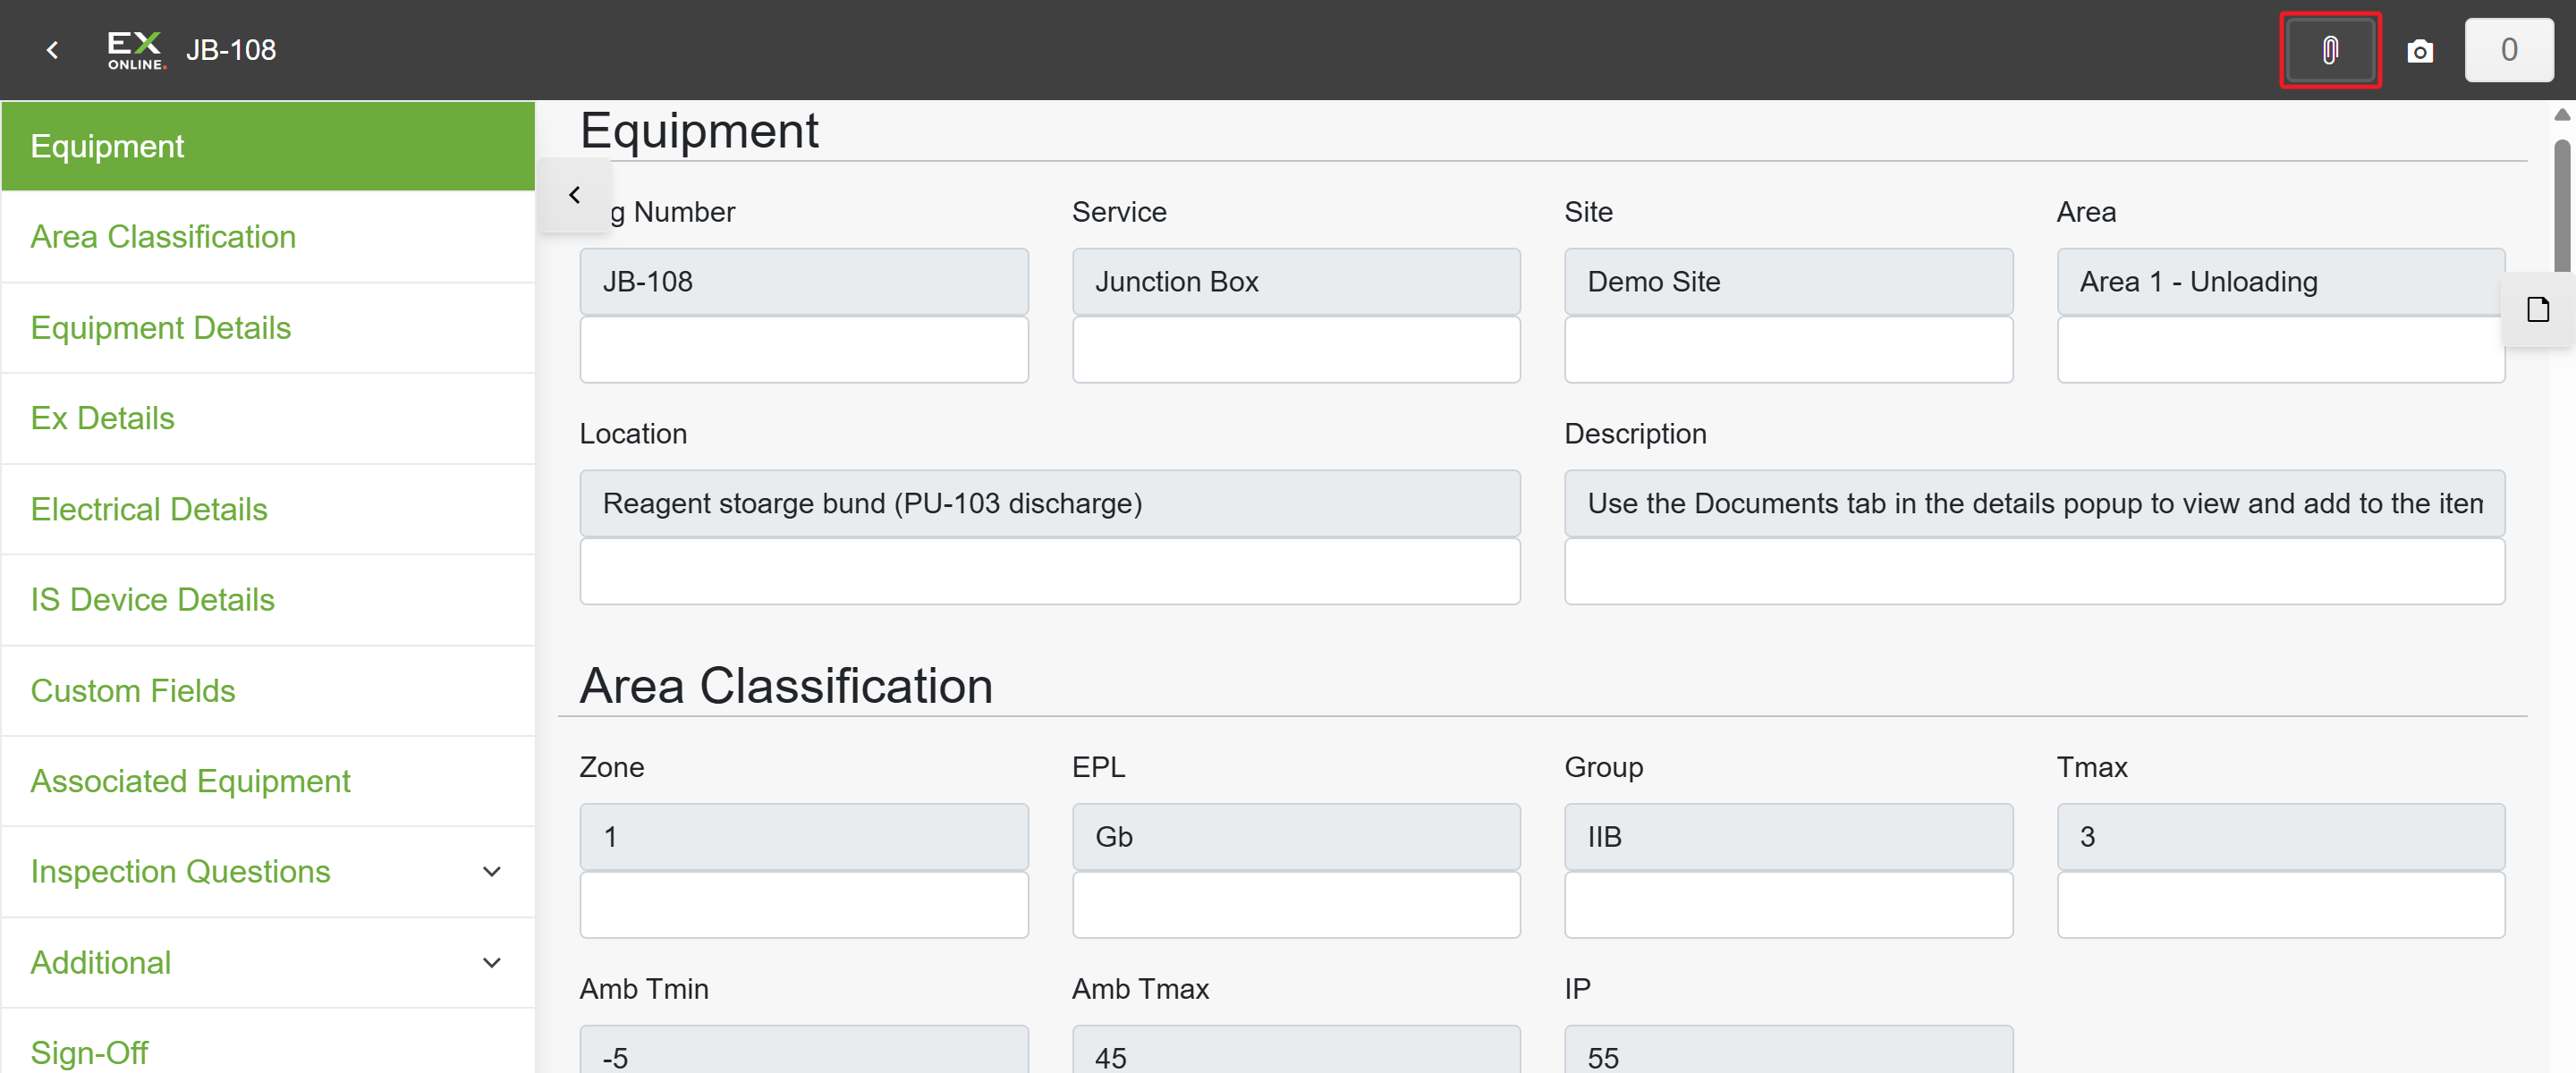
-
Select the file from your device and confirm.
Viewing documents
Section titled “Viewing documents”You can view documents linked to the current equipment item in two ways:
From the check sheet
Section titled “From the check sheet”-
Click the file icon on the right side of the check sheet (below the toolbar).
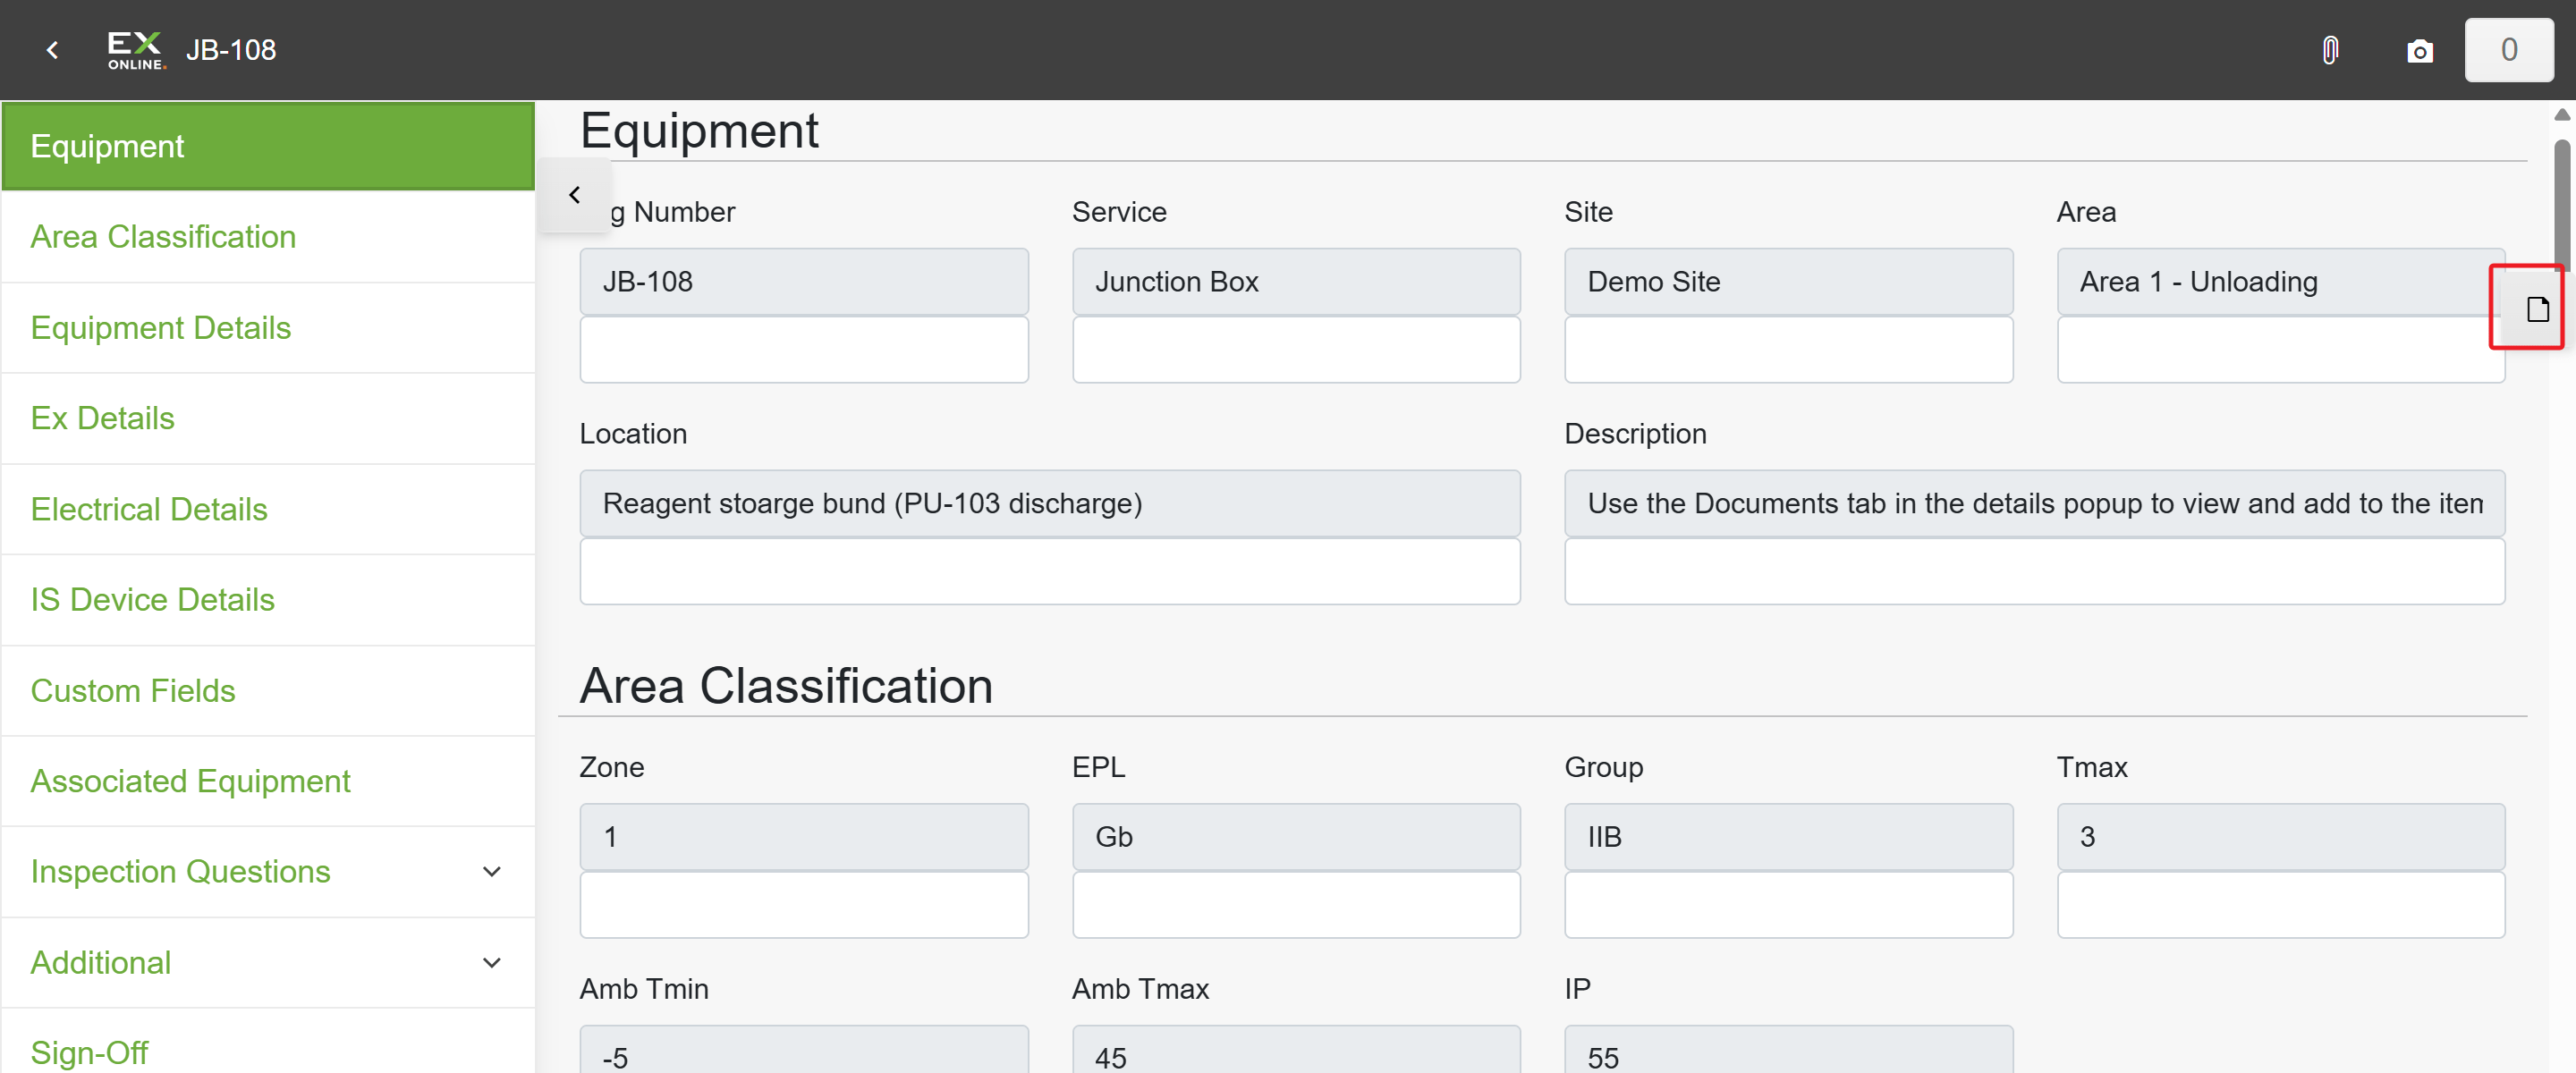
-
The Documents panel opens, listing all documents linked to the current item.
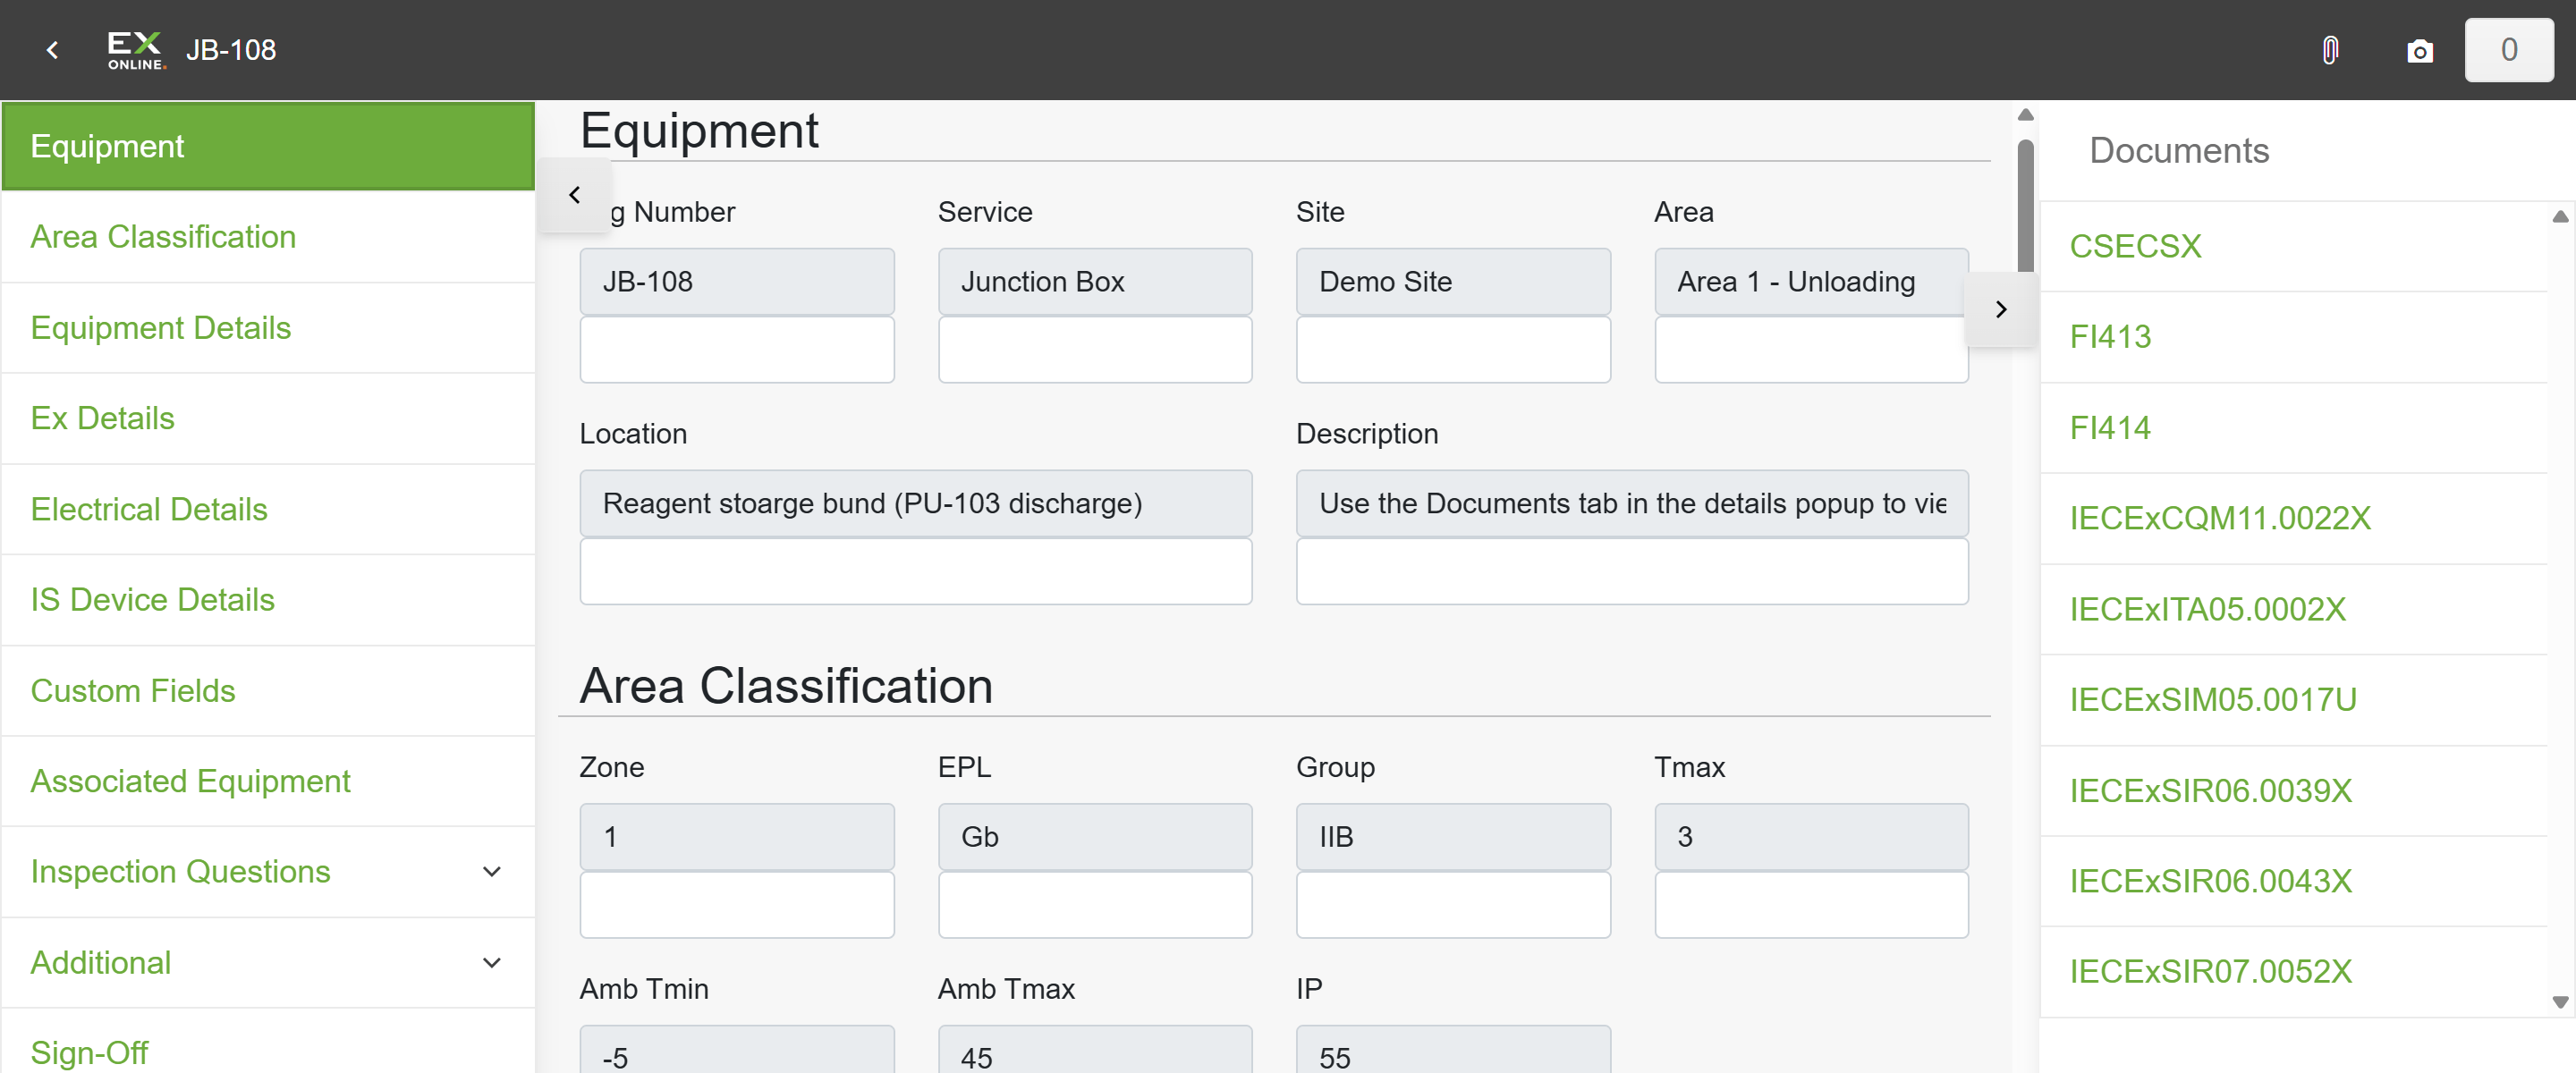
-
Click a document name to open it.
From the Equipment Browser
Section titled “From the Equipment Browser”-
Return to the Equipment Browser by clicking the back arrow or the Ex-Online logo in the top-left.
-
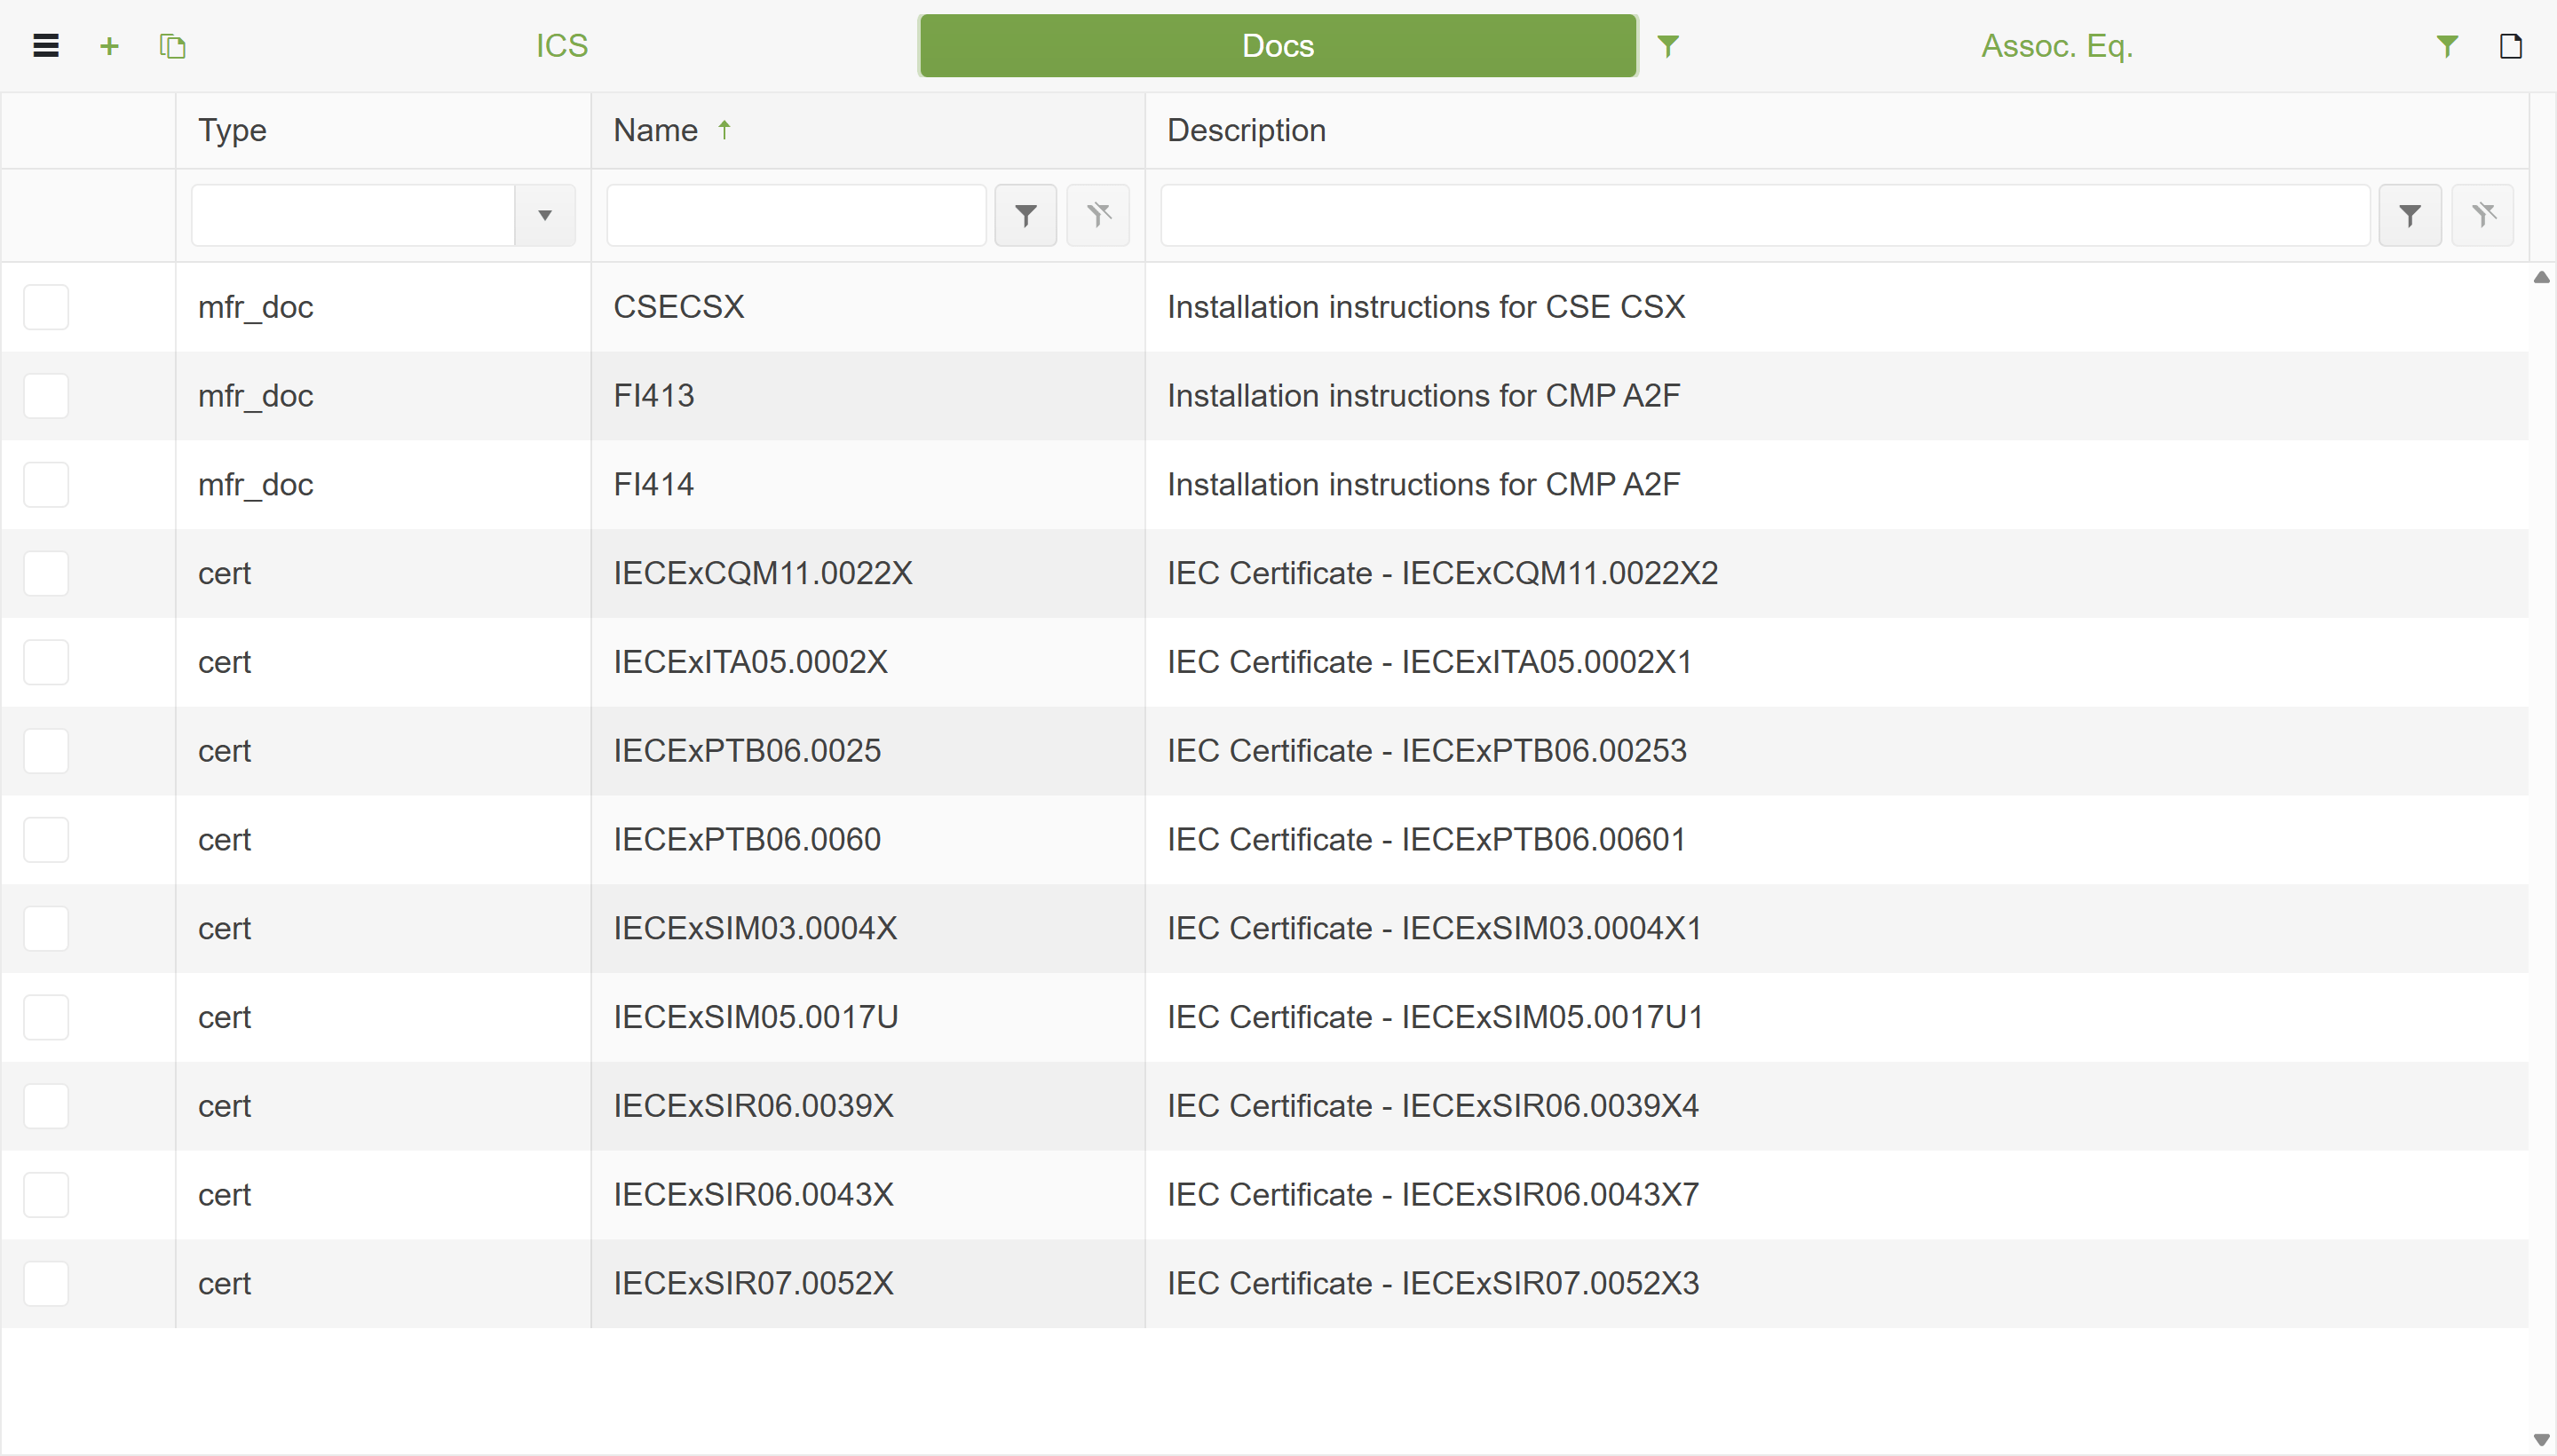
Switch to the Docs tab in the green view tabs bar.
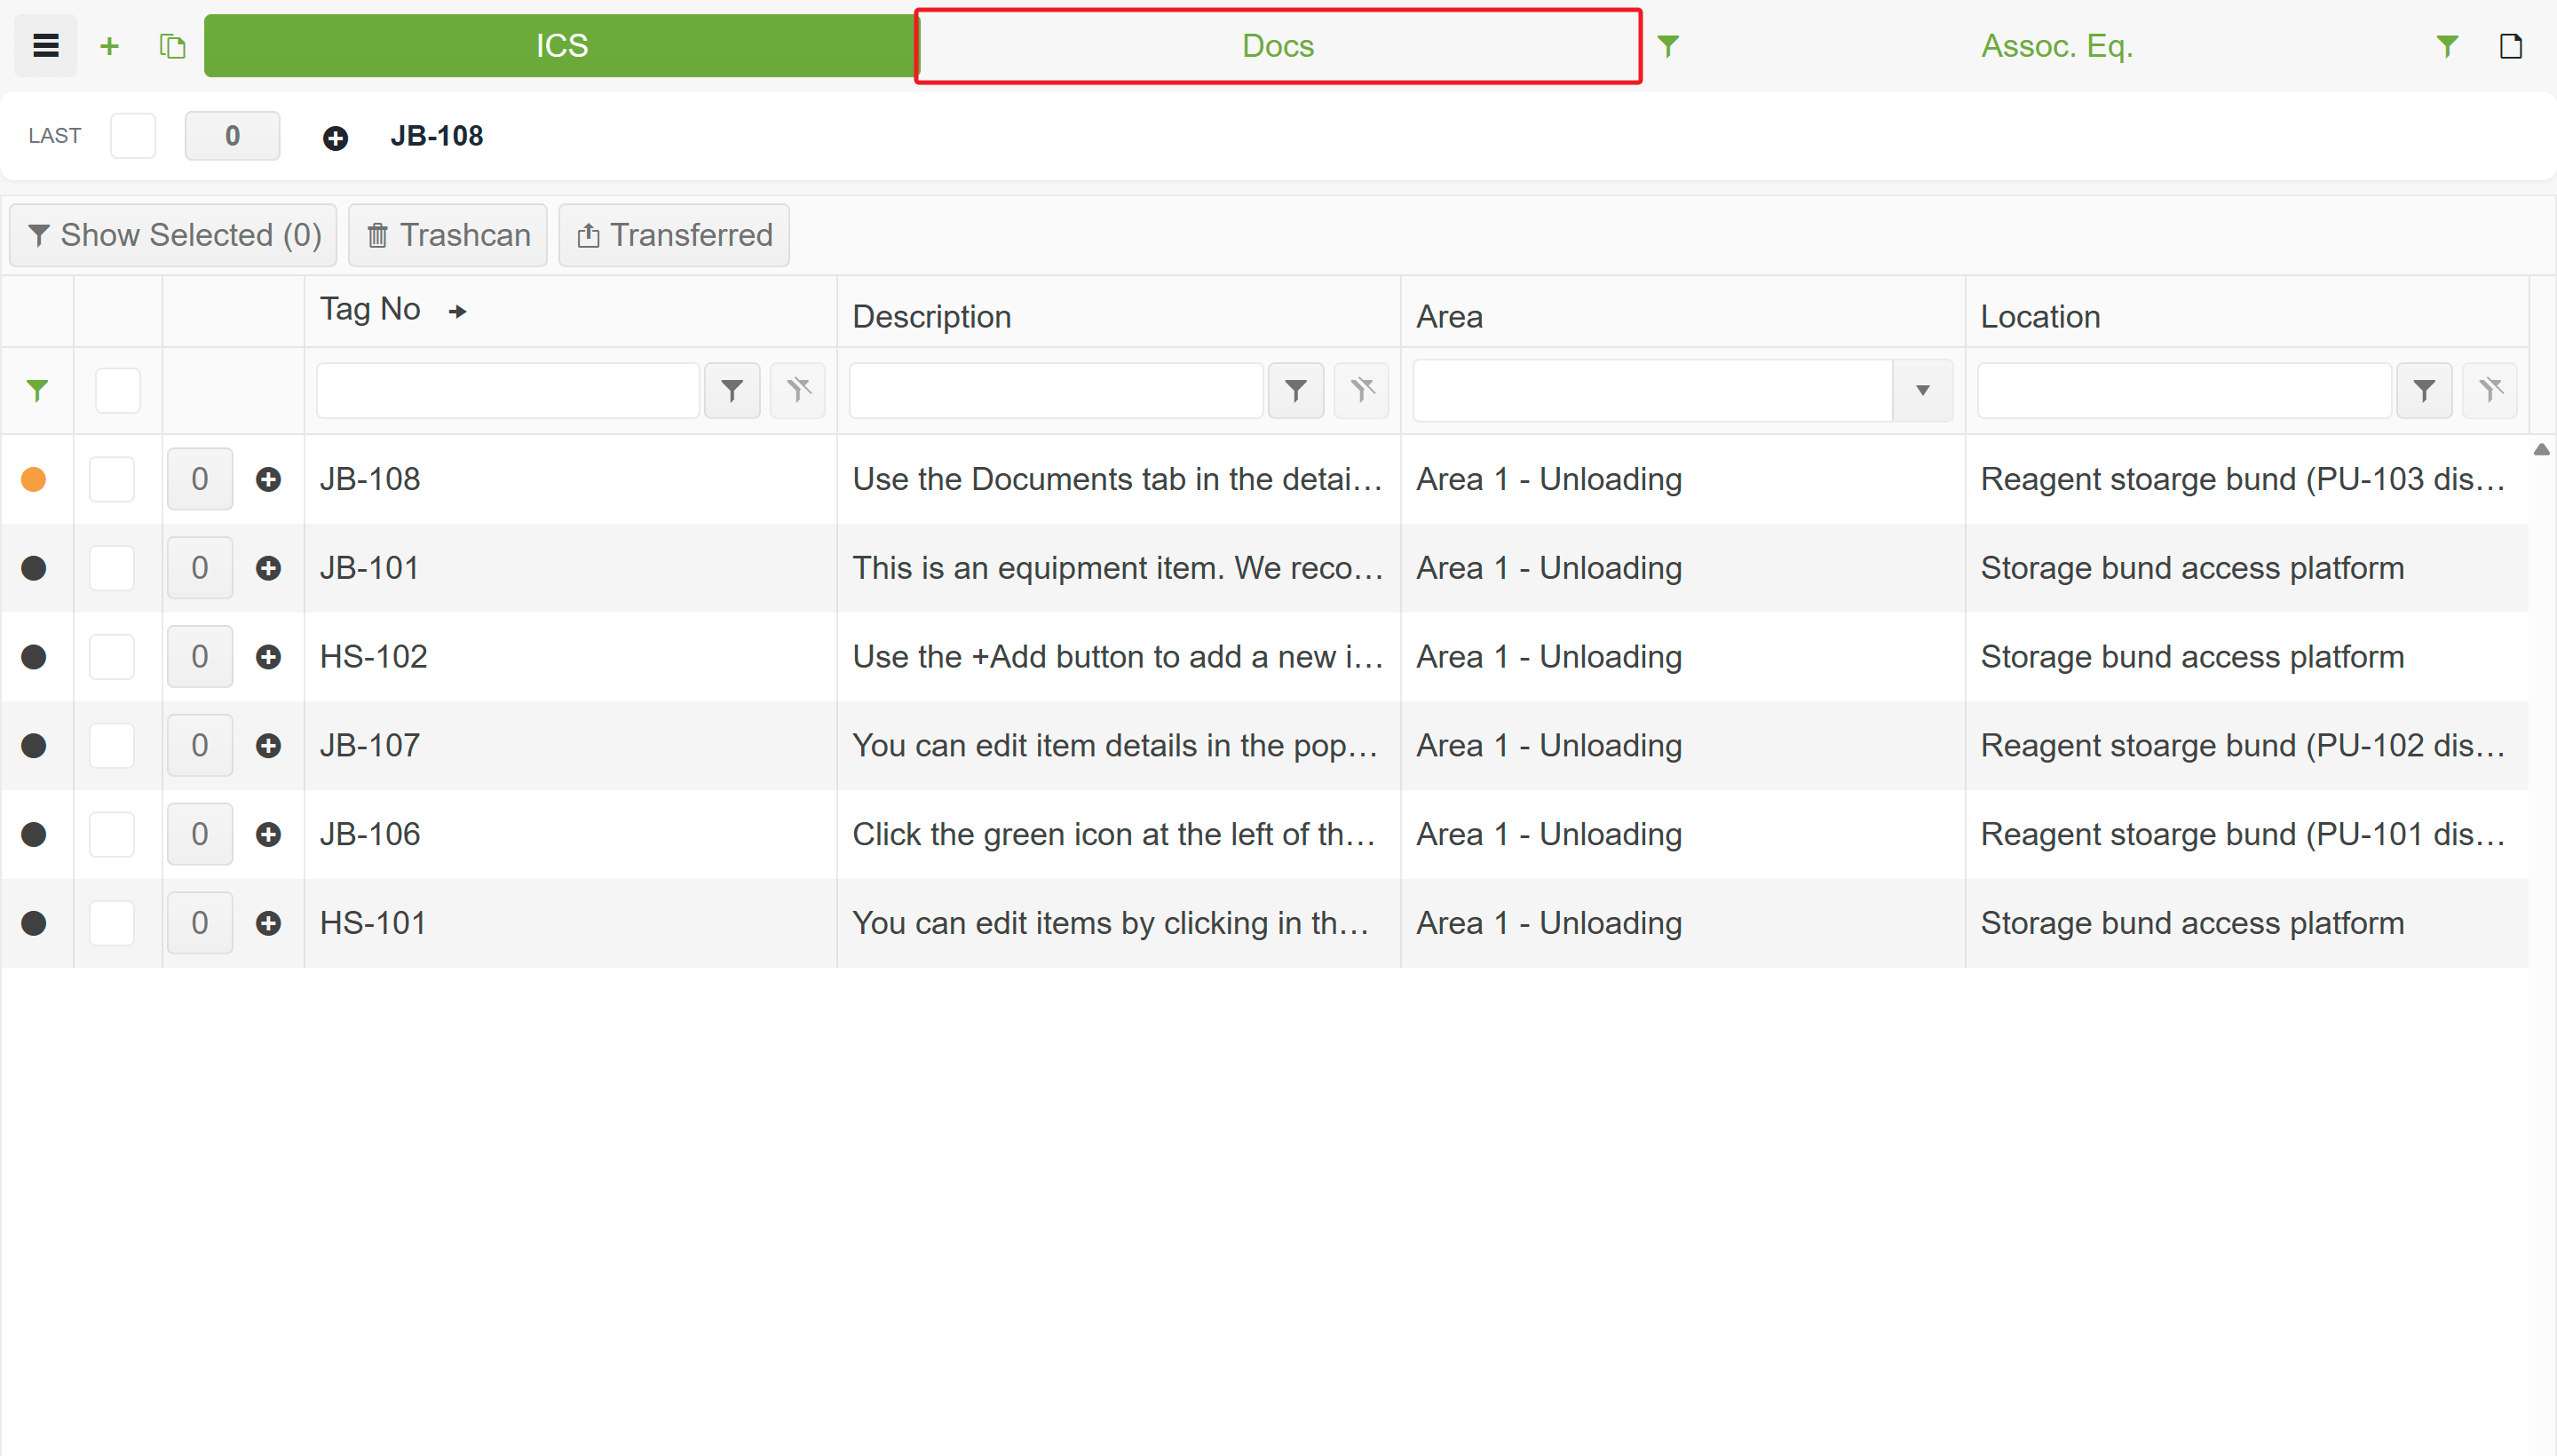
-
The document grid displays all documents in the IWP, with Type, Name, and Description columns.
-
Double-click a row to open the document.
Adding associated equipment
Section titled “Adding associated equipment”Associated equipment (glands, seals, stopping plugs, IS barriers) linked to the current item appears in the Associated Equipment section of the check sheet. You can also manage associated equipment from the Equipment Browser’s Assoc. Eq. tab.
From the check sheet
Section titled “From the check sheet”-
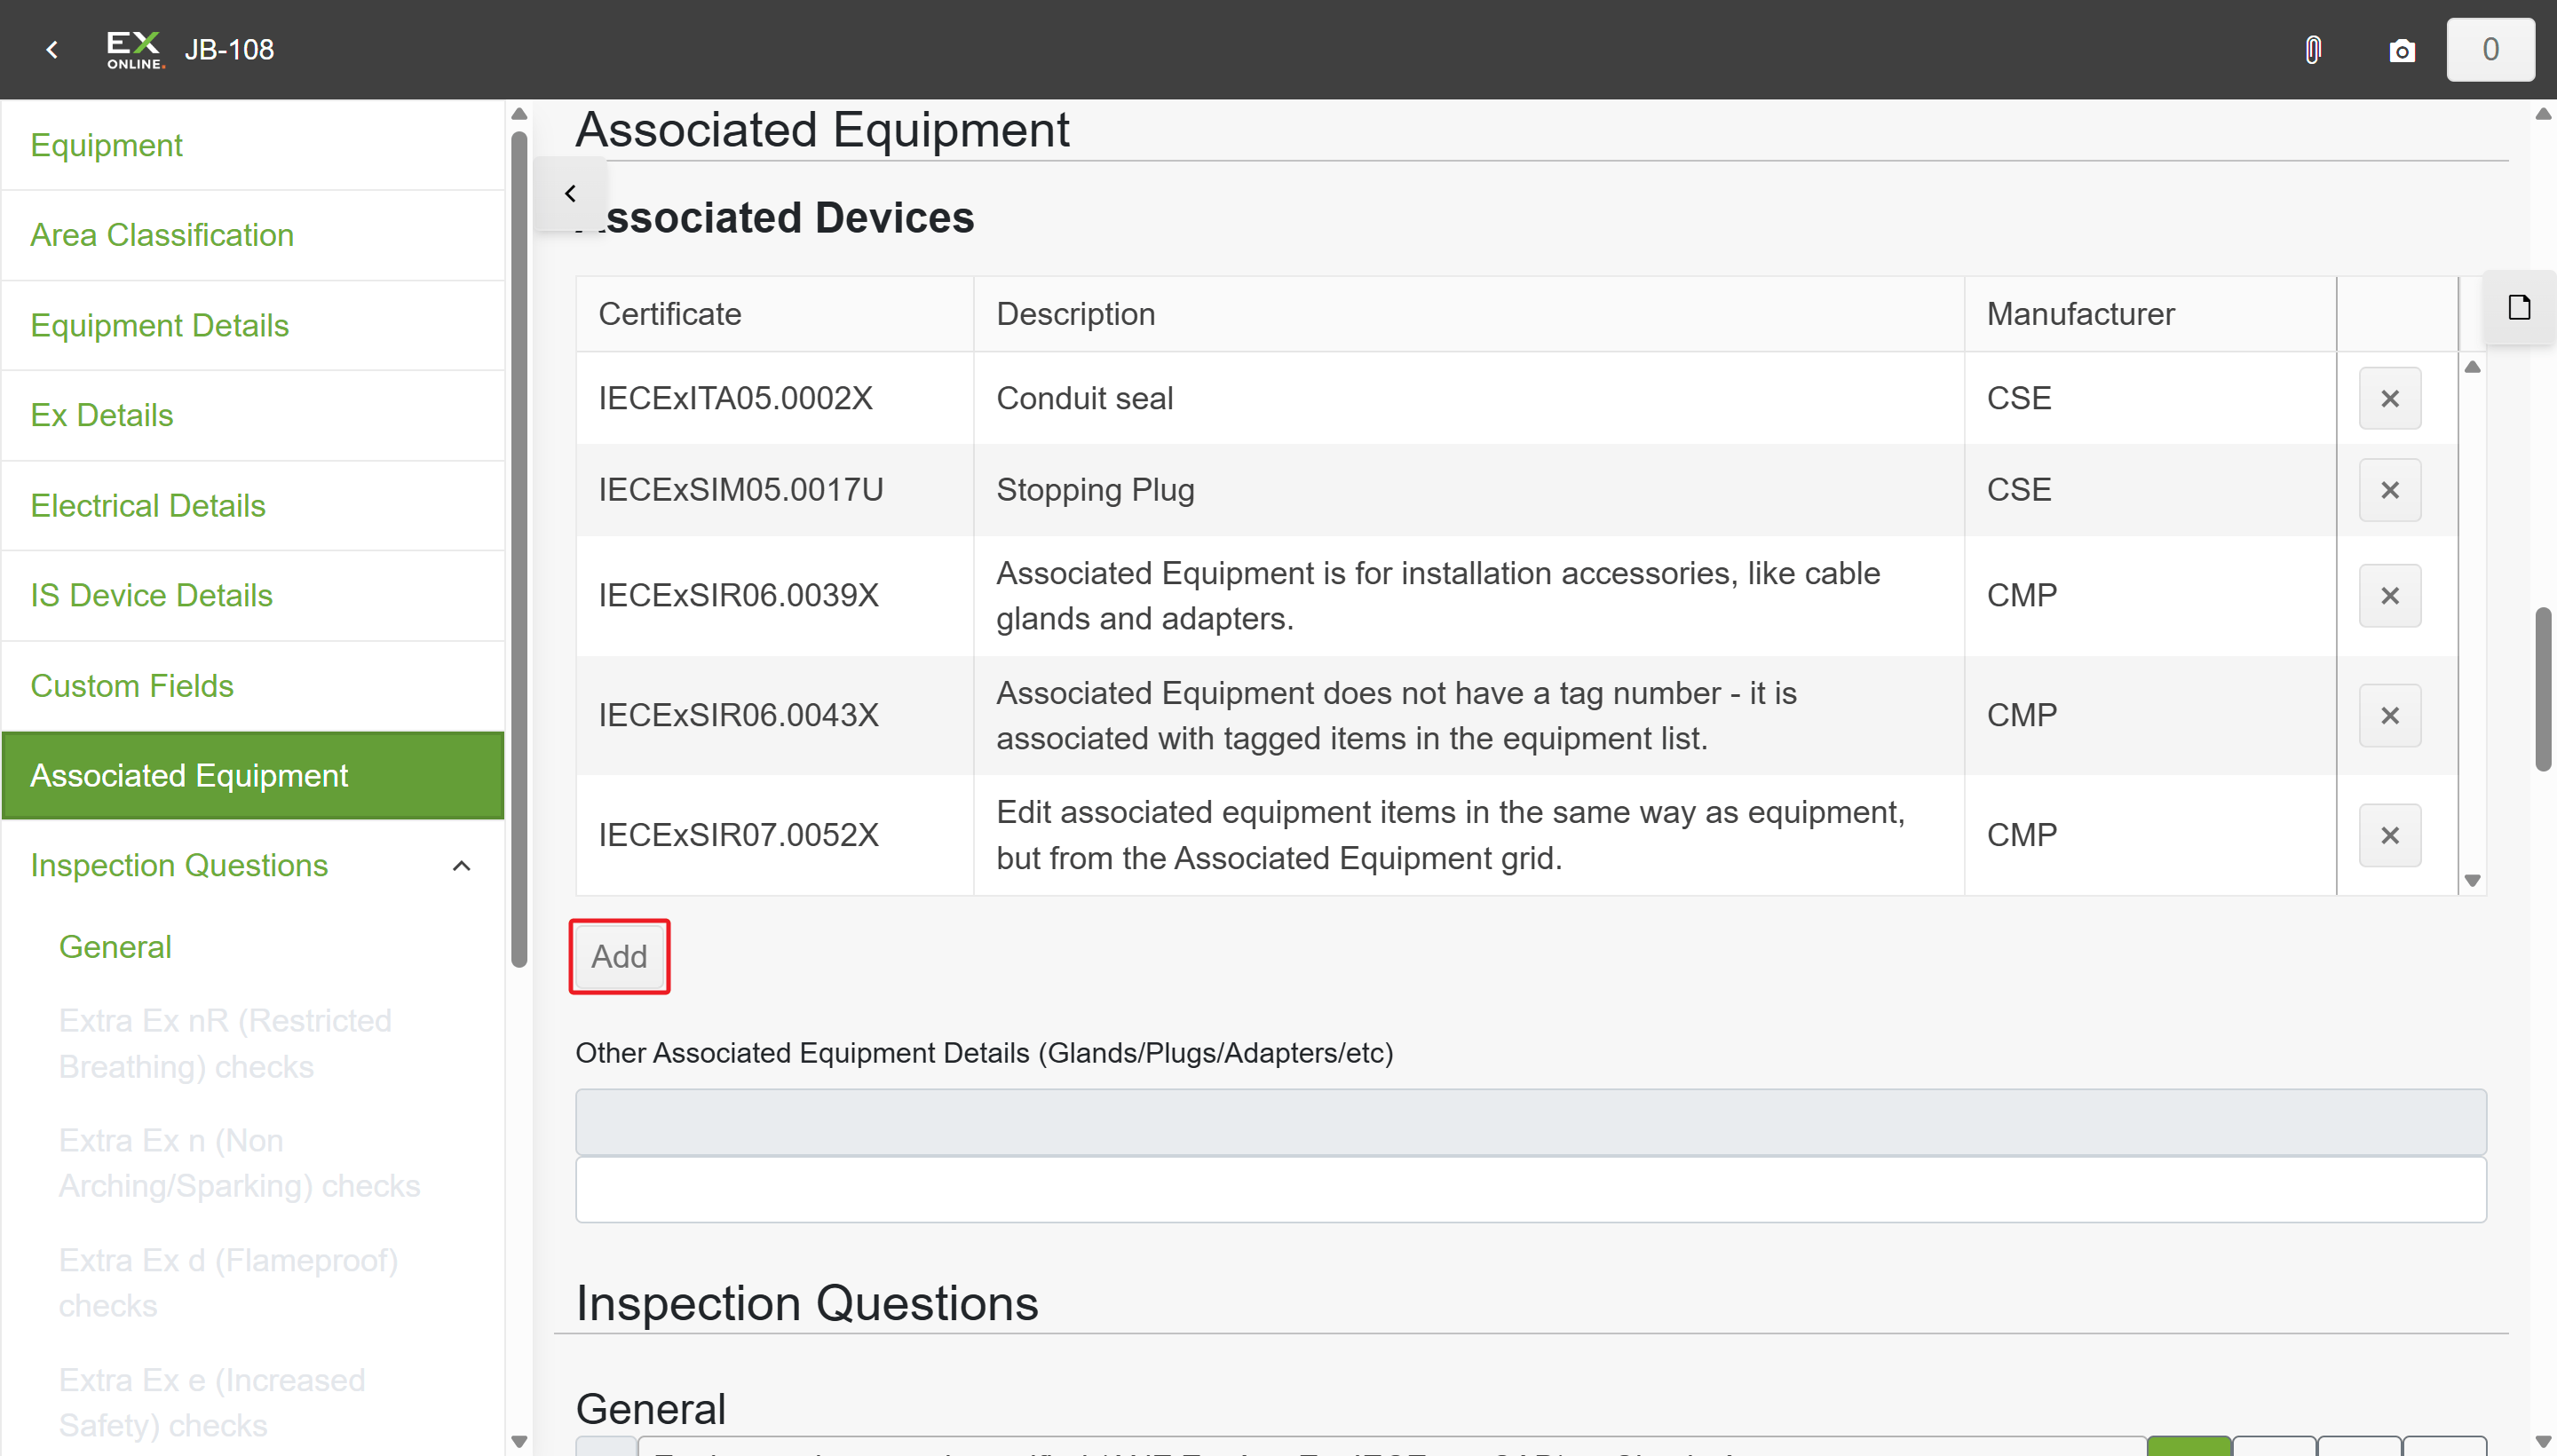
In the sidebar on the left, click Associated Equipment to scroll to that section.
-
The Associated Devices list shows items already linked to this equipment (Certificate, Description, Manufacturer).
-
Click Add to add a new associated equipment item.
-
Fill in the required fields: Description, Certificate, Protection, Service, Manufacturer, and Model.
From the Equipment Browser
Section titled “From the Equipment Browser”-
Return to the Equipment Browser by clicking the back arrow or the Ex-Online logo in the top-left.
-
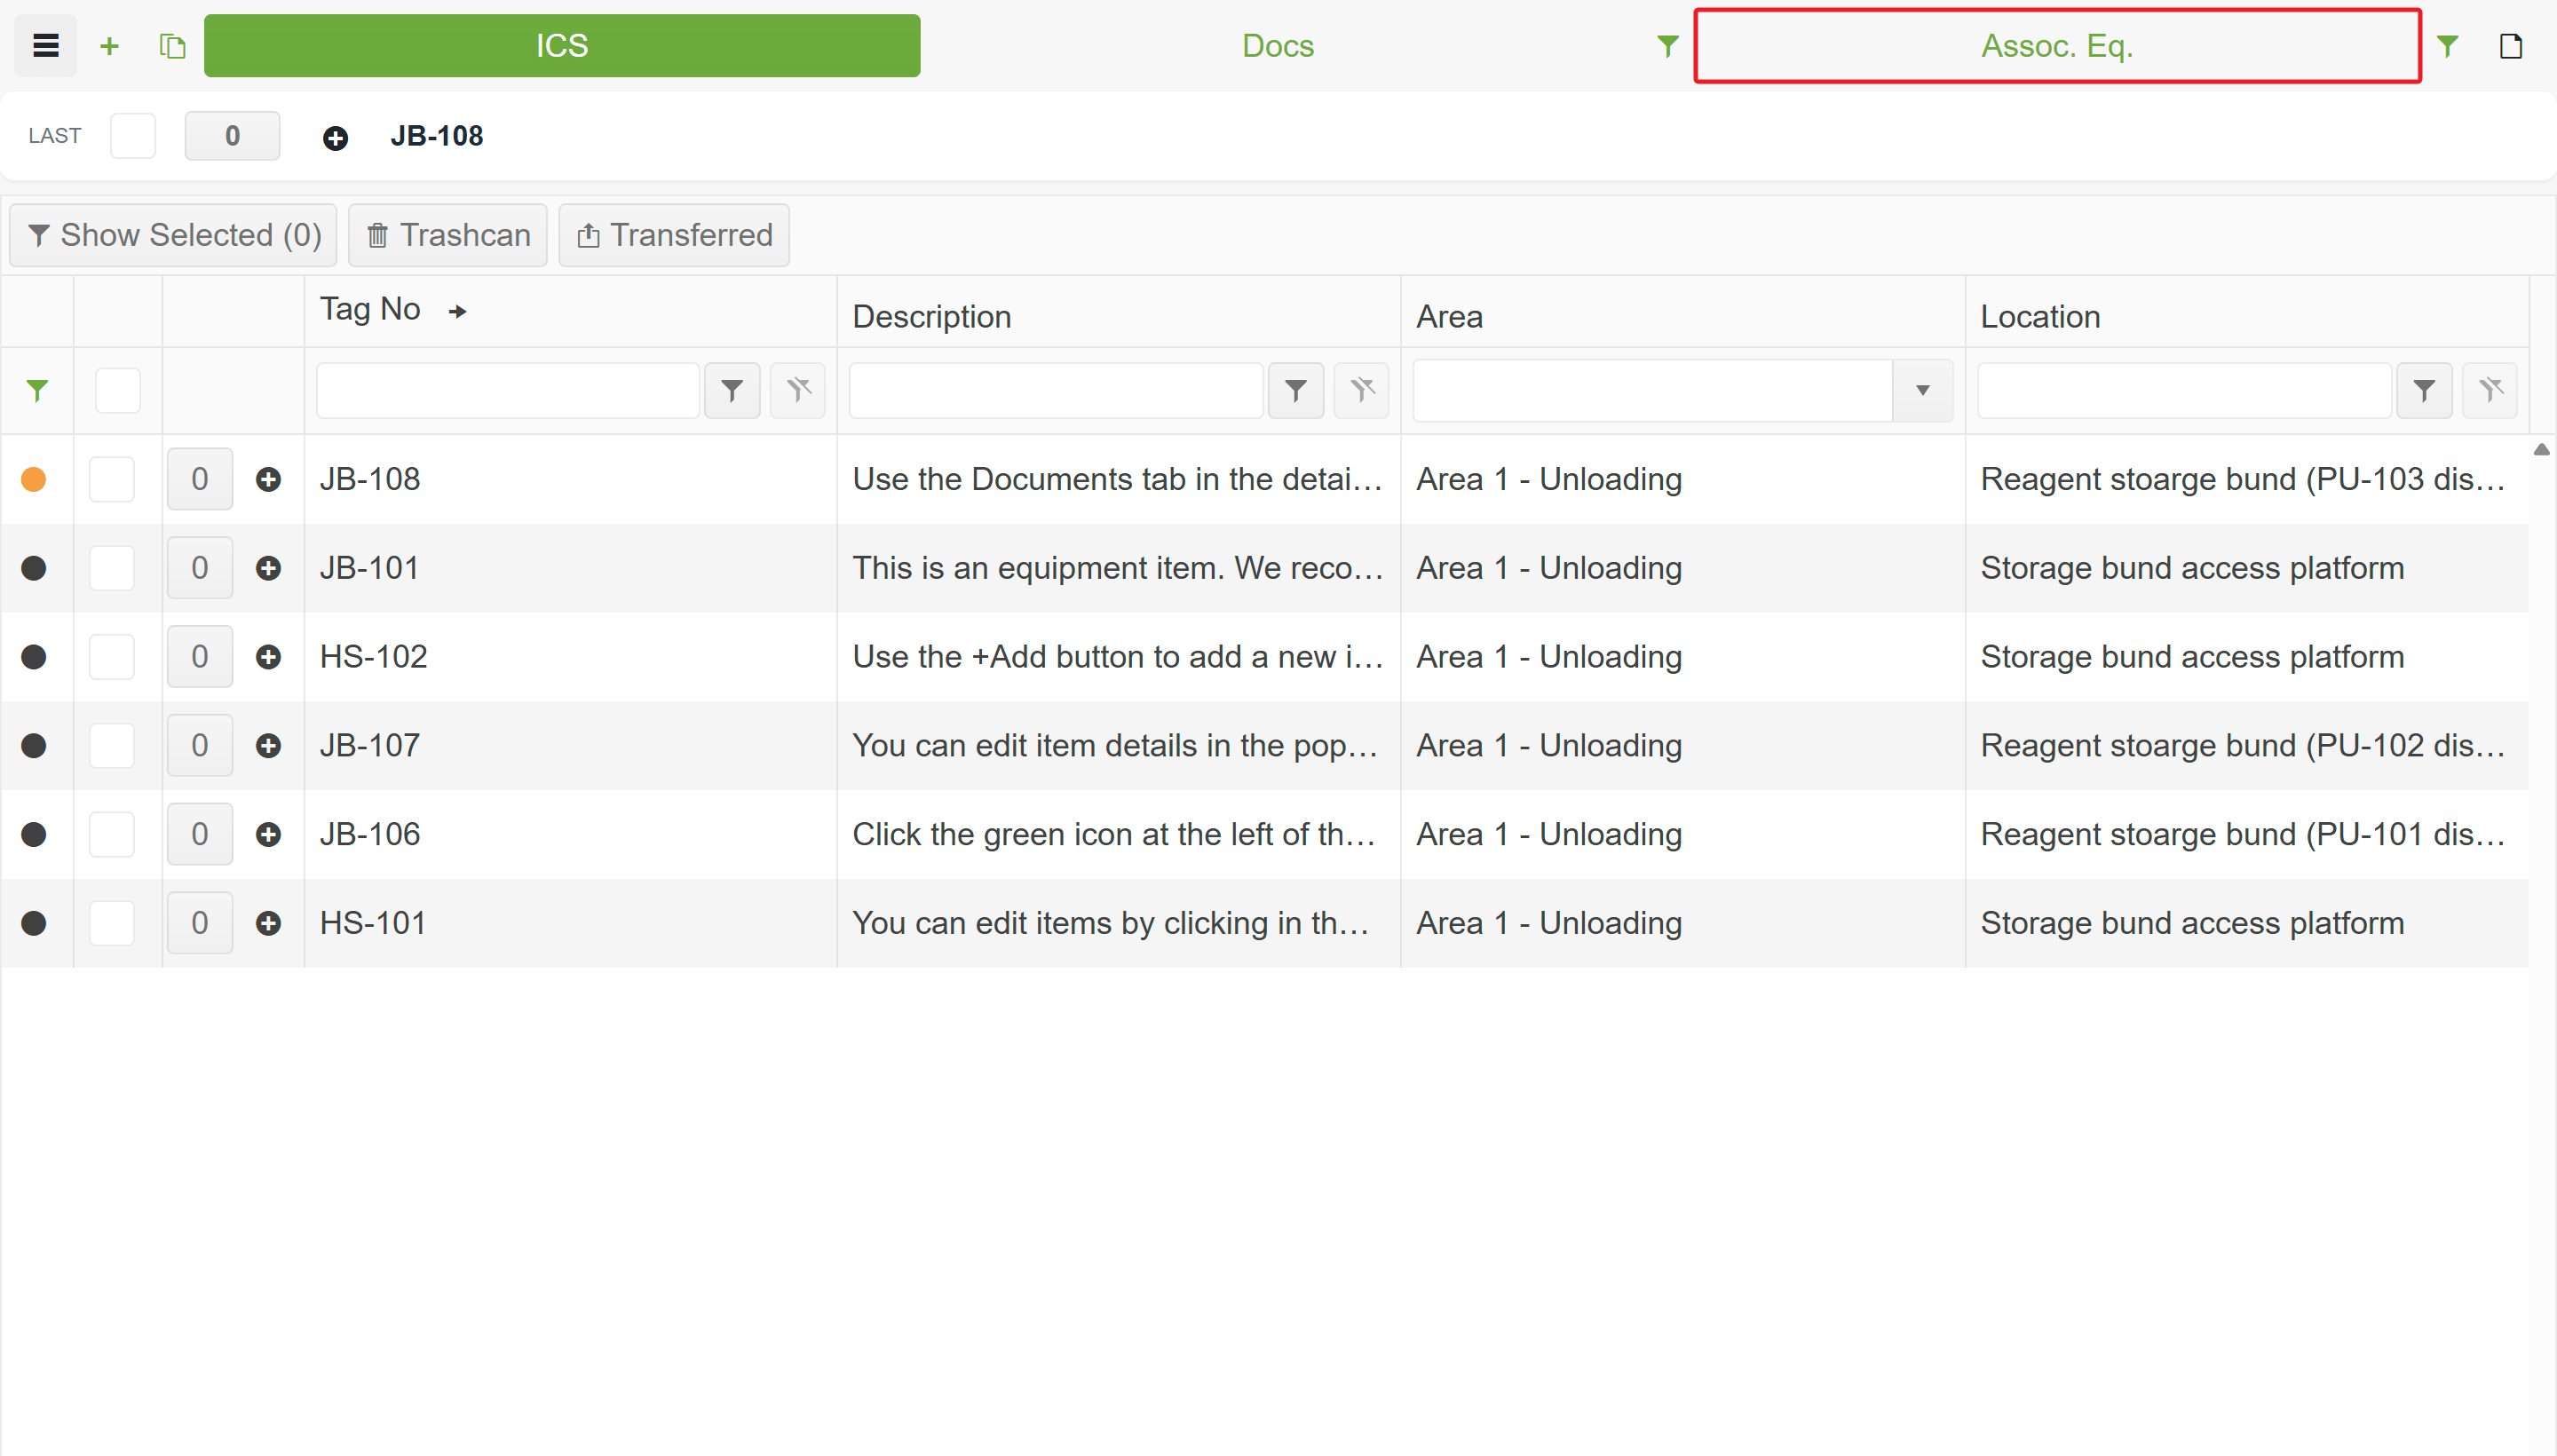
Switch to the Assoc. Eq. tab in the green view tabs bar.
-
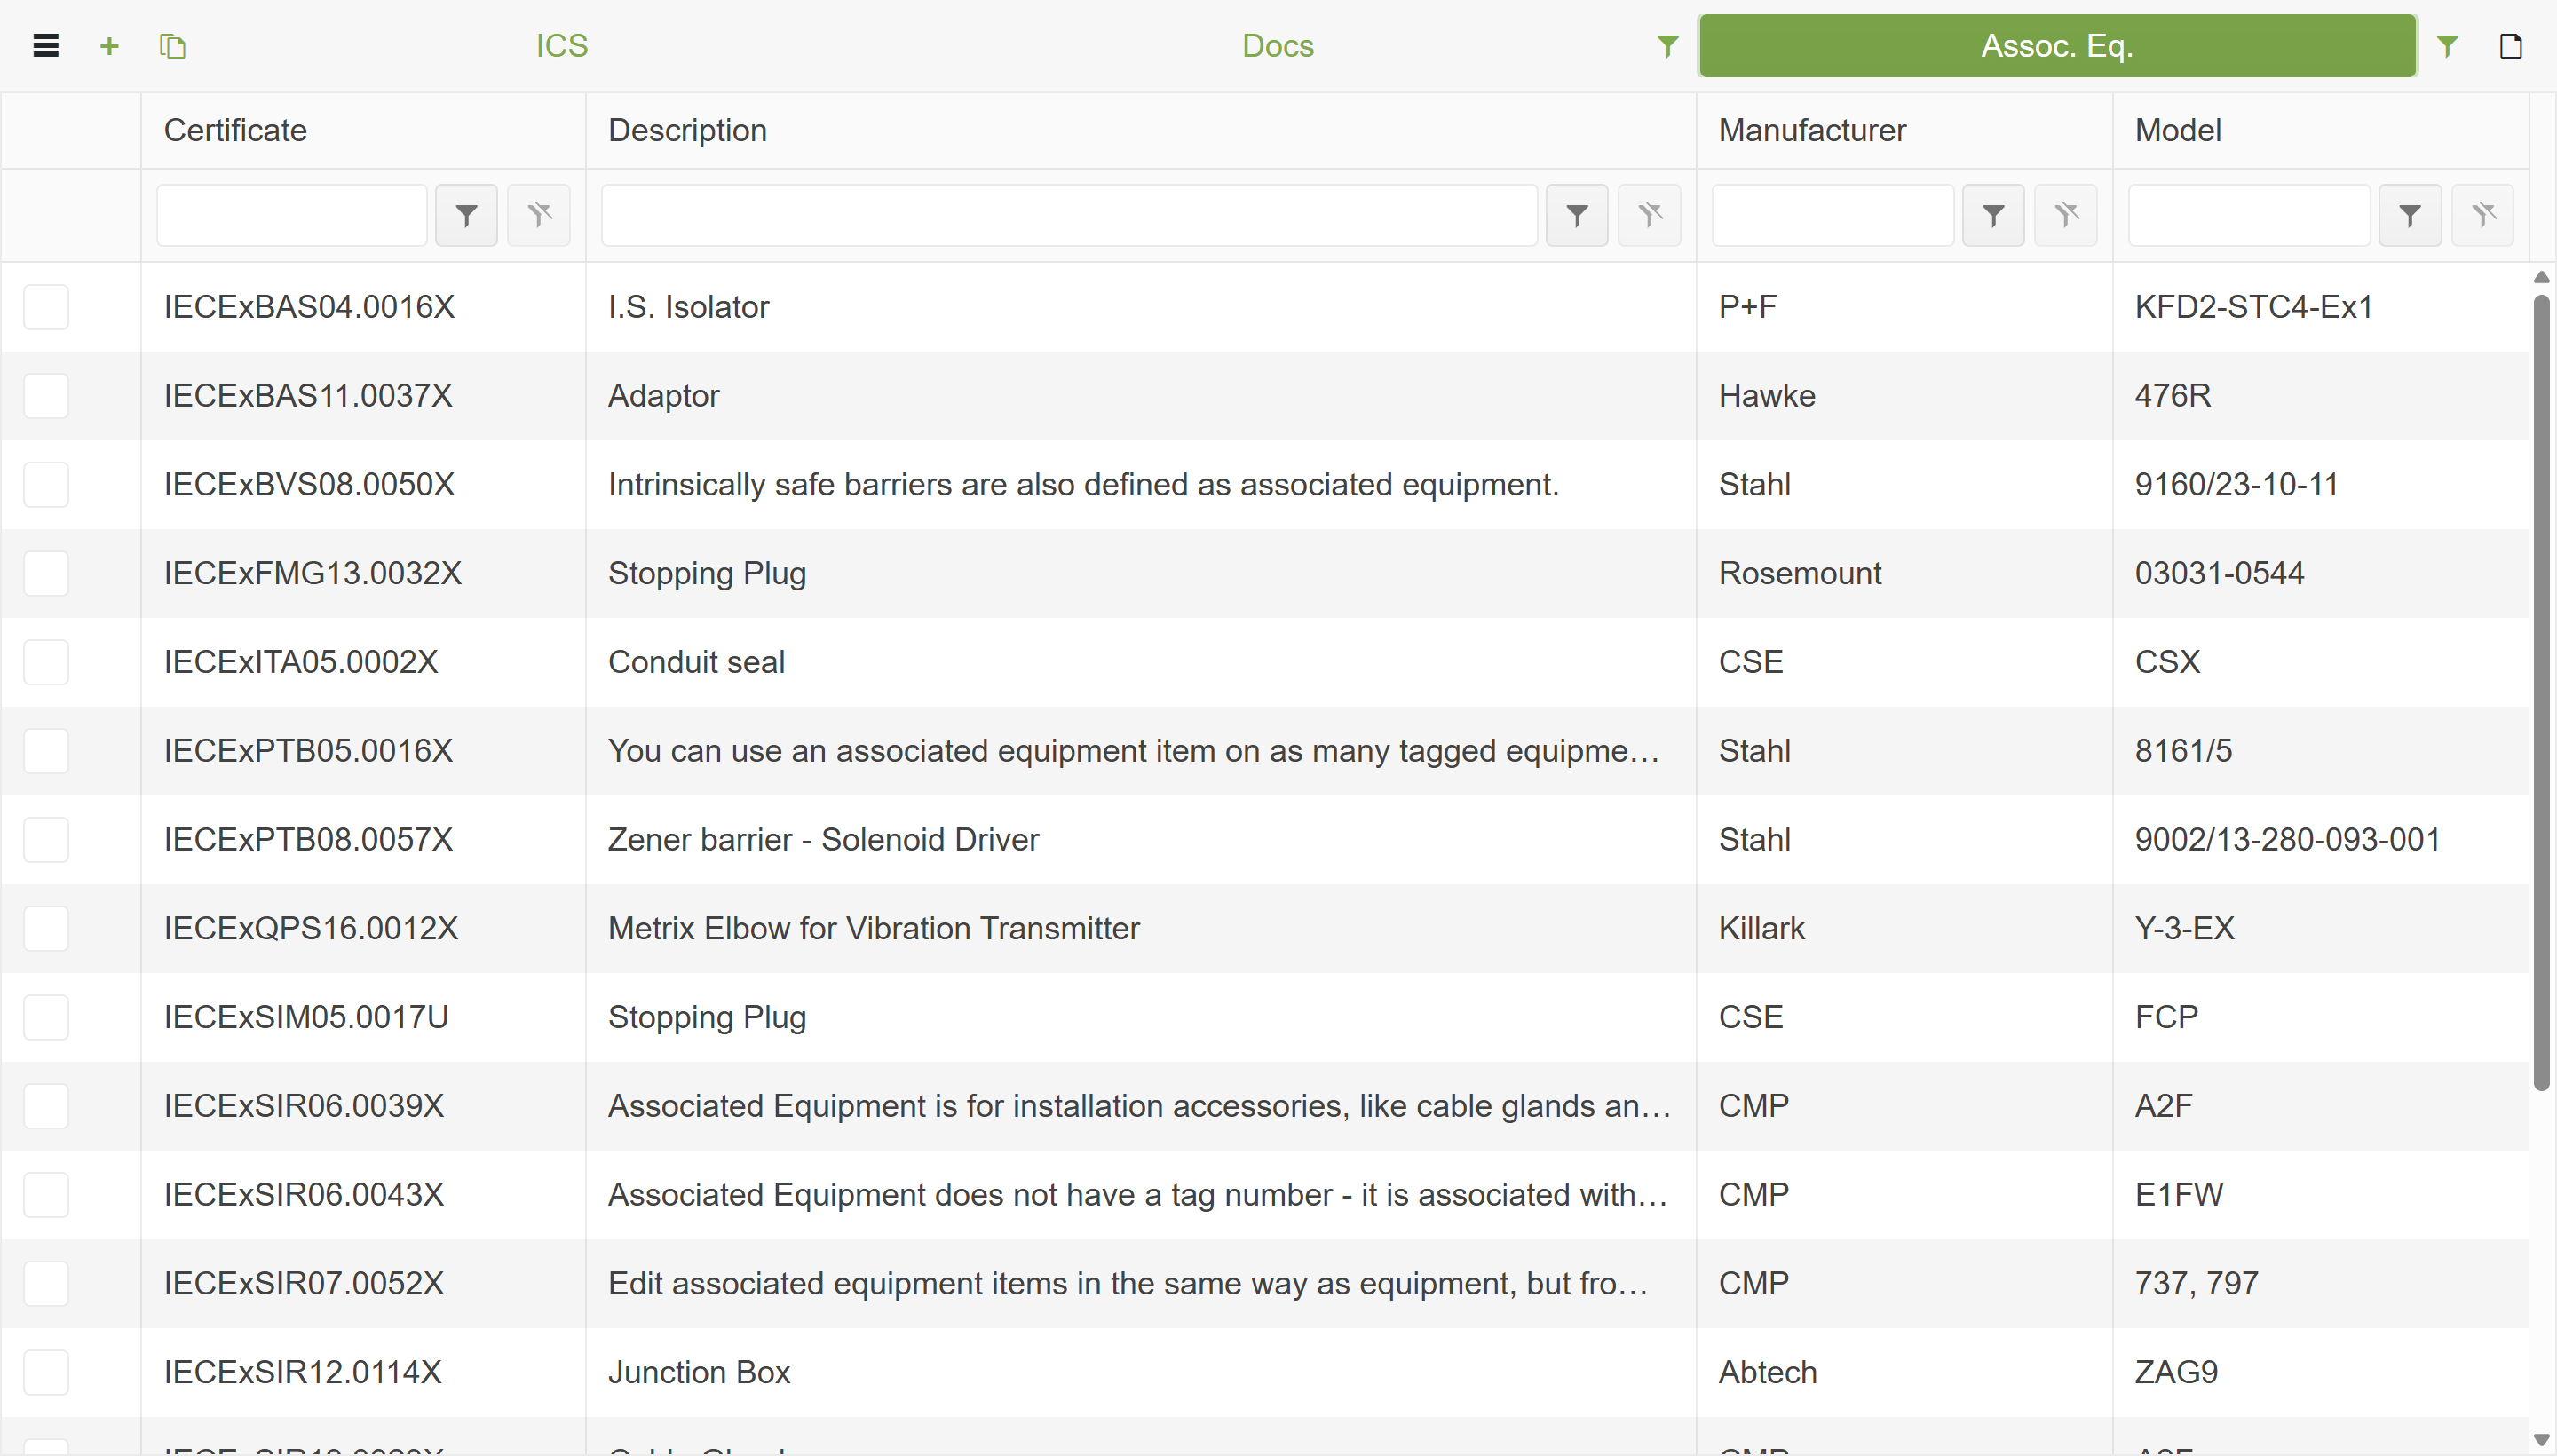
The associated equipment grid displays all associated items in the IWP.
-
To add a new item, click + New in the toolbar.
-
Fill in the required fields and click Save.
For a full description of associated equipment fields, see Associated Equipment.
Signing off
Section titled “Signing off”Once all questions are answered and photos are attached, sign off to lock the check sheet.
-
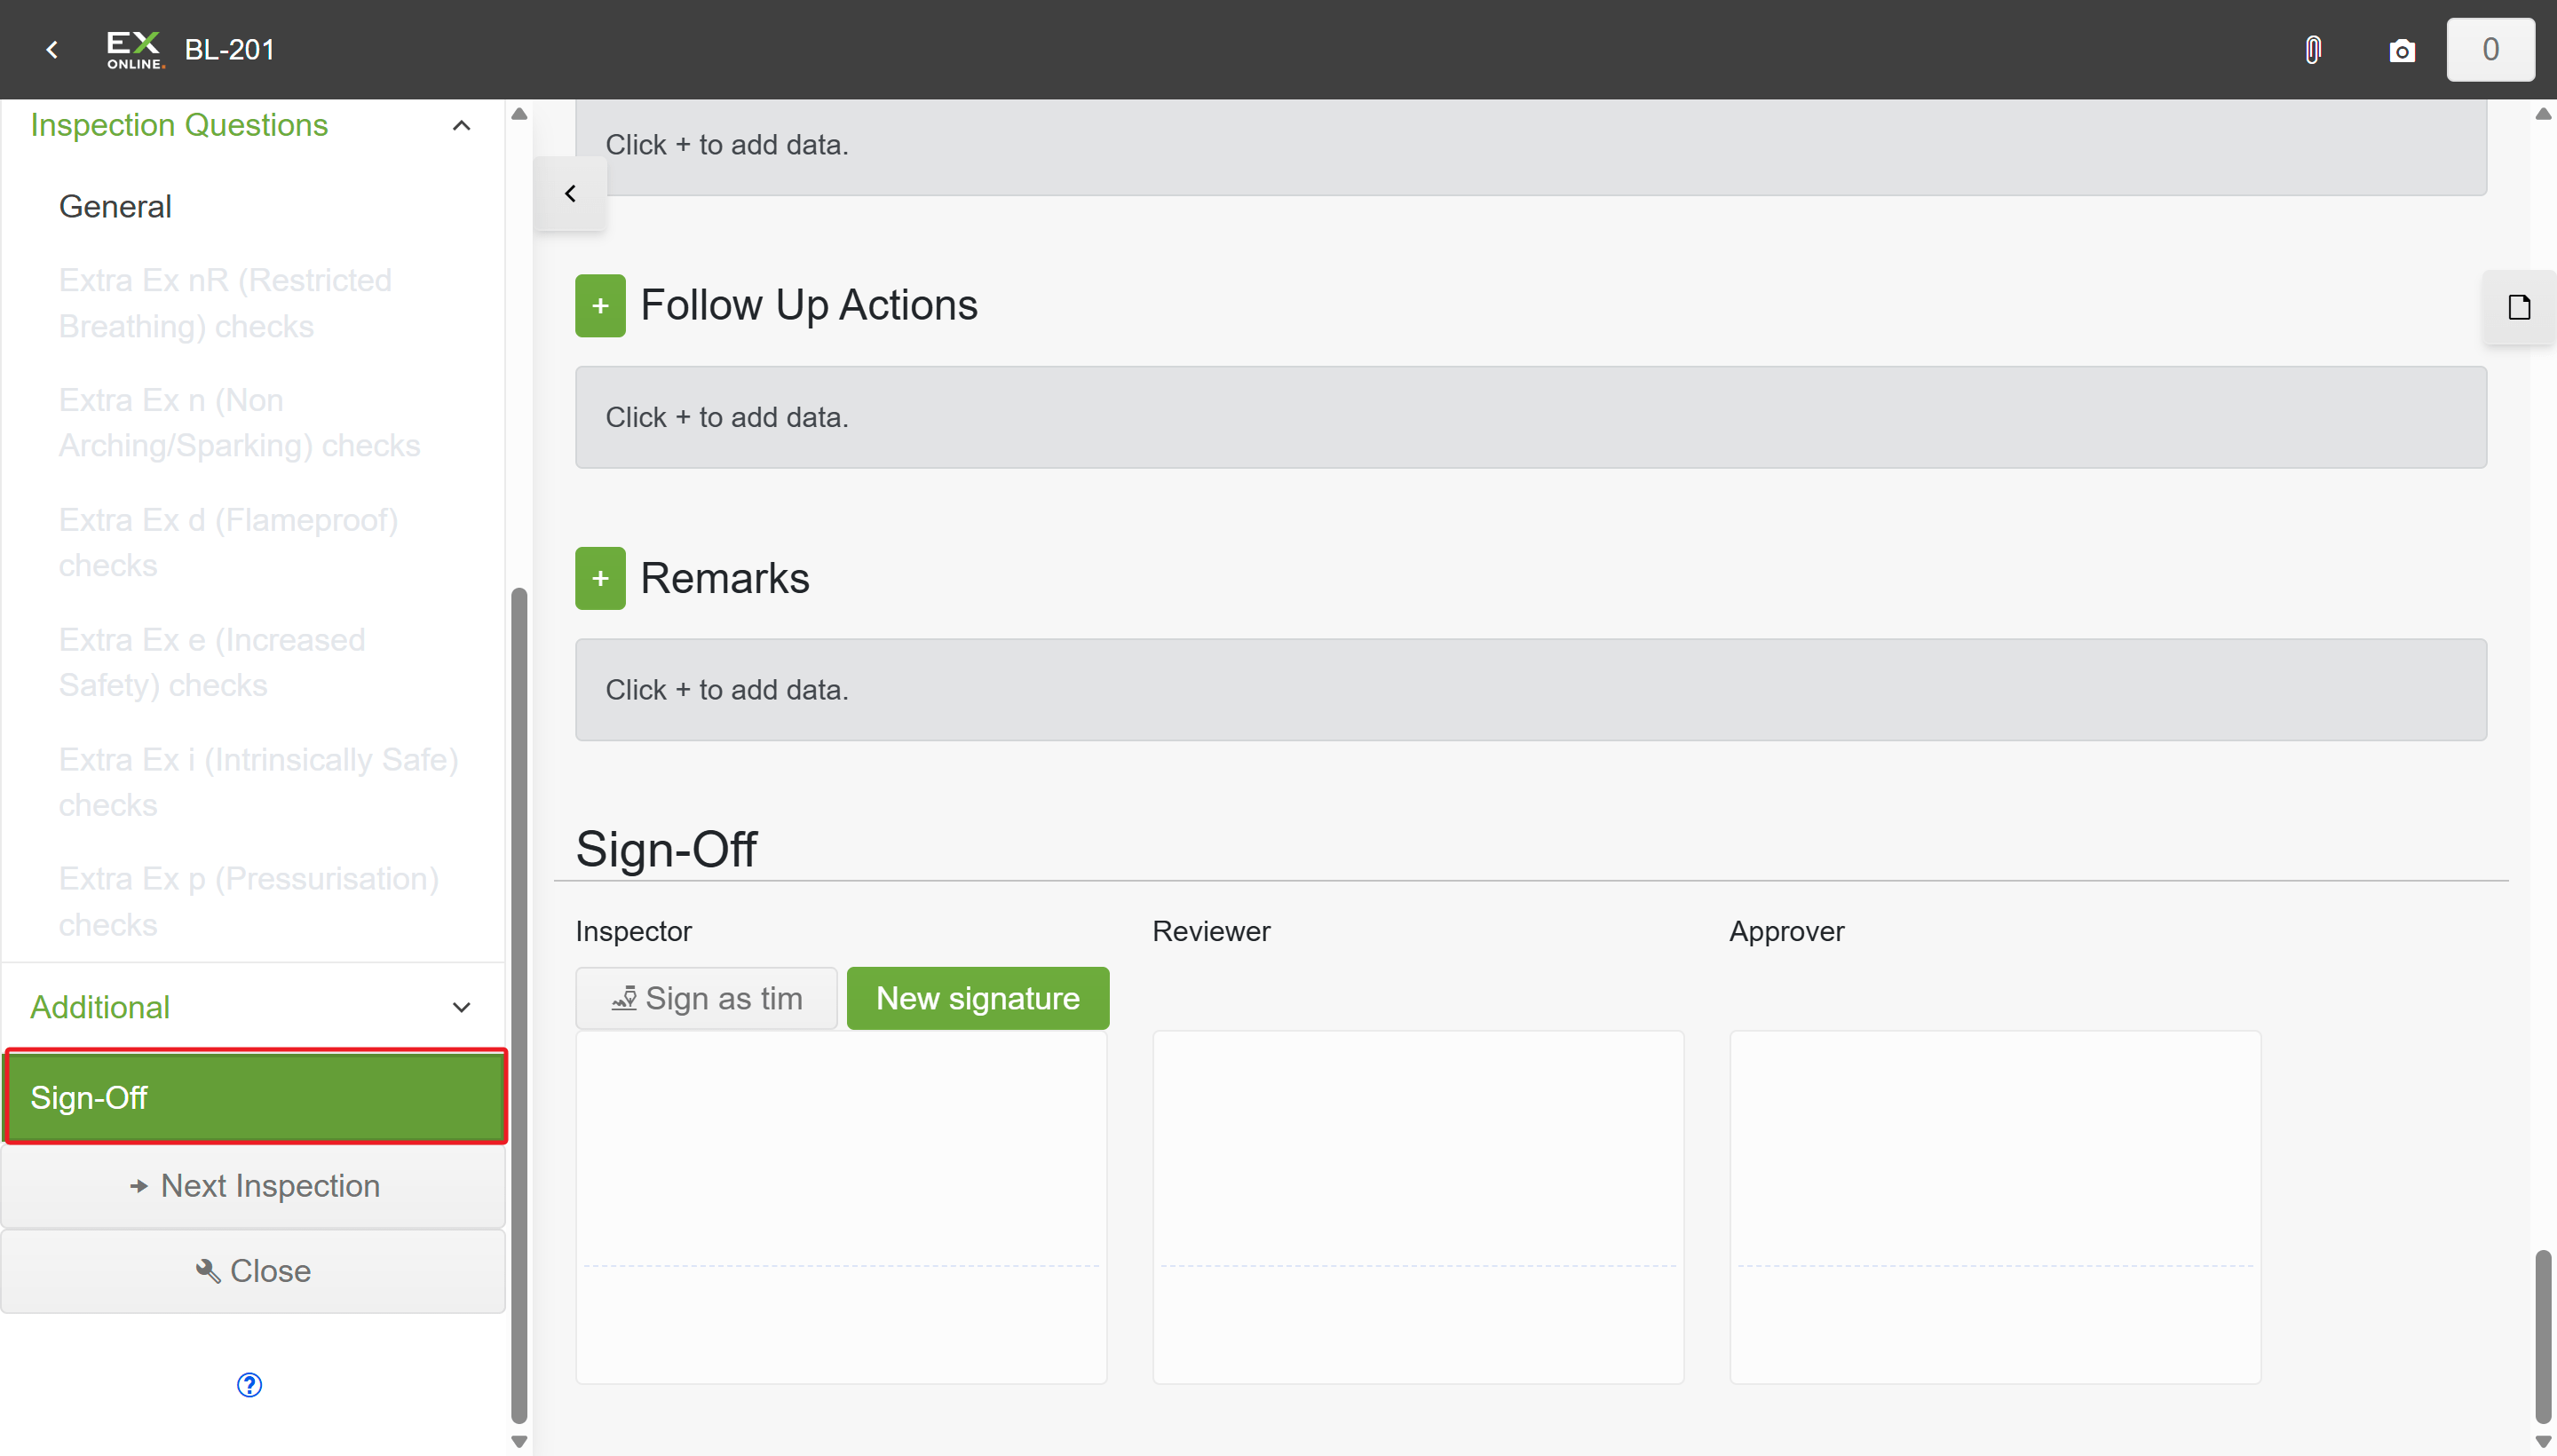
In the sidebar, click Sign-Off.
-
Under the Inspector column, click Sign as [your name] to finalise the inspection — or click New signature first if you haven’t set up a signature yet.
Once signed, an orange banner confirms the check sheet is locked. Your name, time, and signature appear under Inspector. The item’s status in the Equipment Browser changes to green (Completed).
If a Reviewer or Approver is required, see Reviewing and Approving Inspections for the next steps.
Next steps
Section titled “Next steps”After completing and signing off your check sheets, create a transfer file to send results back to Tag Browser. See Uploading Inspection Results for step-by-step instructions.
Related Topics
Section titled “Related Topics”- Inspection App Reference — Full description of every screen and control in the Inspection App
- Merging Work Packs — Combine results from multiple inspectors
- Reviewing and Approving — Hand off for reviewer or approver sign-off