
Inspection App
This page describes the screens and controls in the Ex-Online Inspection App. The app has three main screens: the Main Screen (IWP management), the Equipment Browser (item list), and the Inspection Check Sheet (per-item data and checks).
Main Screen
Section titled “Main Screen”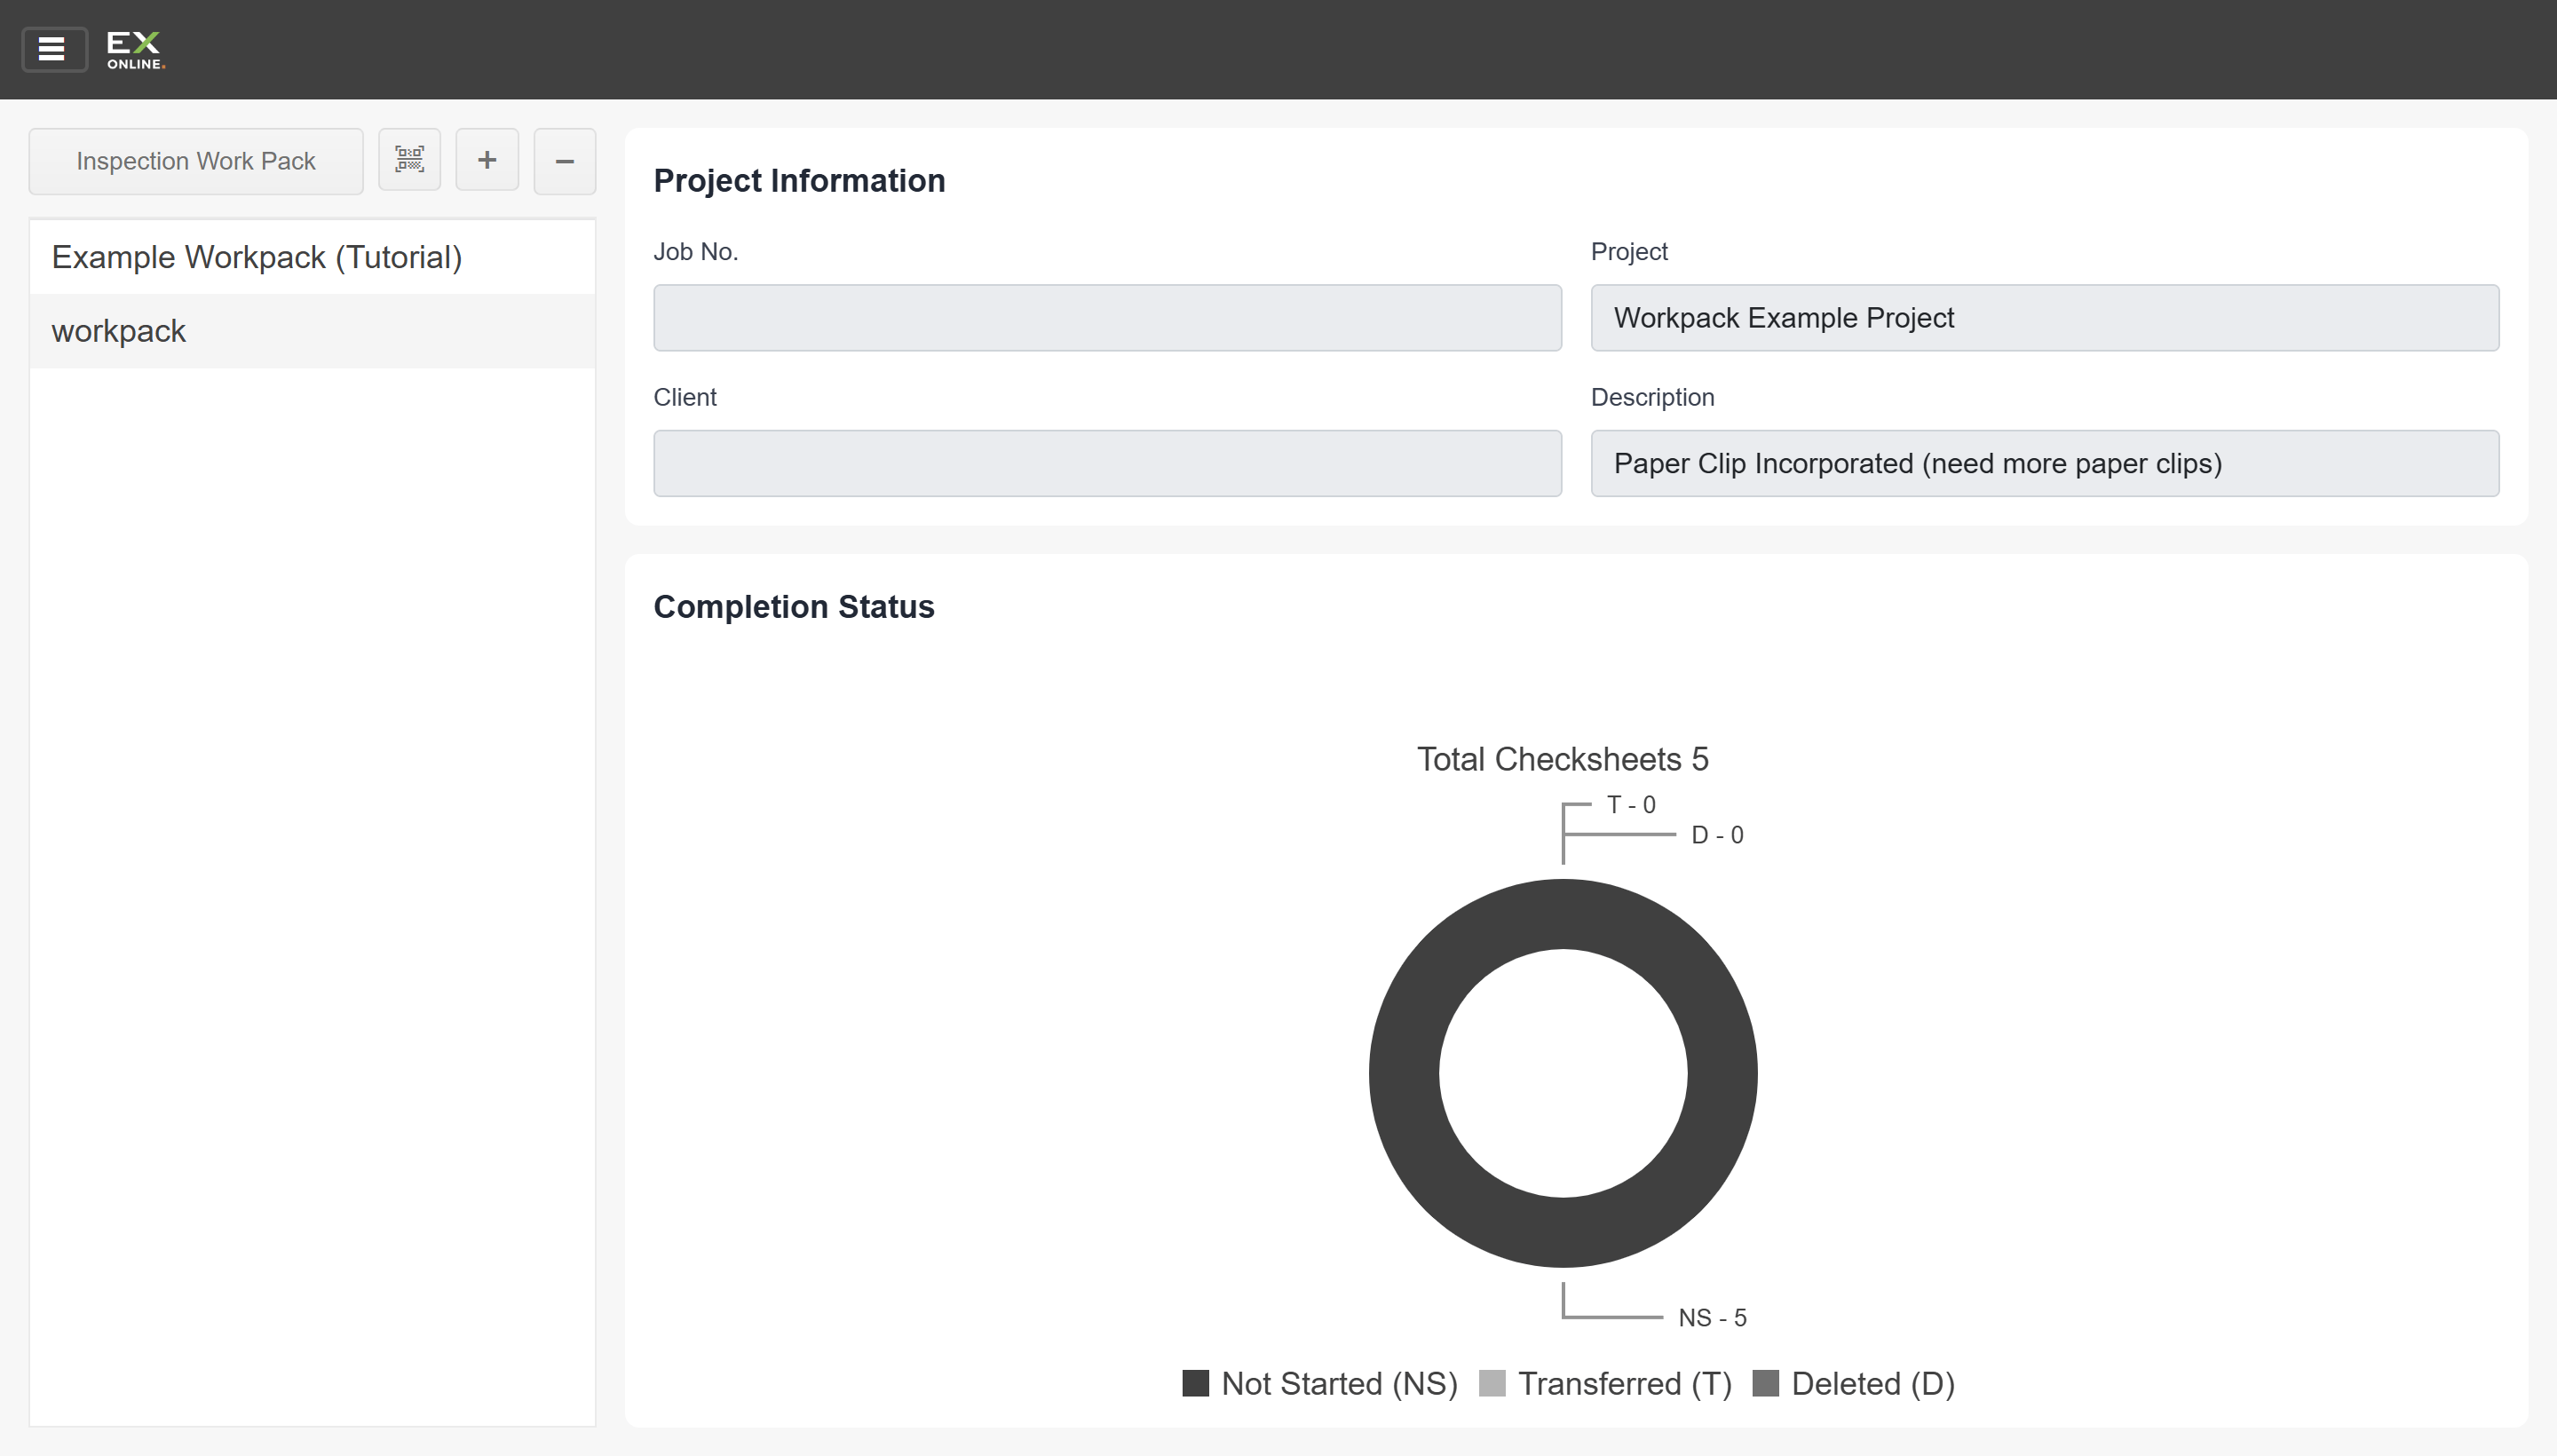
The main screen appears after launching the app. It displays downloaded Inspection Work Packs (IWPs) and has three areas:
| Area | Description |
|---|---|
| Toolbar | Buttons for adding and managing IWPs (see below). |
| IWP List (left) | List of IWPs currently loaded in the app. Double-clicking an IWP opens it in the Equipment Browser. |
| IWP Details (right) | Project Information (job number, project name, client, description) and a Completion Status pie chart for the selected IWP. |
Toolbar
Section titled “Toolbar”| Button | Description |
|---|---|
| QR Scan | Scans a QR code to download an IWP. |
| + | Imports an IWP from a file. |
| − | Deletes the selected IWP. |
Sidebar
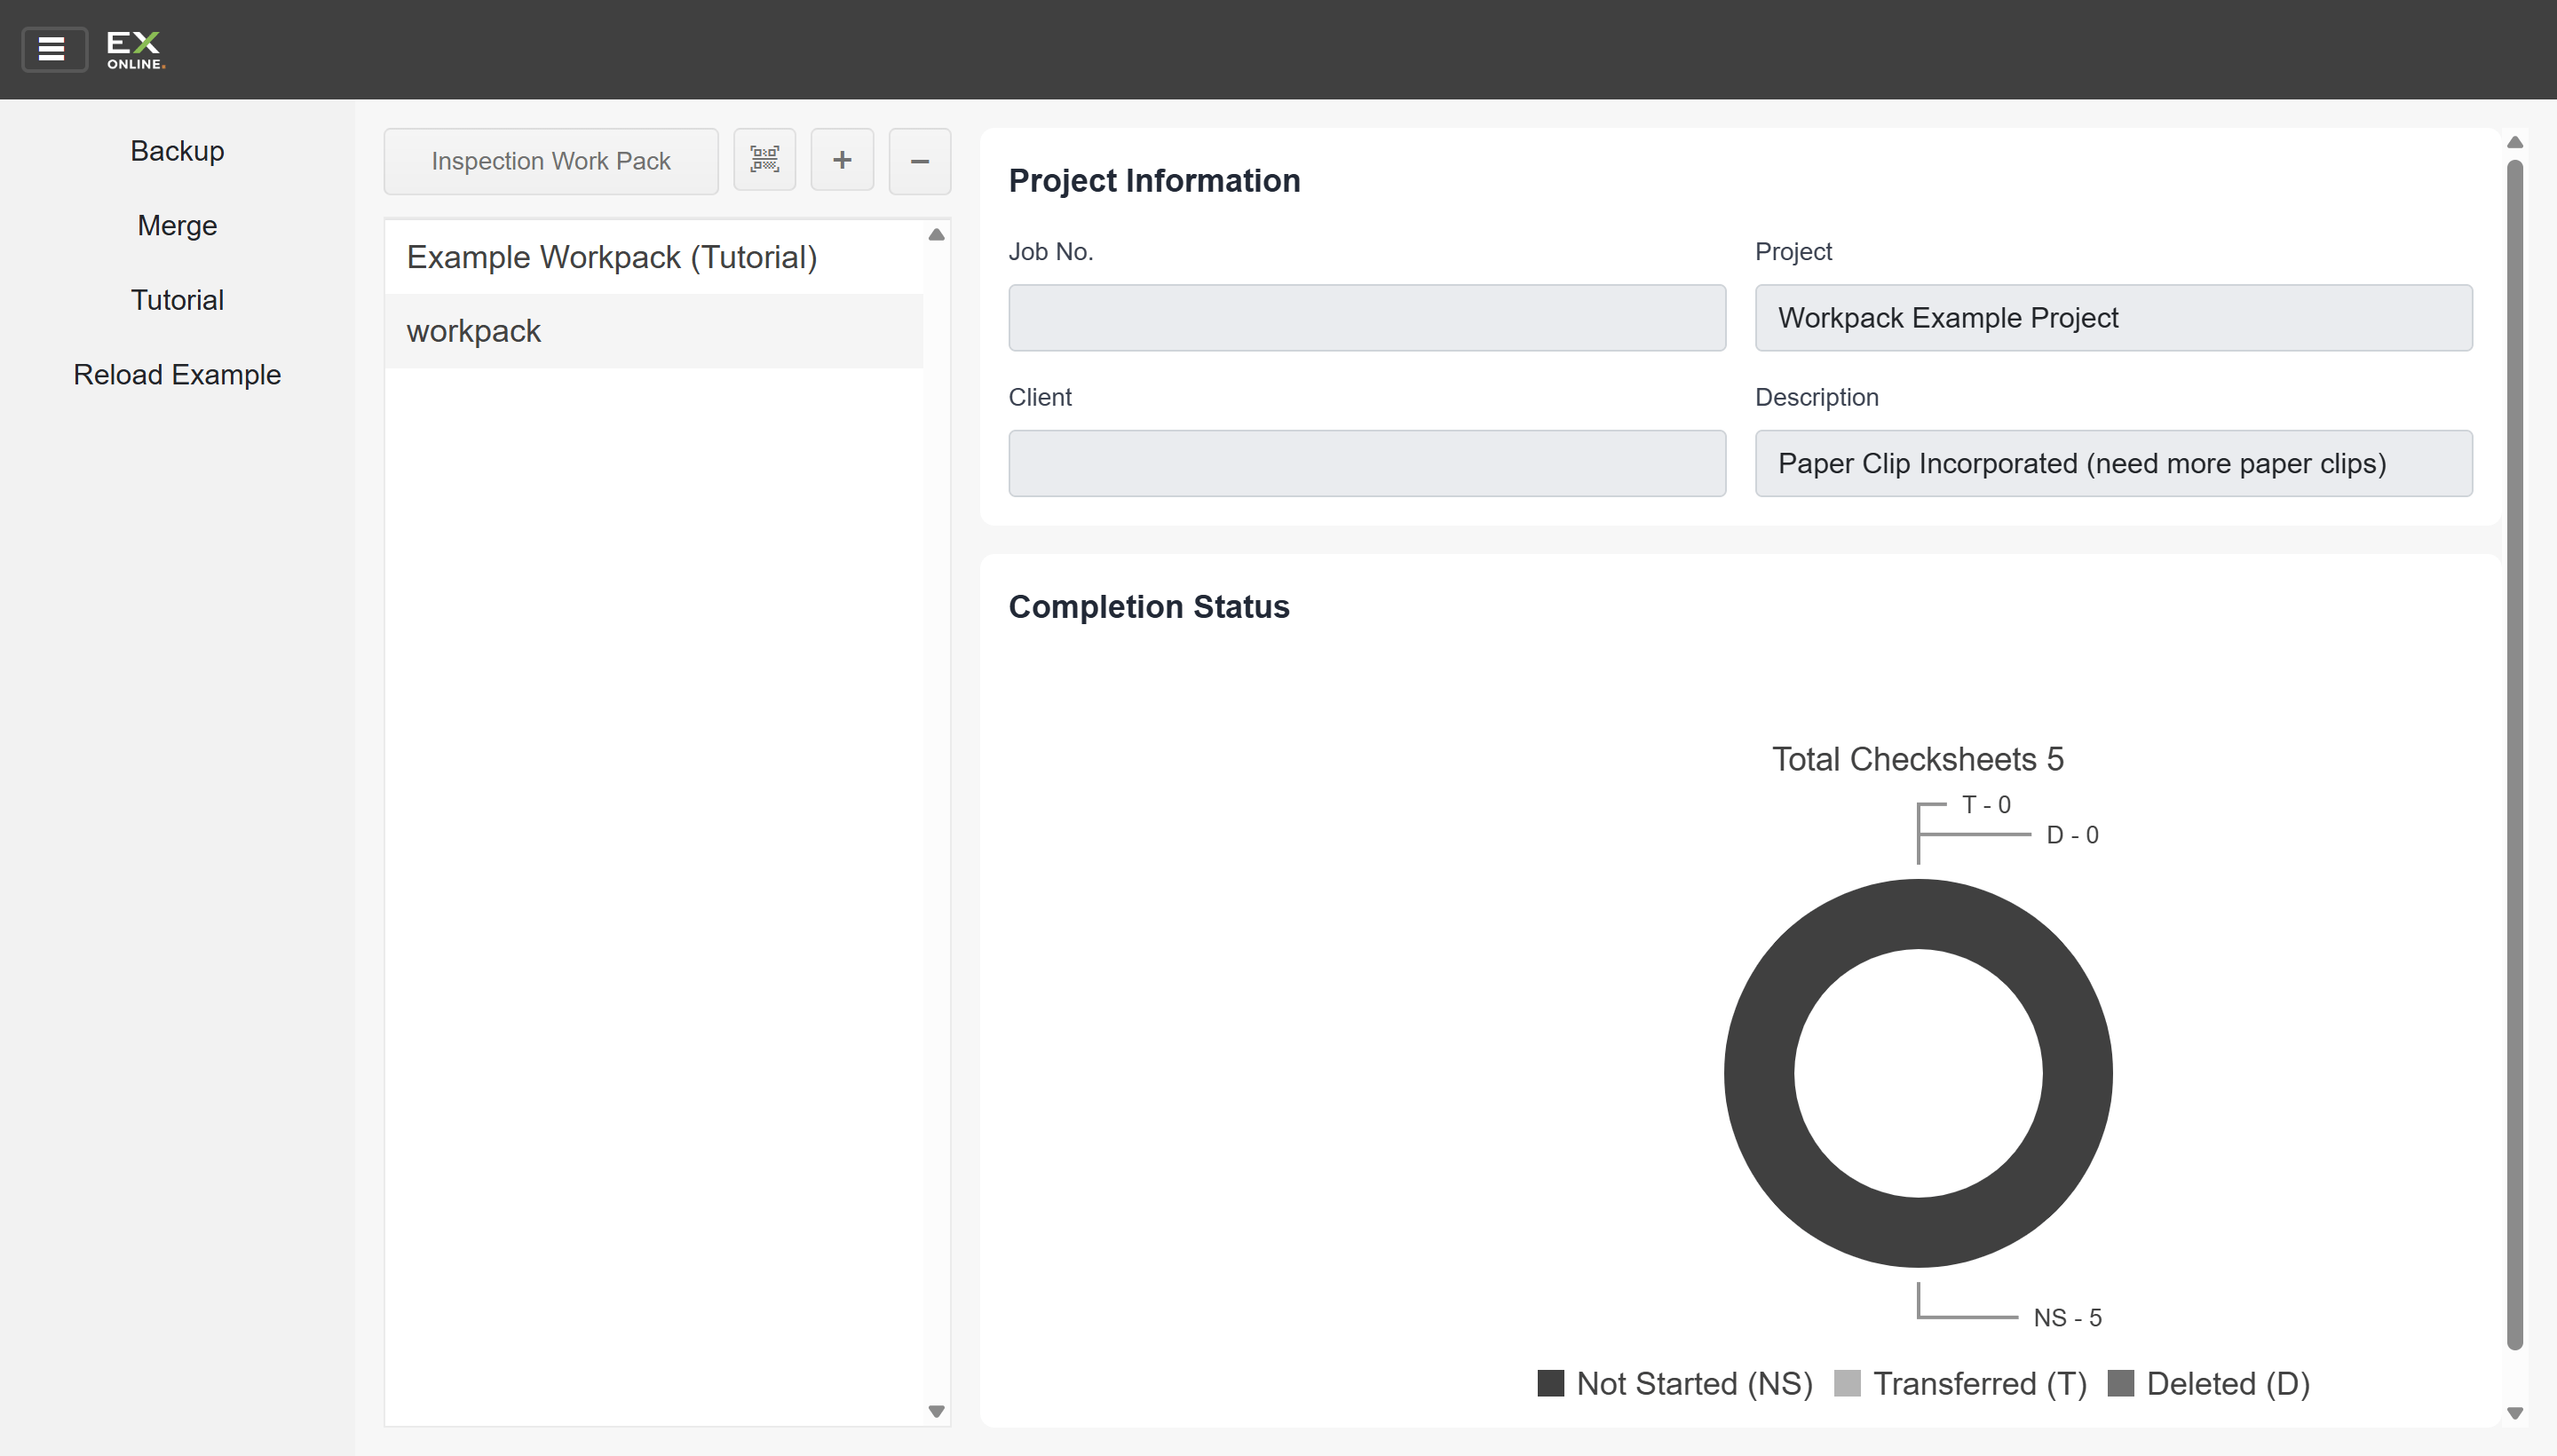
Section titled “Sidebar”The hamburger icon (top left) opens the sidebar menu.
| Option | Description |
|---|---|
| Backup | Backs up the selected IWP to a file. |
| Merge | Merges data from another IWP into the selected one — useful when an updated IWP is issued and existing work needs to be combined. For step-by-step instructions, see Merging Work Packs. |
| Tutorial | Opens the built-in tutorial walkthrough. |
| Reload Example | Resets the example work pack to its original state. |
Equipment Browser
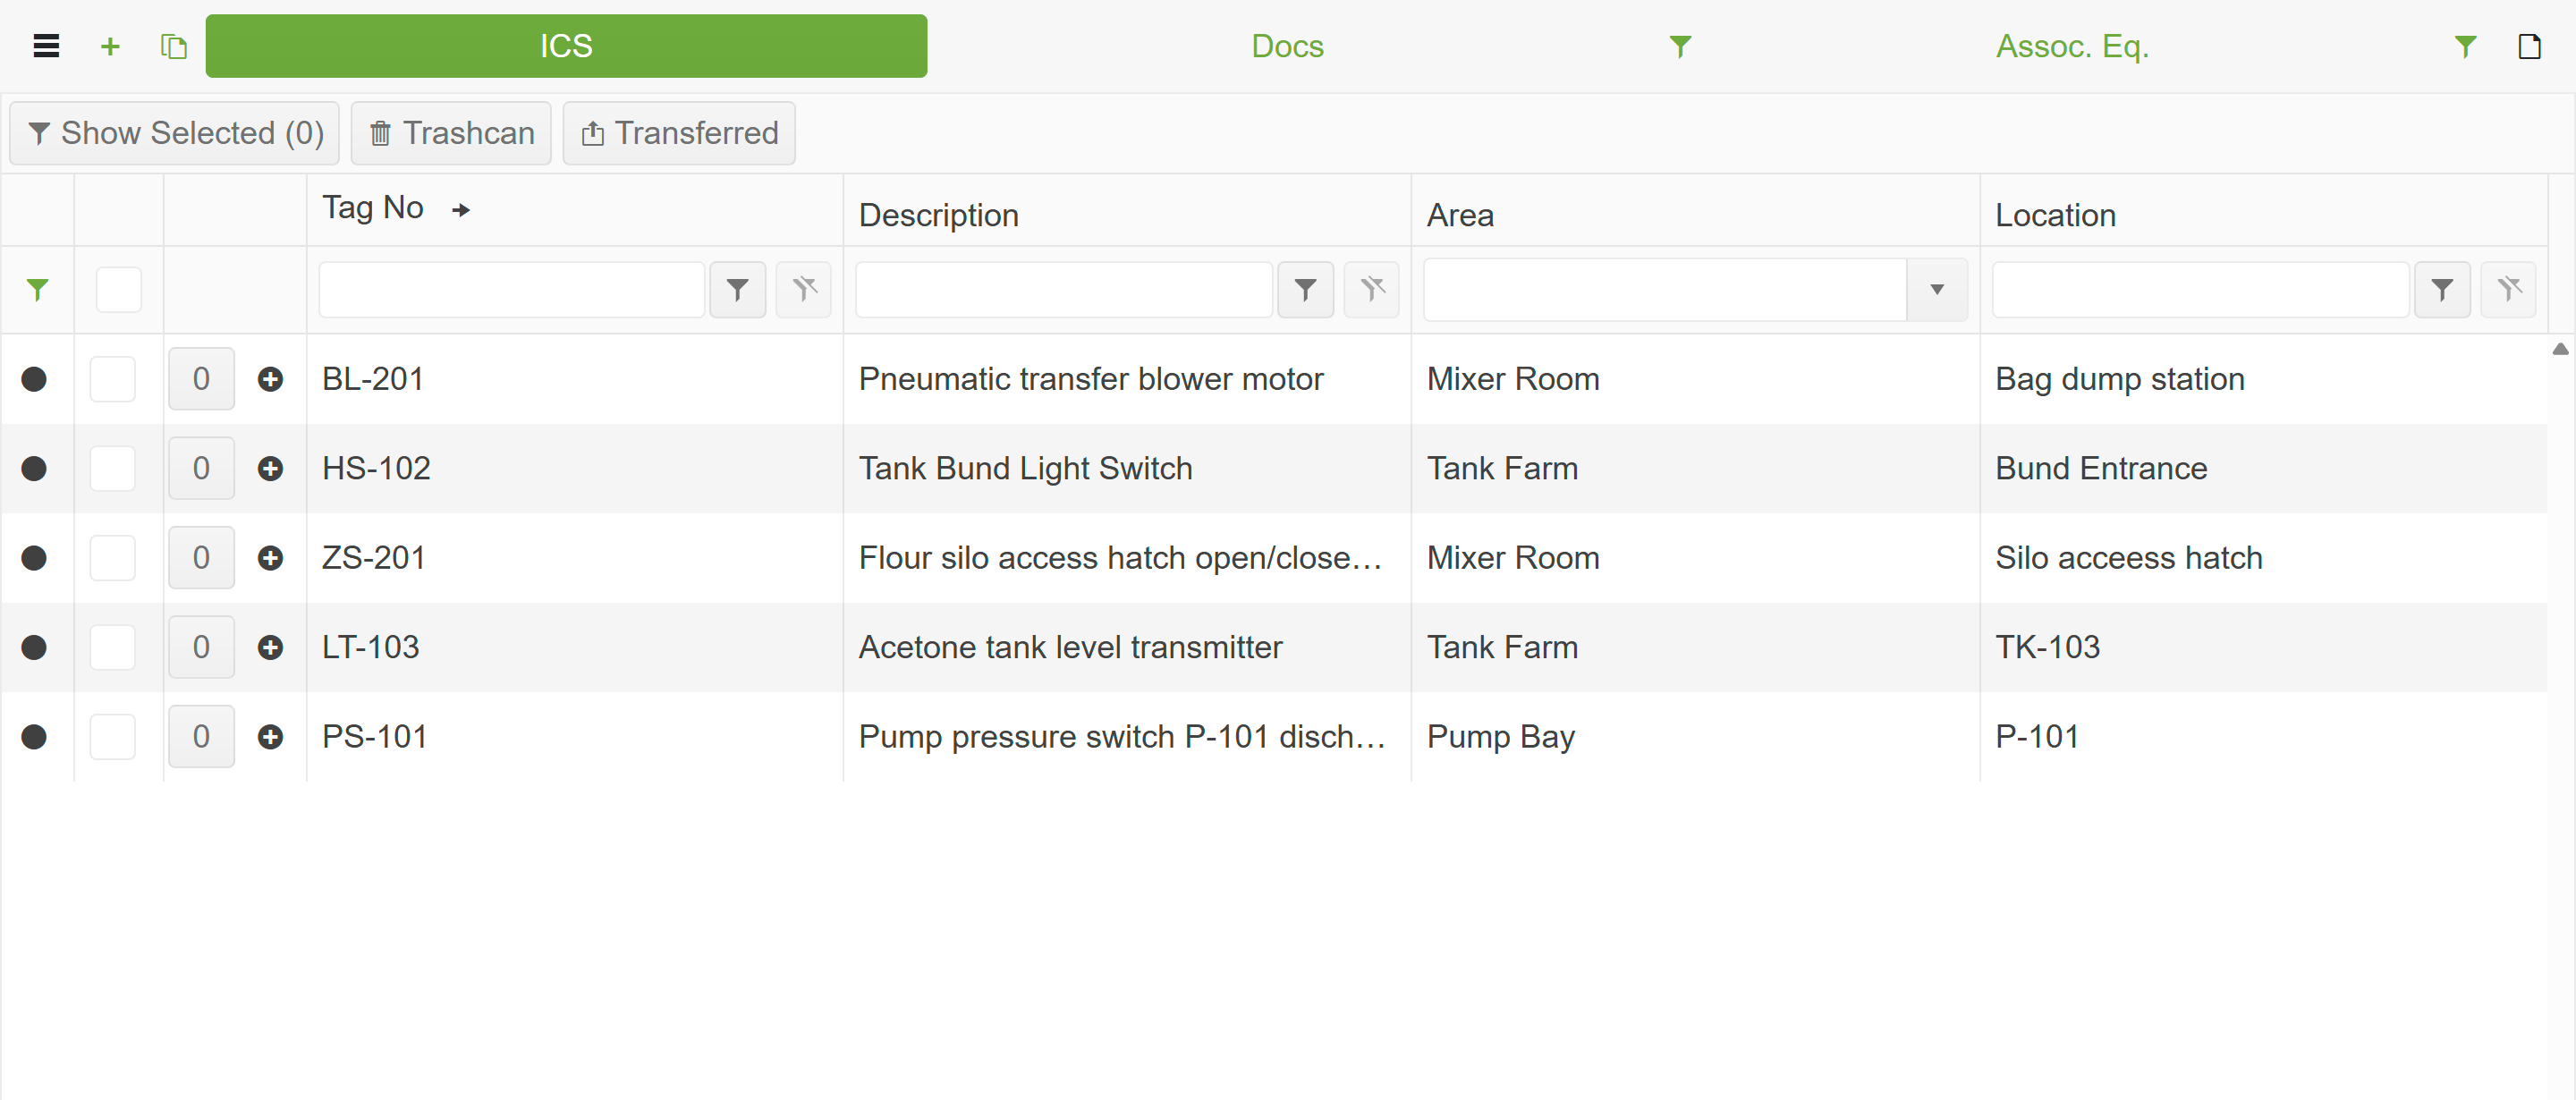
Section titled “Equipment Browser”The Equipment Browser opens to the ICS (Inspection Check Sheet) view by default, listing every equipment item in the work pack. Double-clicking a row opens that item’s Inspection Check Sheet.
Toolbar
Section titled “Toolbar”| Button | Description |
|---|---|
| Sidebar Menu (hamburger icon) | Opens the sidebar. |
| + New | Adds a new equipment item not included in the original work pack. |
| Copy | Duplicates an existing item’s data into a new check sheet. Tag number and other details can be modified after copying. |
Equipment Browser Sidebar
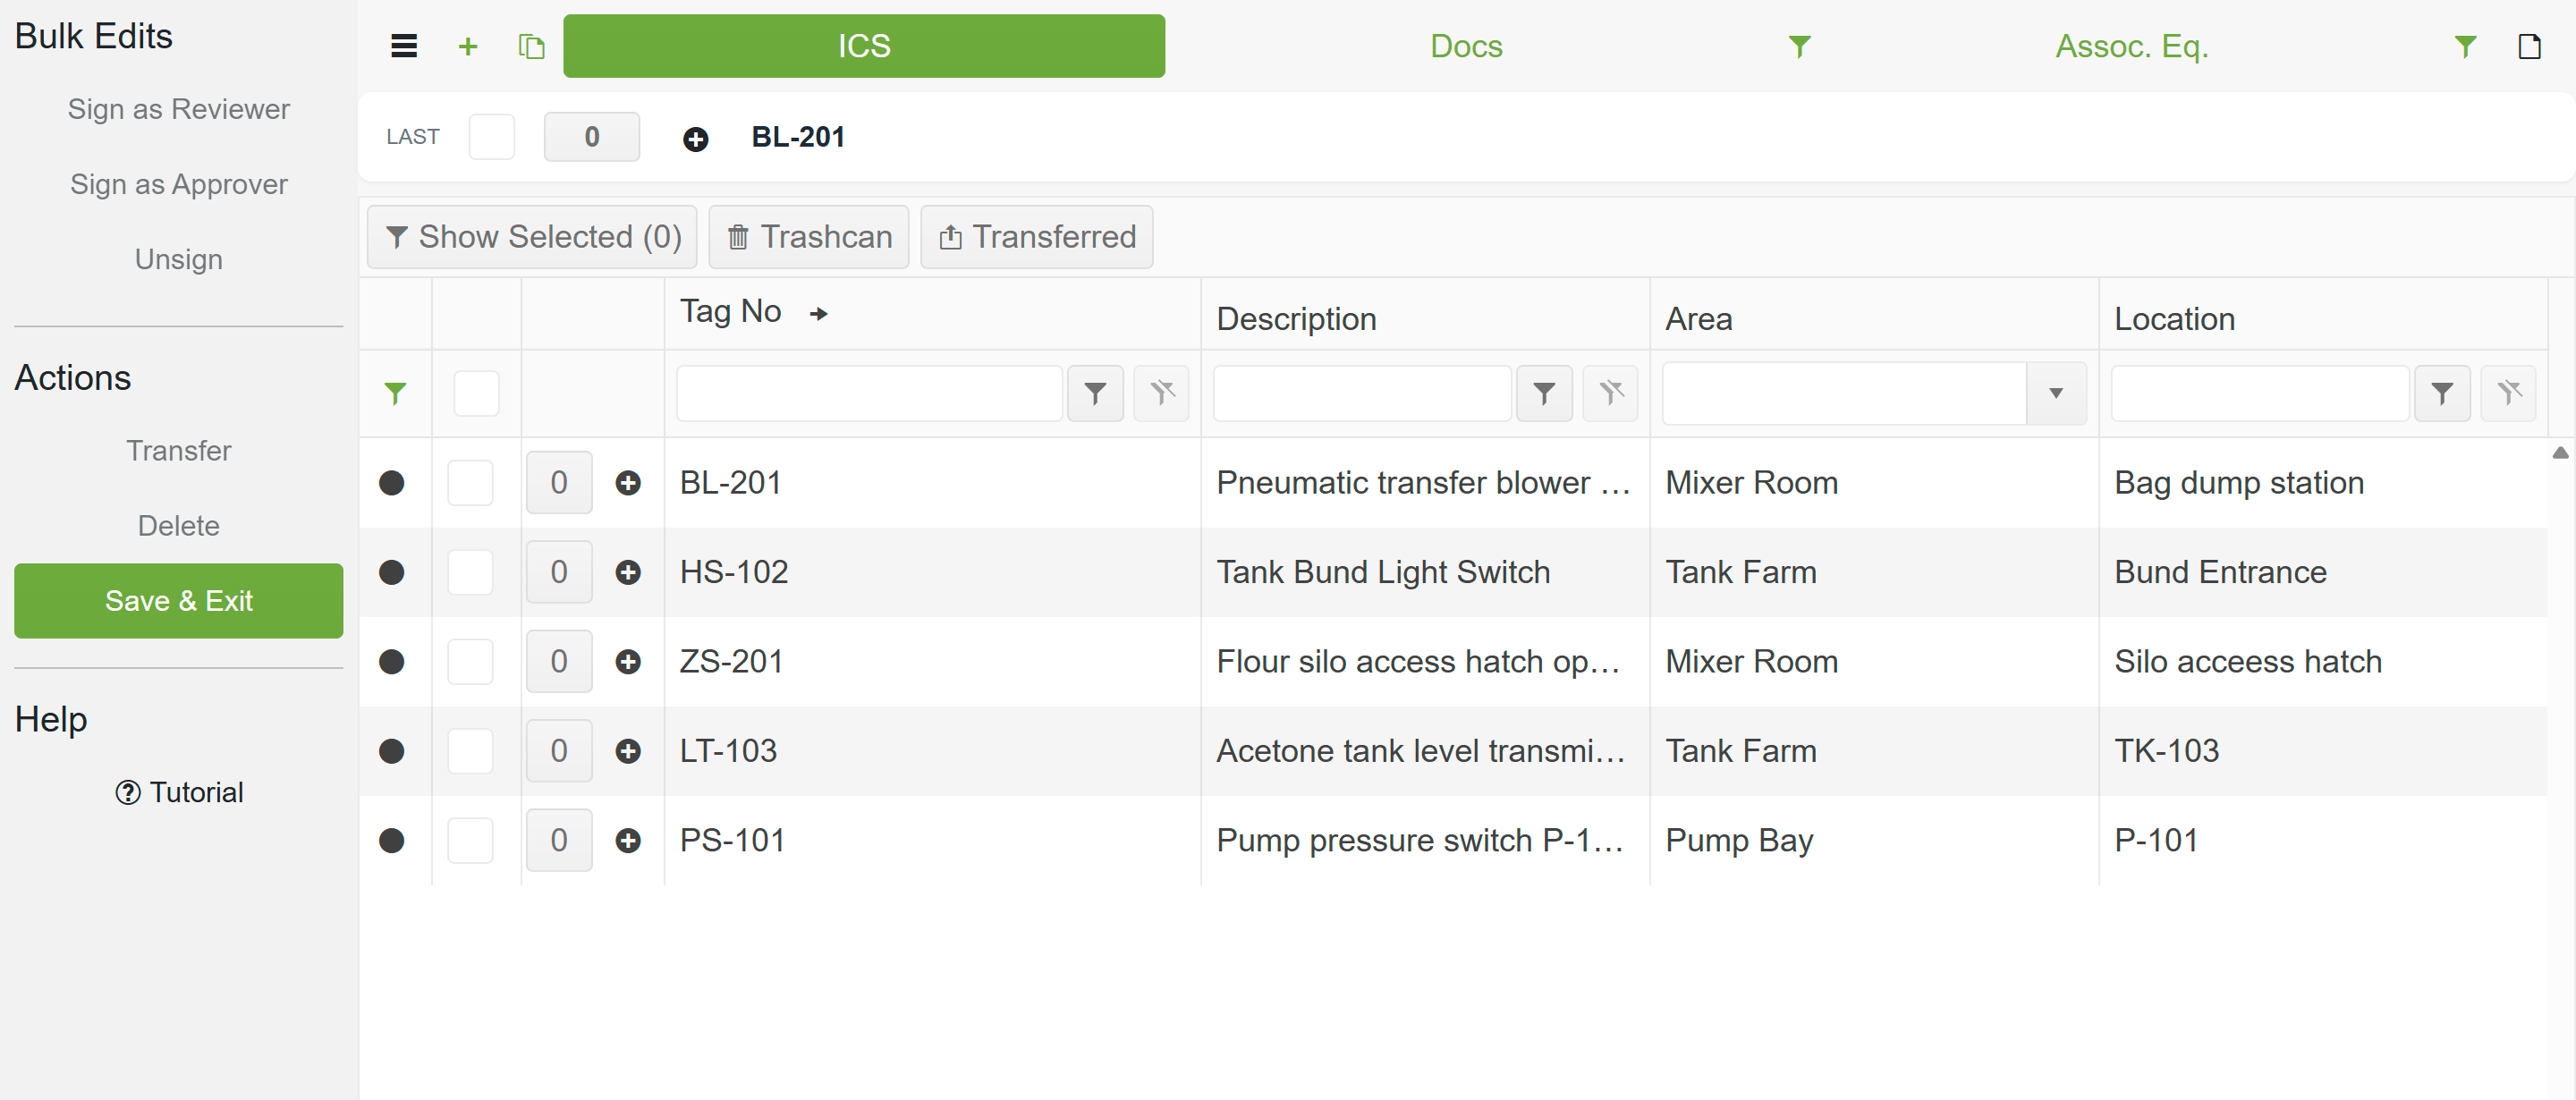
Section titled “Equipment Browser Sidebar”The hamburger icon in the toolbar opens the sidebar.
| Section | Options |
|---|---|
| Bulk Edits | Sign as Reviewer, Sign as Approver, Unsign — applies sign-off actions to all selected items at once. |
| Actions |
|
| Help | Tutorial — opens the built-in tutorial walkthrough. |
Equipment Grid
Section titled “Equipment Grid”Each row represents one equipment item. The columns are sortable and filterable:
| Column | Description |
|---|---|
| Status Dot | Coloured dot showing inspection progress:
|
| Selection Checkbox | Marks items for the Show Selected filter or bulk actions. |
| Photo Count | Number of photos attached. Tapping it opens the Photo Manager. |
| Tag No. | Unique equipment tag number. Clicking the header sorts the column. |
| Description | Item description. |
| Area | Location area. |
| Location | Specific location details. |
The filter row below the column headers narrows results by any column.
Filter Bar
Section titled “Filter Bar”Three toggle buttons sit above the grid:
| Filter | Description |
|---|---|
| Show Selected | Displays only items with a ticked checkbox. The number in parentheses shows the count. |
| Trashcan | Shows items that have been deleted from the work pack. |
| Transferred | Shows items that have already been transferred. |
The Filter Manager icon (green funnel, top right) provides additional column-level filtering.
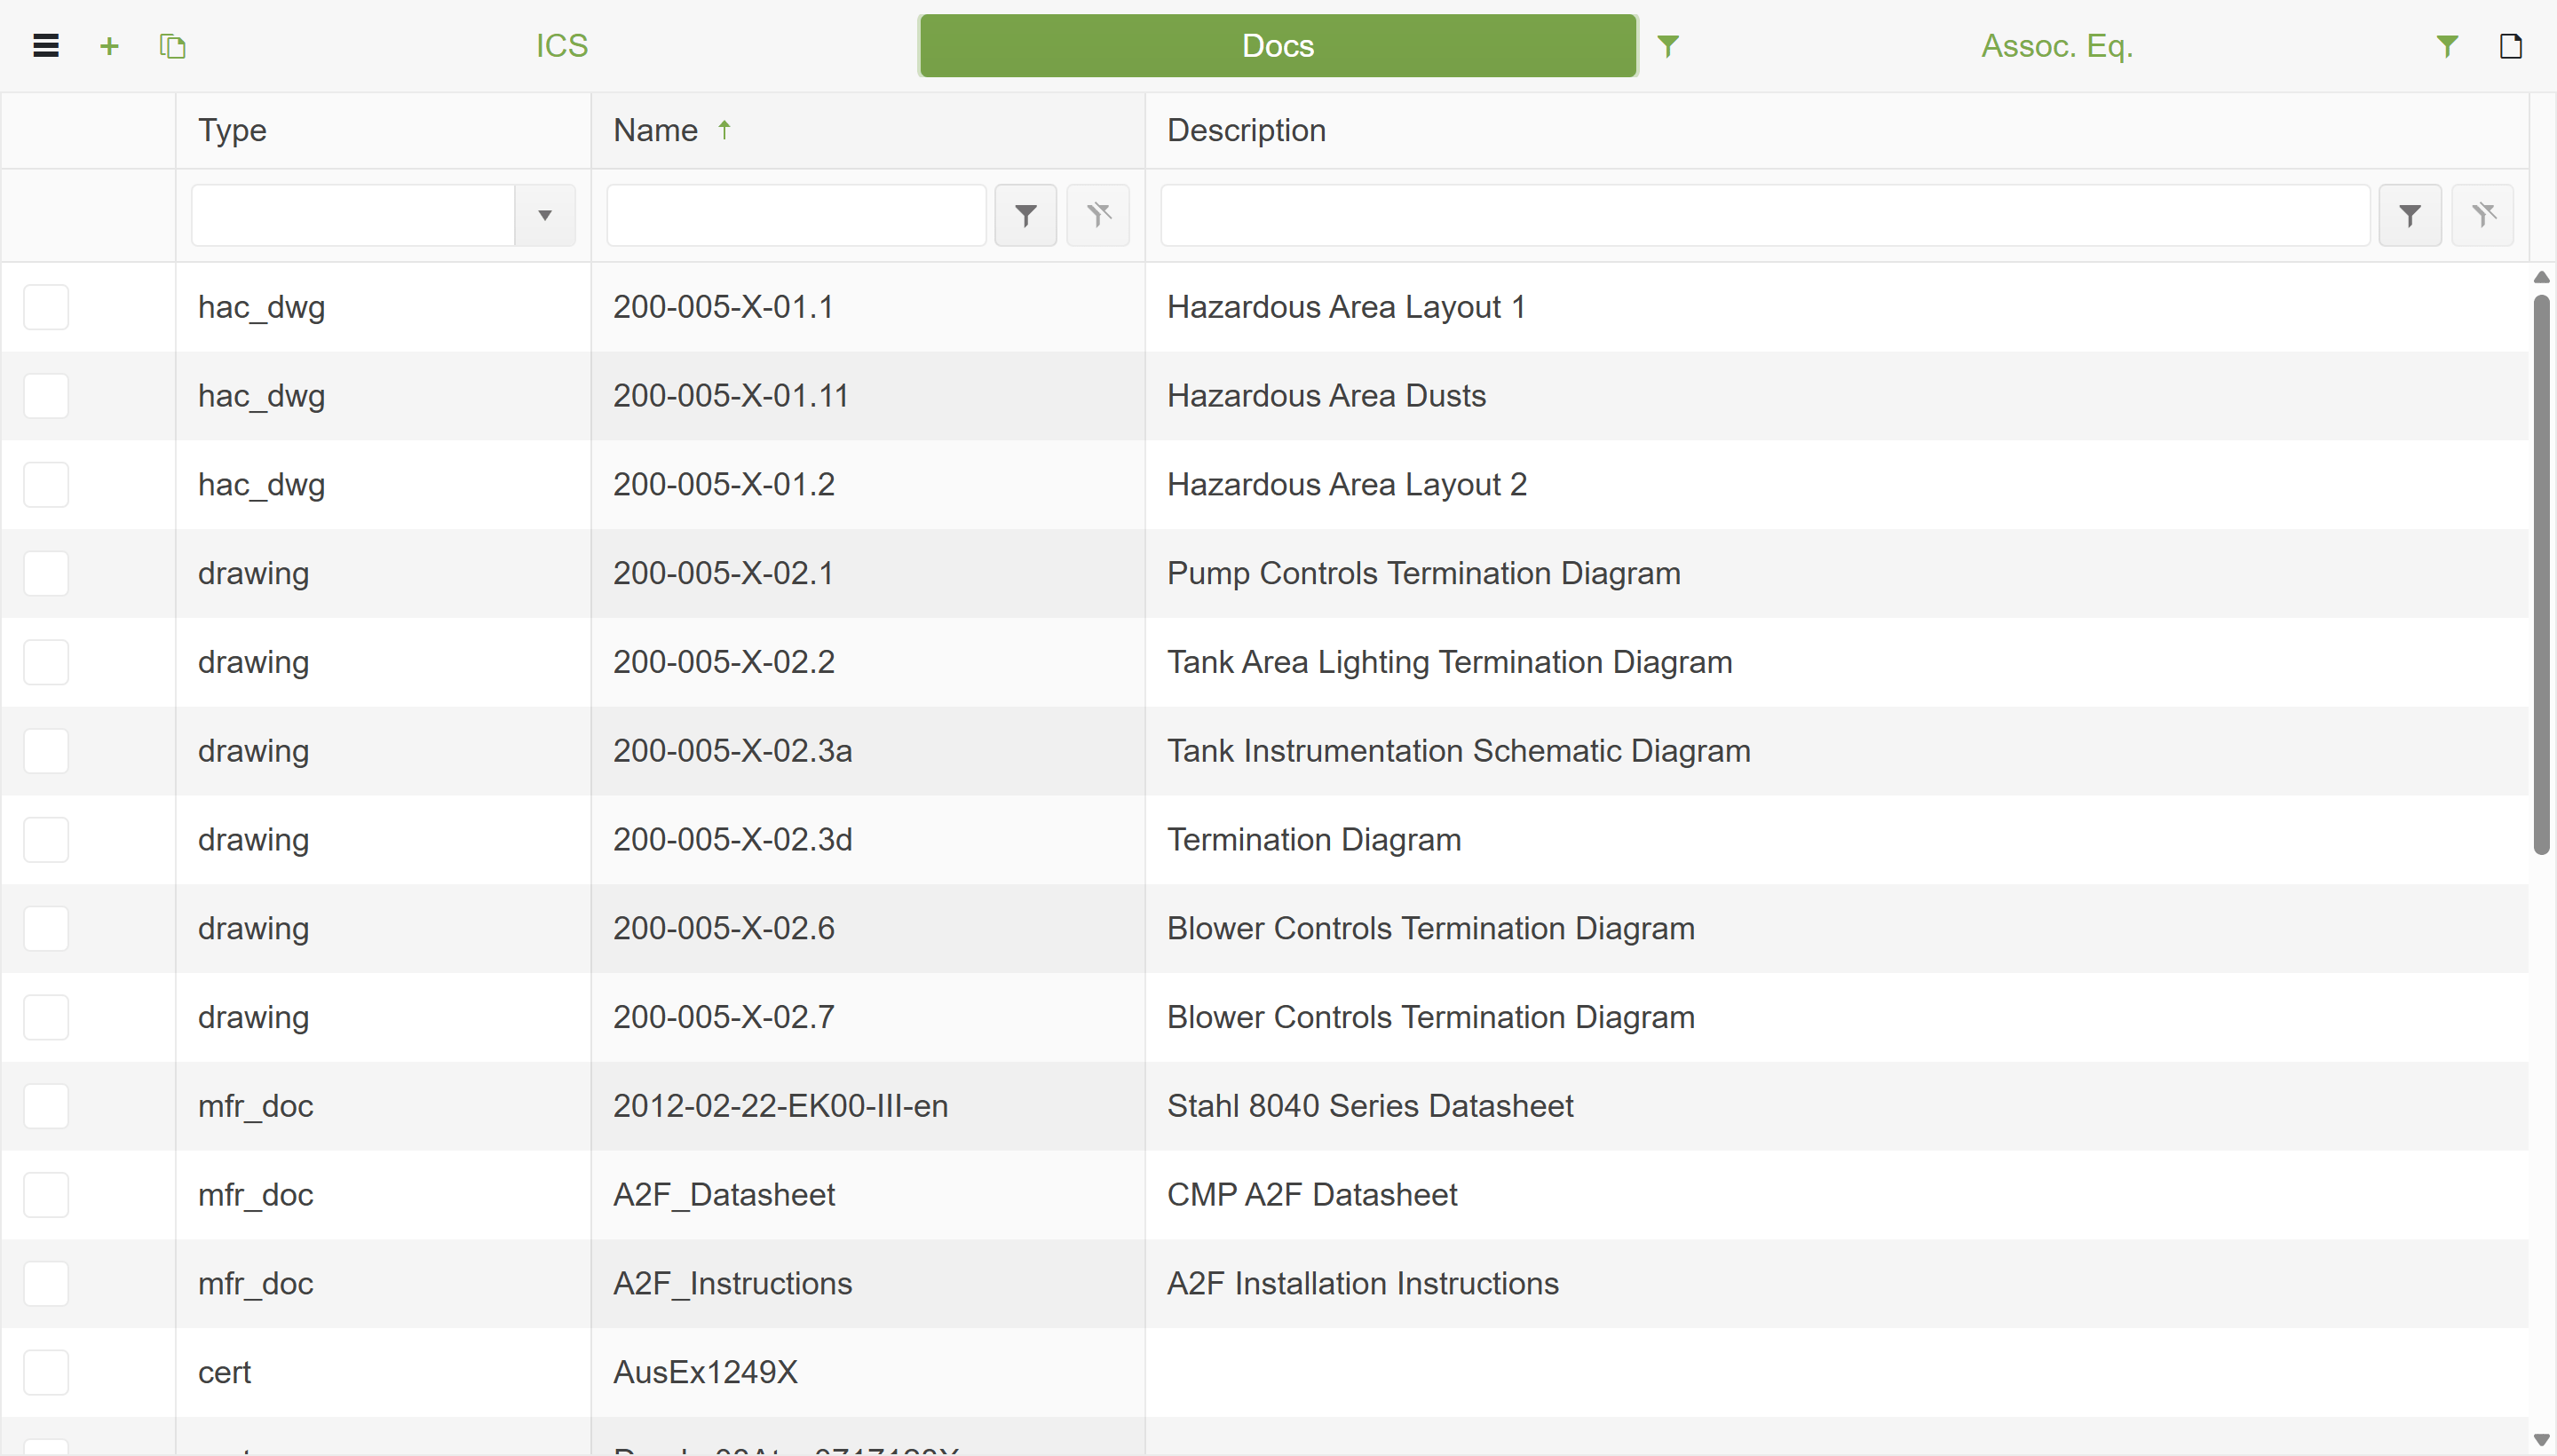
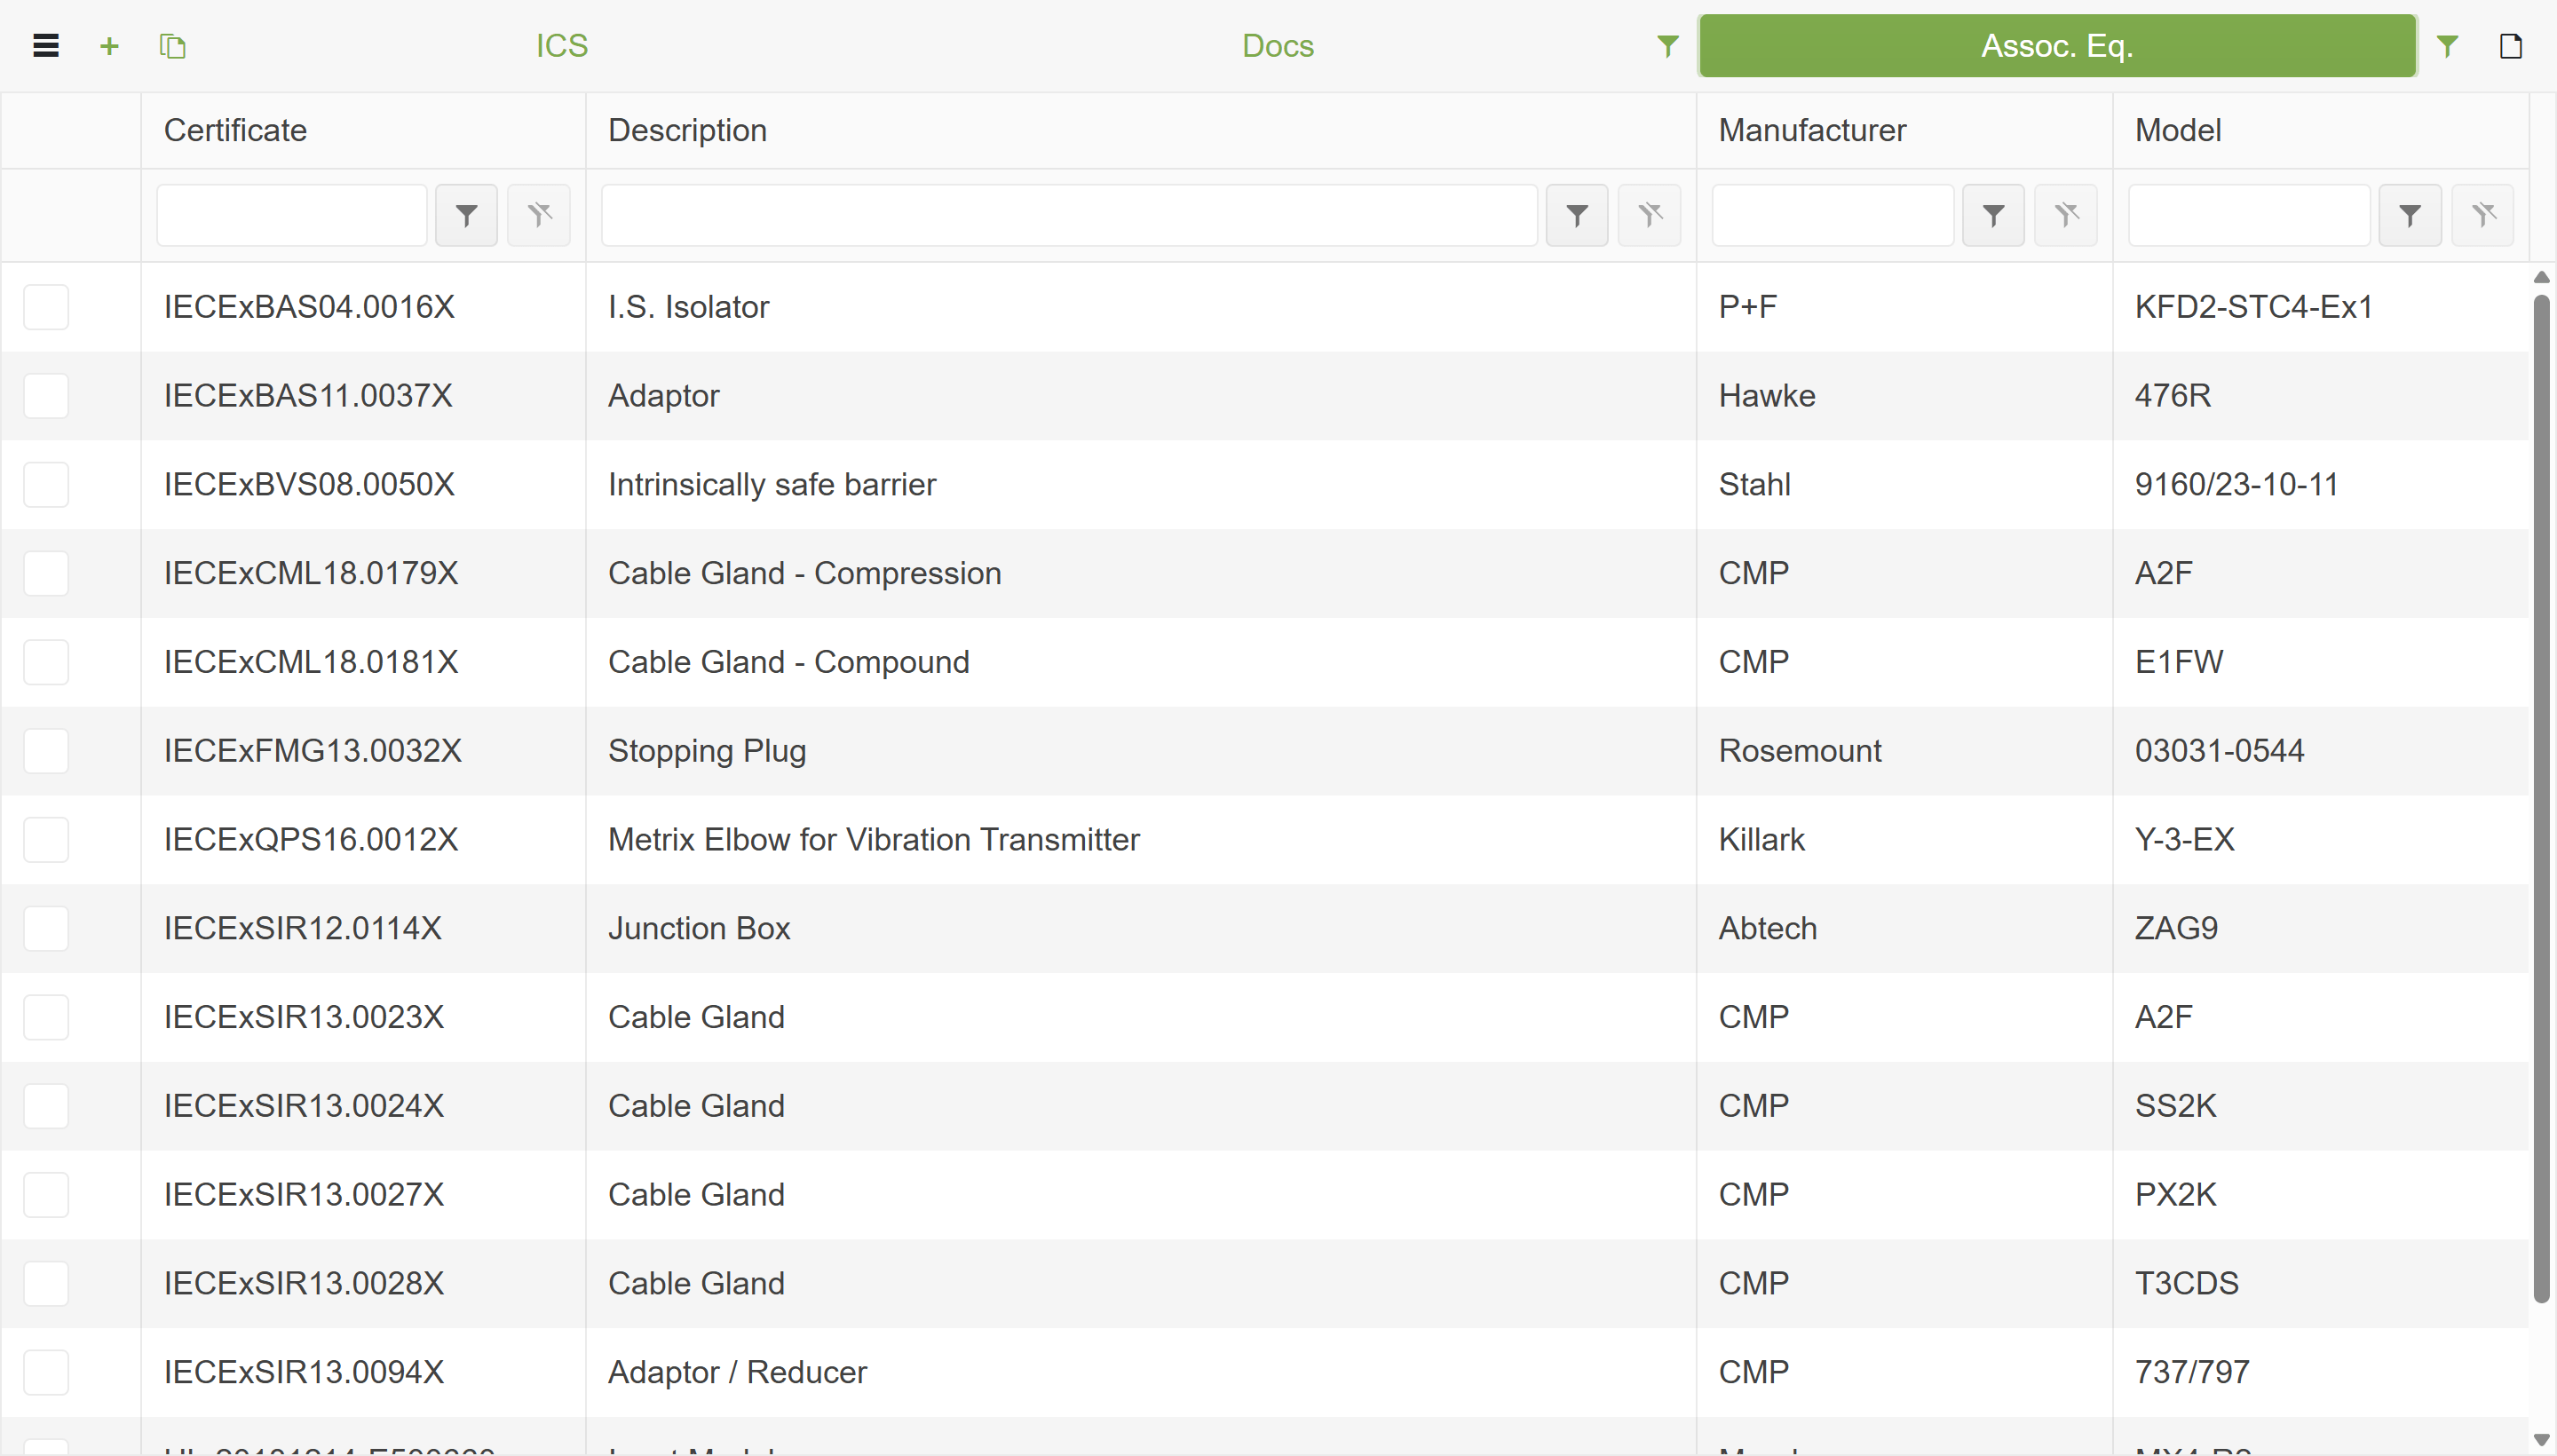
Other Views: Docs & Assoc. Eq.
Section titled “Other Views: Docs & Assoc. Eq.”The green bar at the top displays the ICS name. Two additional tabs sit beside it:
| Tab | What it shows |
|---|---|
| Docs | Documents included in the work pack — hazardous-area drawings, termination diagrams, certificates, manufacturer datasheets, and installation instructions. |
| Assoc. Eq. | Associated equipment — cable glands, barriers, isolators, junction boxes, and other ancillary items linked to the main equipment. |
Inspection Check Sheet (ICS)
Section titled “Inspection Check Sheet (ICS)”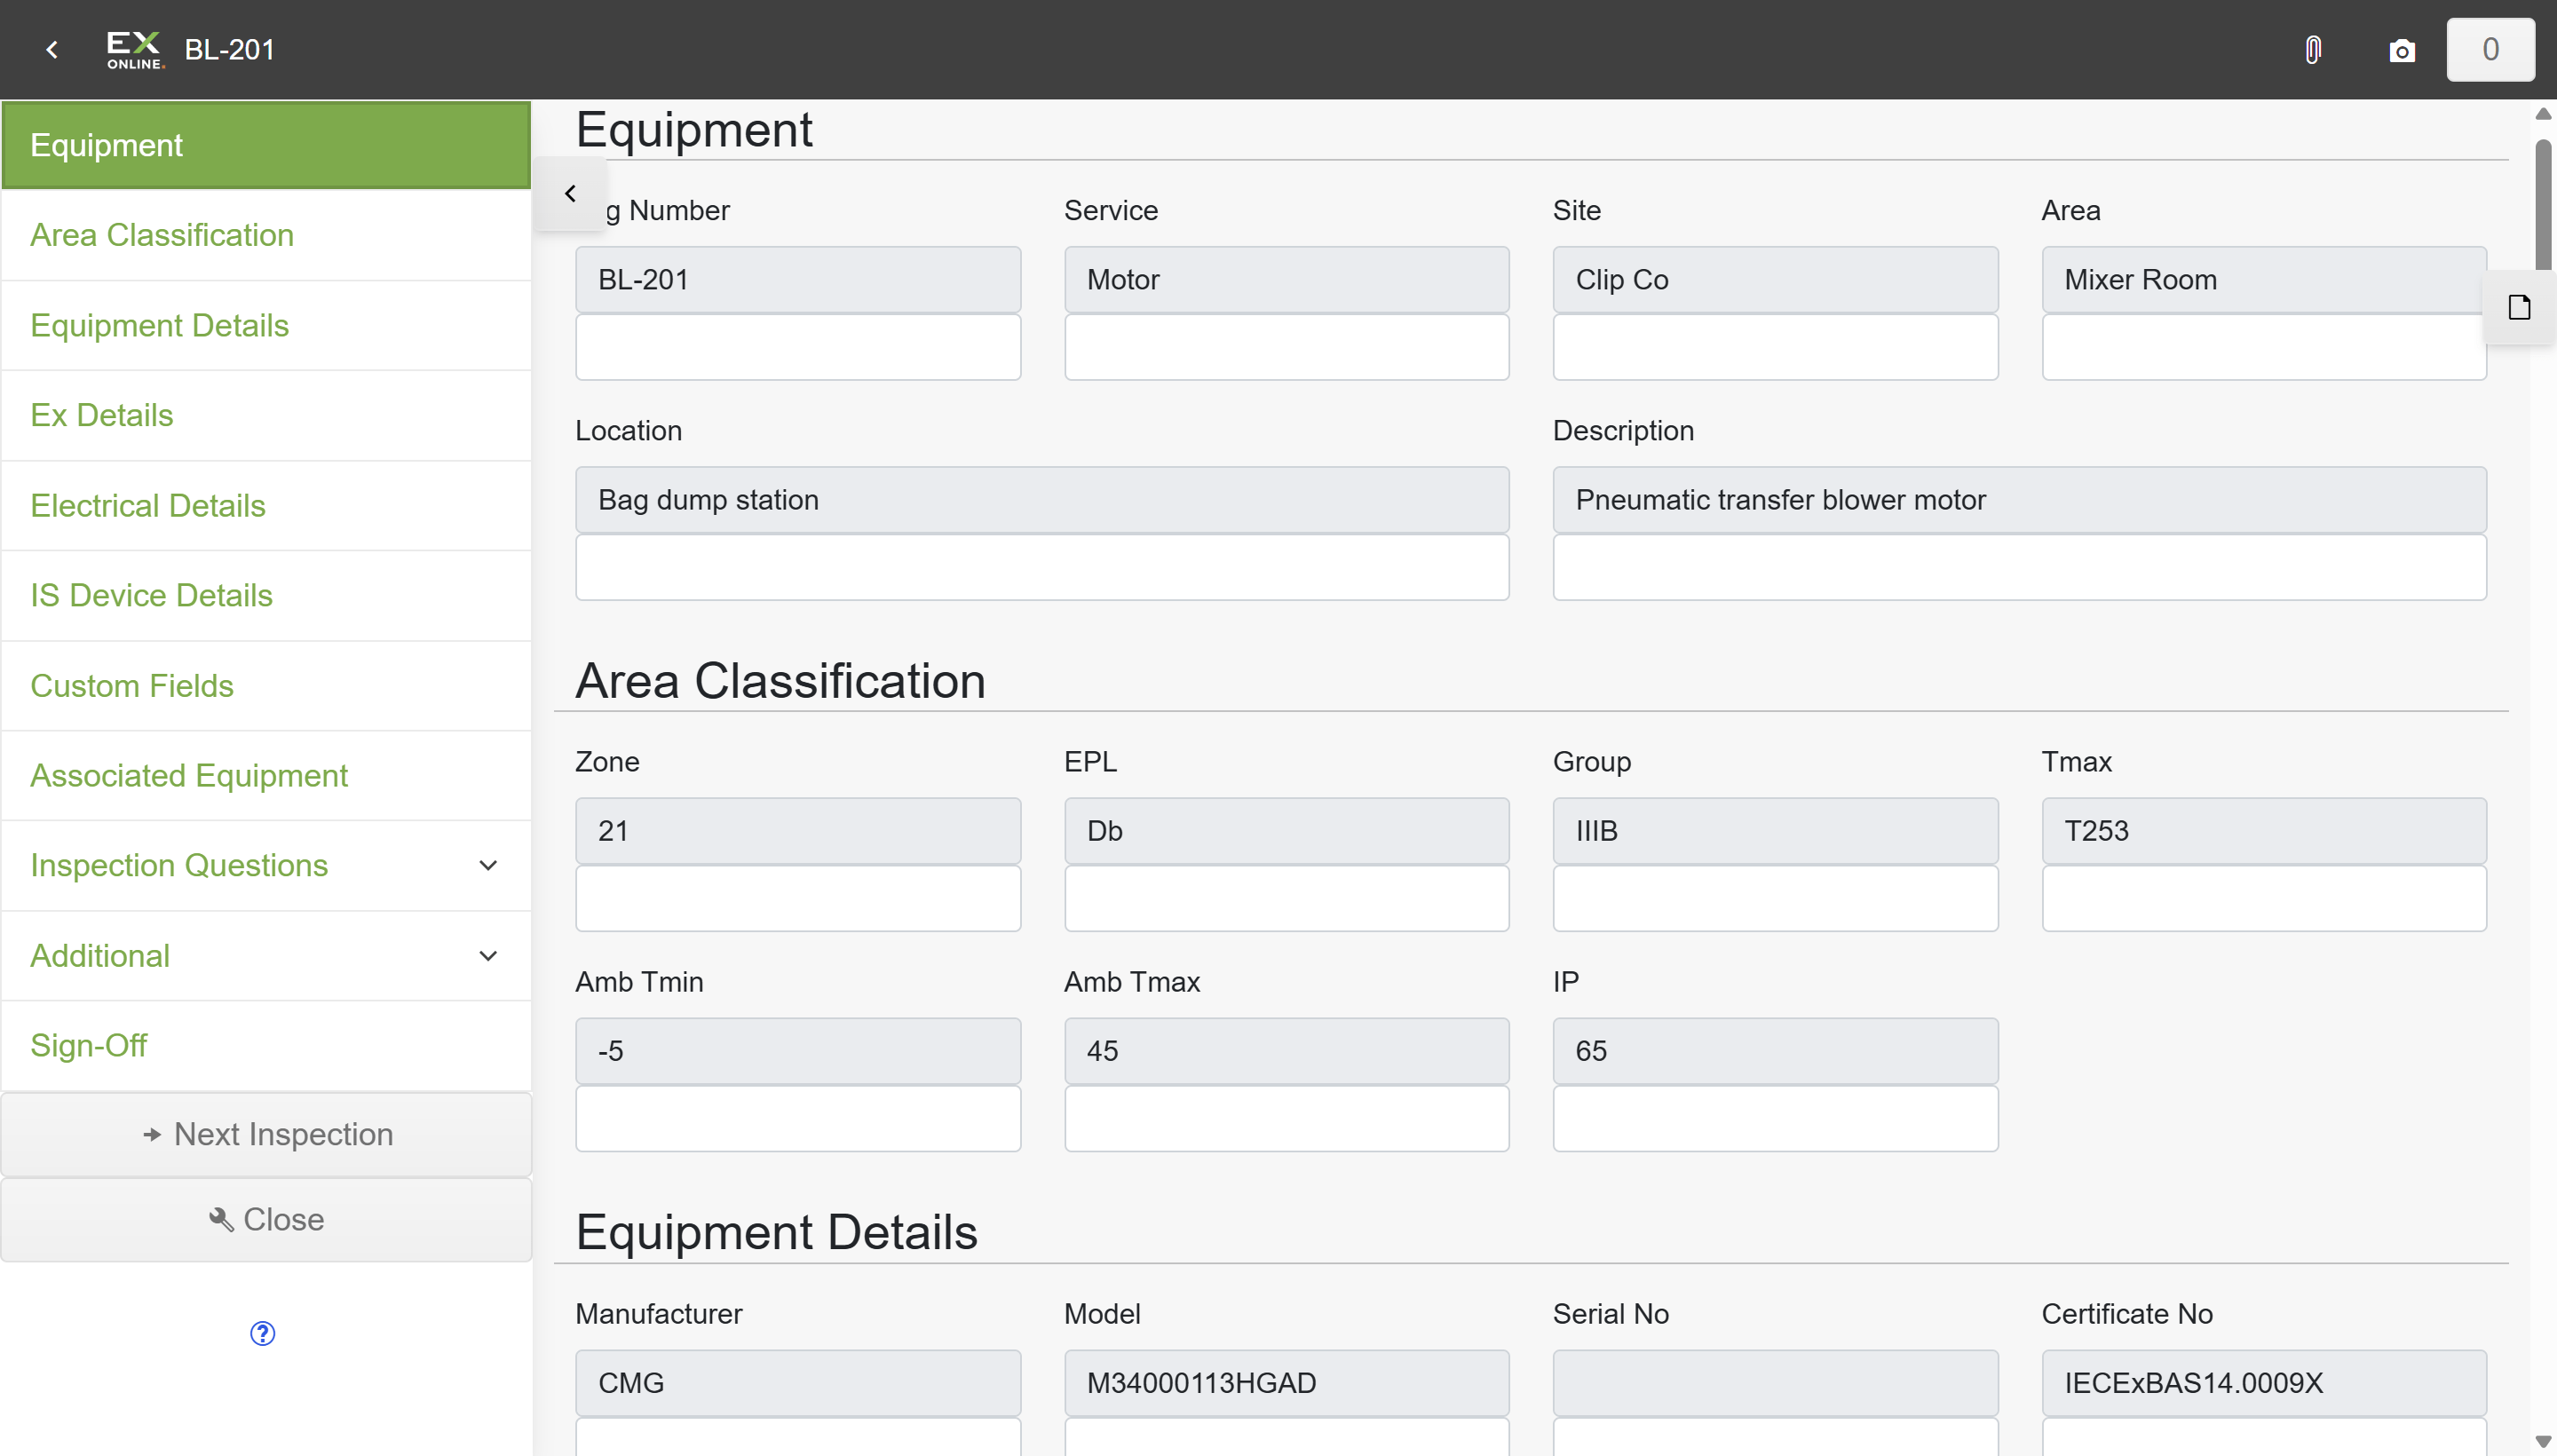
Each equipment item has an Inspection Check Sheet (ICS).
Navigation Bar
Section titled “Navigation Bar”The hamburger icon (top left) opens the navigation bar. The left arrow next to the hamburger icon returns to the Equipment Browser. Tapping a section name jumps to that section.
| Section | Contents |
|---|---|
| Equipment | Tag number, service, site, area, location, description |
| Area Classification | Zone, EPL, group, temperature class, ambient limits, IP rating |
| Equipment Details | Manufacturer, model, serial number, certificate number |
| Ex Details | Simple device flag, protection concept, EPL, group, temperature, IP |
| Electrical Details | Voltage, amps, Hz, kW, RPM, IA/IN, tE |
| IS Device Details | Ui, Ii, Pi, Ci, Li (intrinsic safety parameters) |
| Custom Fields | User-defined fields (other_1 through other_6) |
| Associated Equipment | Cable glands, barriers, and other ancillary devices linked to this item |
| Inspection Questions | The main Y/N/NA/NC checks grouped by standard (see Inspection Questions) |
| Additional | Additional defects, follow-up actions, and remarks |
| Sign-Off | Inspector, reviewer, and approver signatures (see Sign-Off) |
The navigation bar also contains two action buttons:
| Button | Action |
|---|---|
| Next Inspection | Skips directly to the Inspection Questions section. |
| Inspection Grade | Changes the inspection grade (Detailed, Close, Visual, or Continuous Supervision), which determines which questions are shown. See Inspection Grade for definitions. |
Equipment Data
Section titled “Equipment Data”Existing equipment and area data appears in blue-gray fields. This data cannot be edited directly, but new values entered in the white text fields below overwrite it.
Inspection Questions
Section titled “Inspection Questions”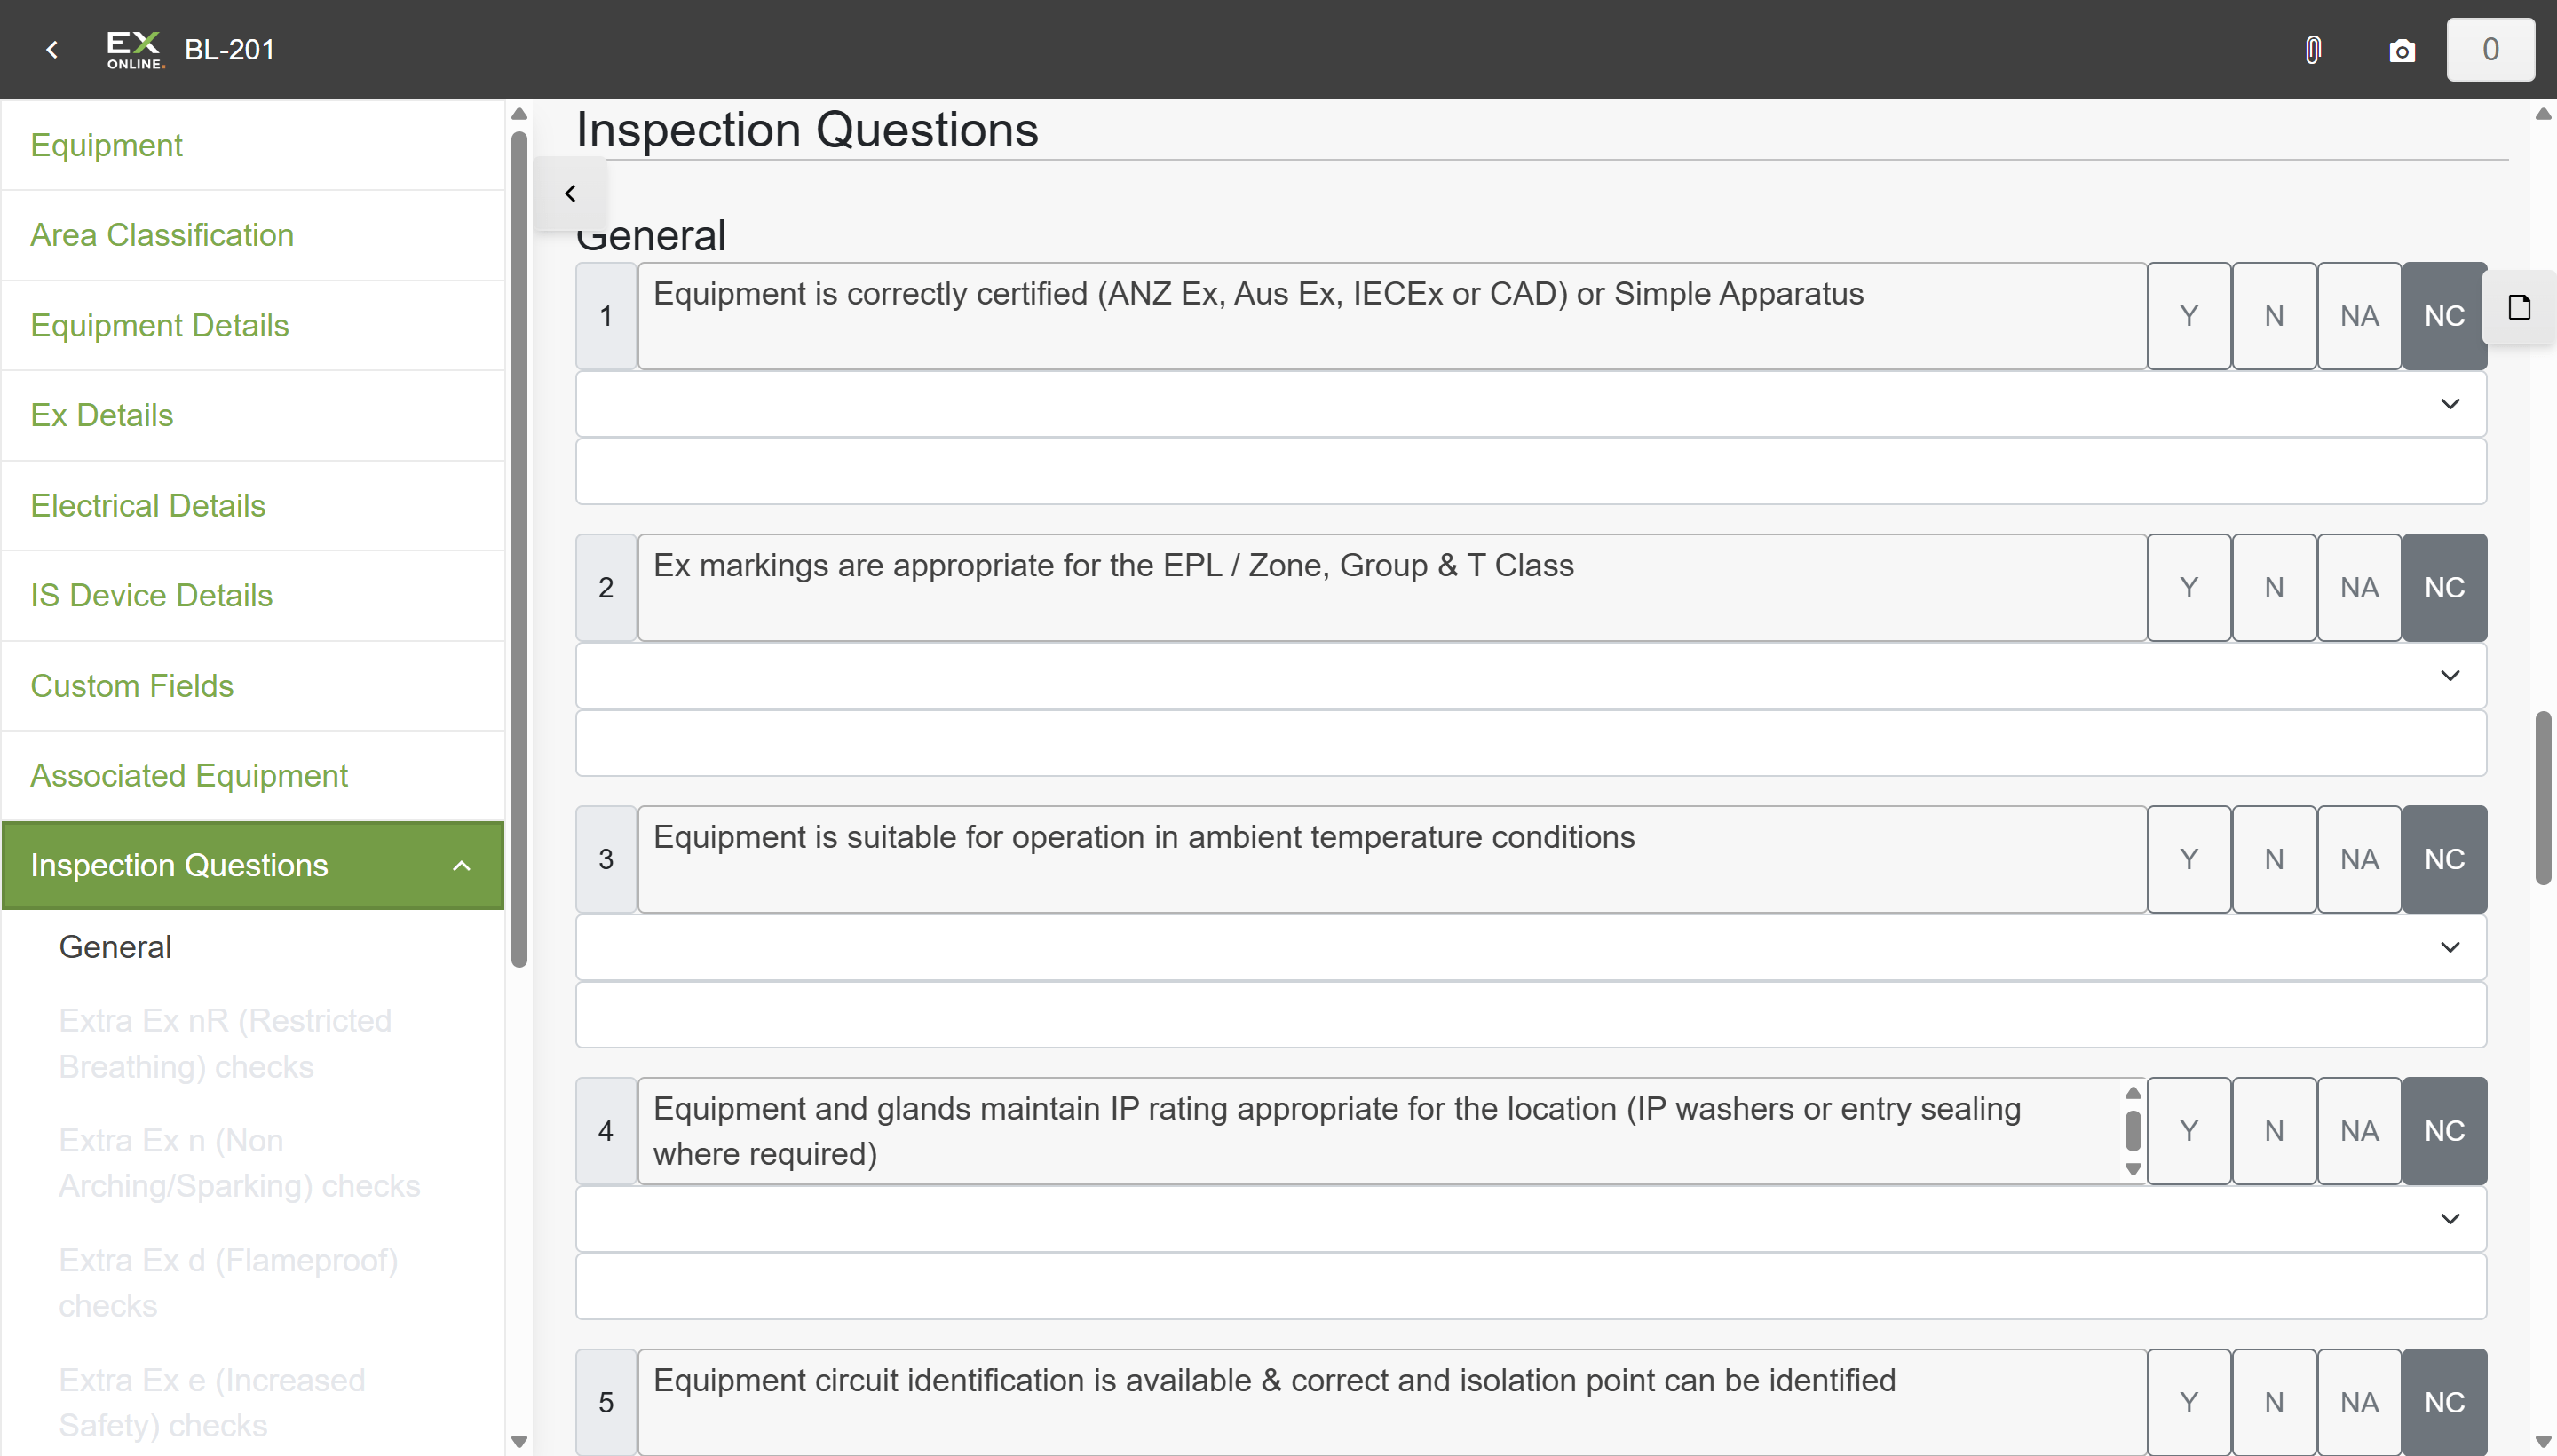
Each check has three components:
| Element | Description |
|---|---|
| Question/Check | The inspection question according to applied standards (ATEX, IECEx, AS/NZS, etc.) |
| Check Result | Y (Yes/Compliant), N (No/Non-Conformity), NA (Not Applicable), or NC (Not Checked). Default is NC |
| Non-Conformity | When N is selected, details are entered using the dropdown for common issues or the text field for specifics |
The Additional section (accessible from the navigation bar) allows recording non-conformities that don’t fit a specific check, plus follow-up actions and remarks.
Previous Defects
Section titled “Previous Defects”When the IWP includes inspection history, defects from previous inspections appear inline below the relevant question. Each row shows a severity bar, status, inspector name, and date.
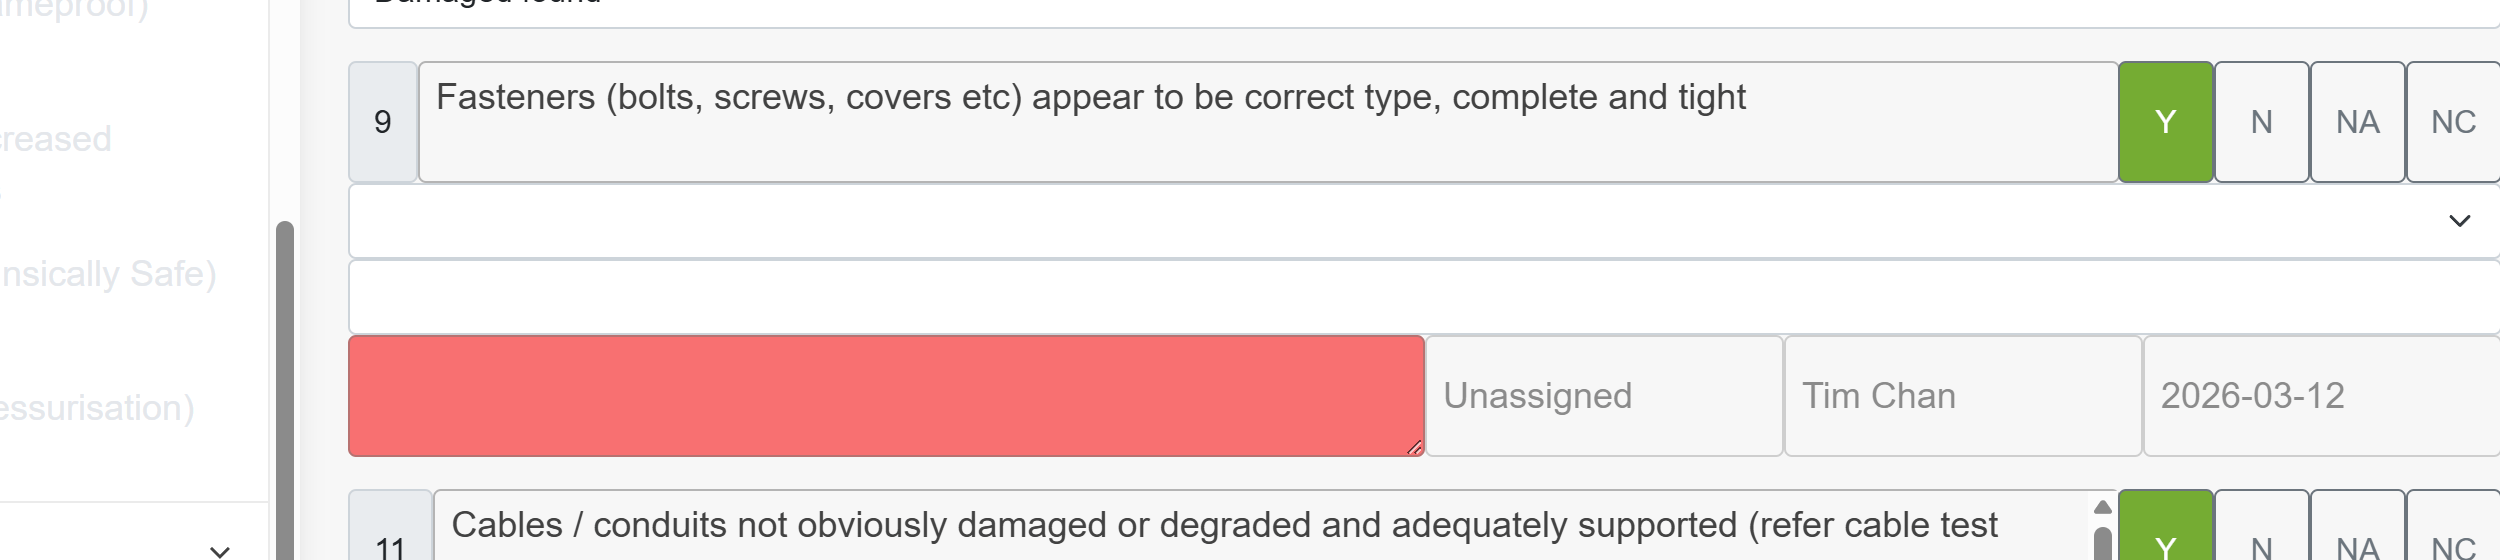
These rows are read-only and cannot be edited — they provide context so the inspector can see outstanding issues while answering the current inspection.
Documents & Photos
Section titled “Documents & Photos”
| Icon | Action |
|---|---|
| Paperclip (left) | Opens the document menu bar. Documents open in a separate window for side-by-side comparison, with navigation buttons for paging and zoom. |
| Camera (middle) | Captures a photo. Photos are automatically linked to the current equipment item and stored within the IWP — they are included when transferring or uploading results. |
| Photo count (right) | Displays the number of photos attached to this item. Tapping it opens the Photo Manager. |
Photo Manager
Section titled “Photo Manager”Tapping the photo count badge opens the Photo Manager in a separate window. It displays thumbnails along the top and the selected photo in the main area.
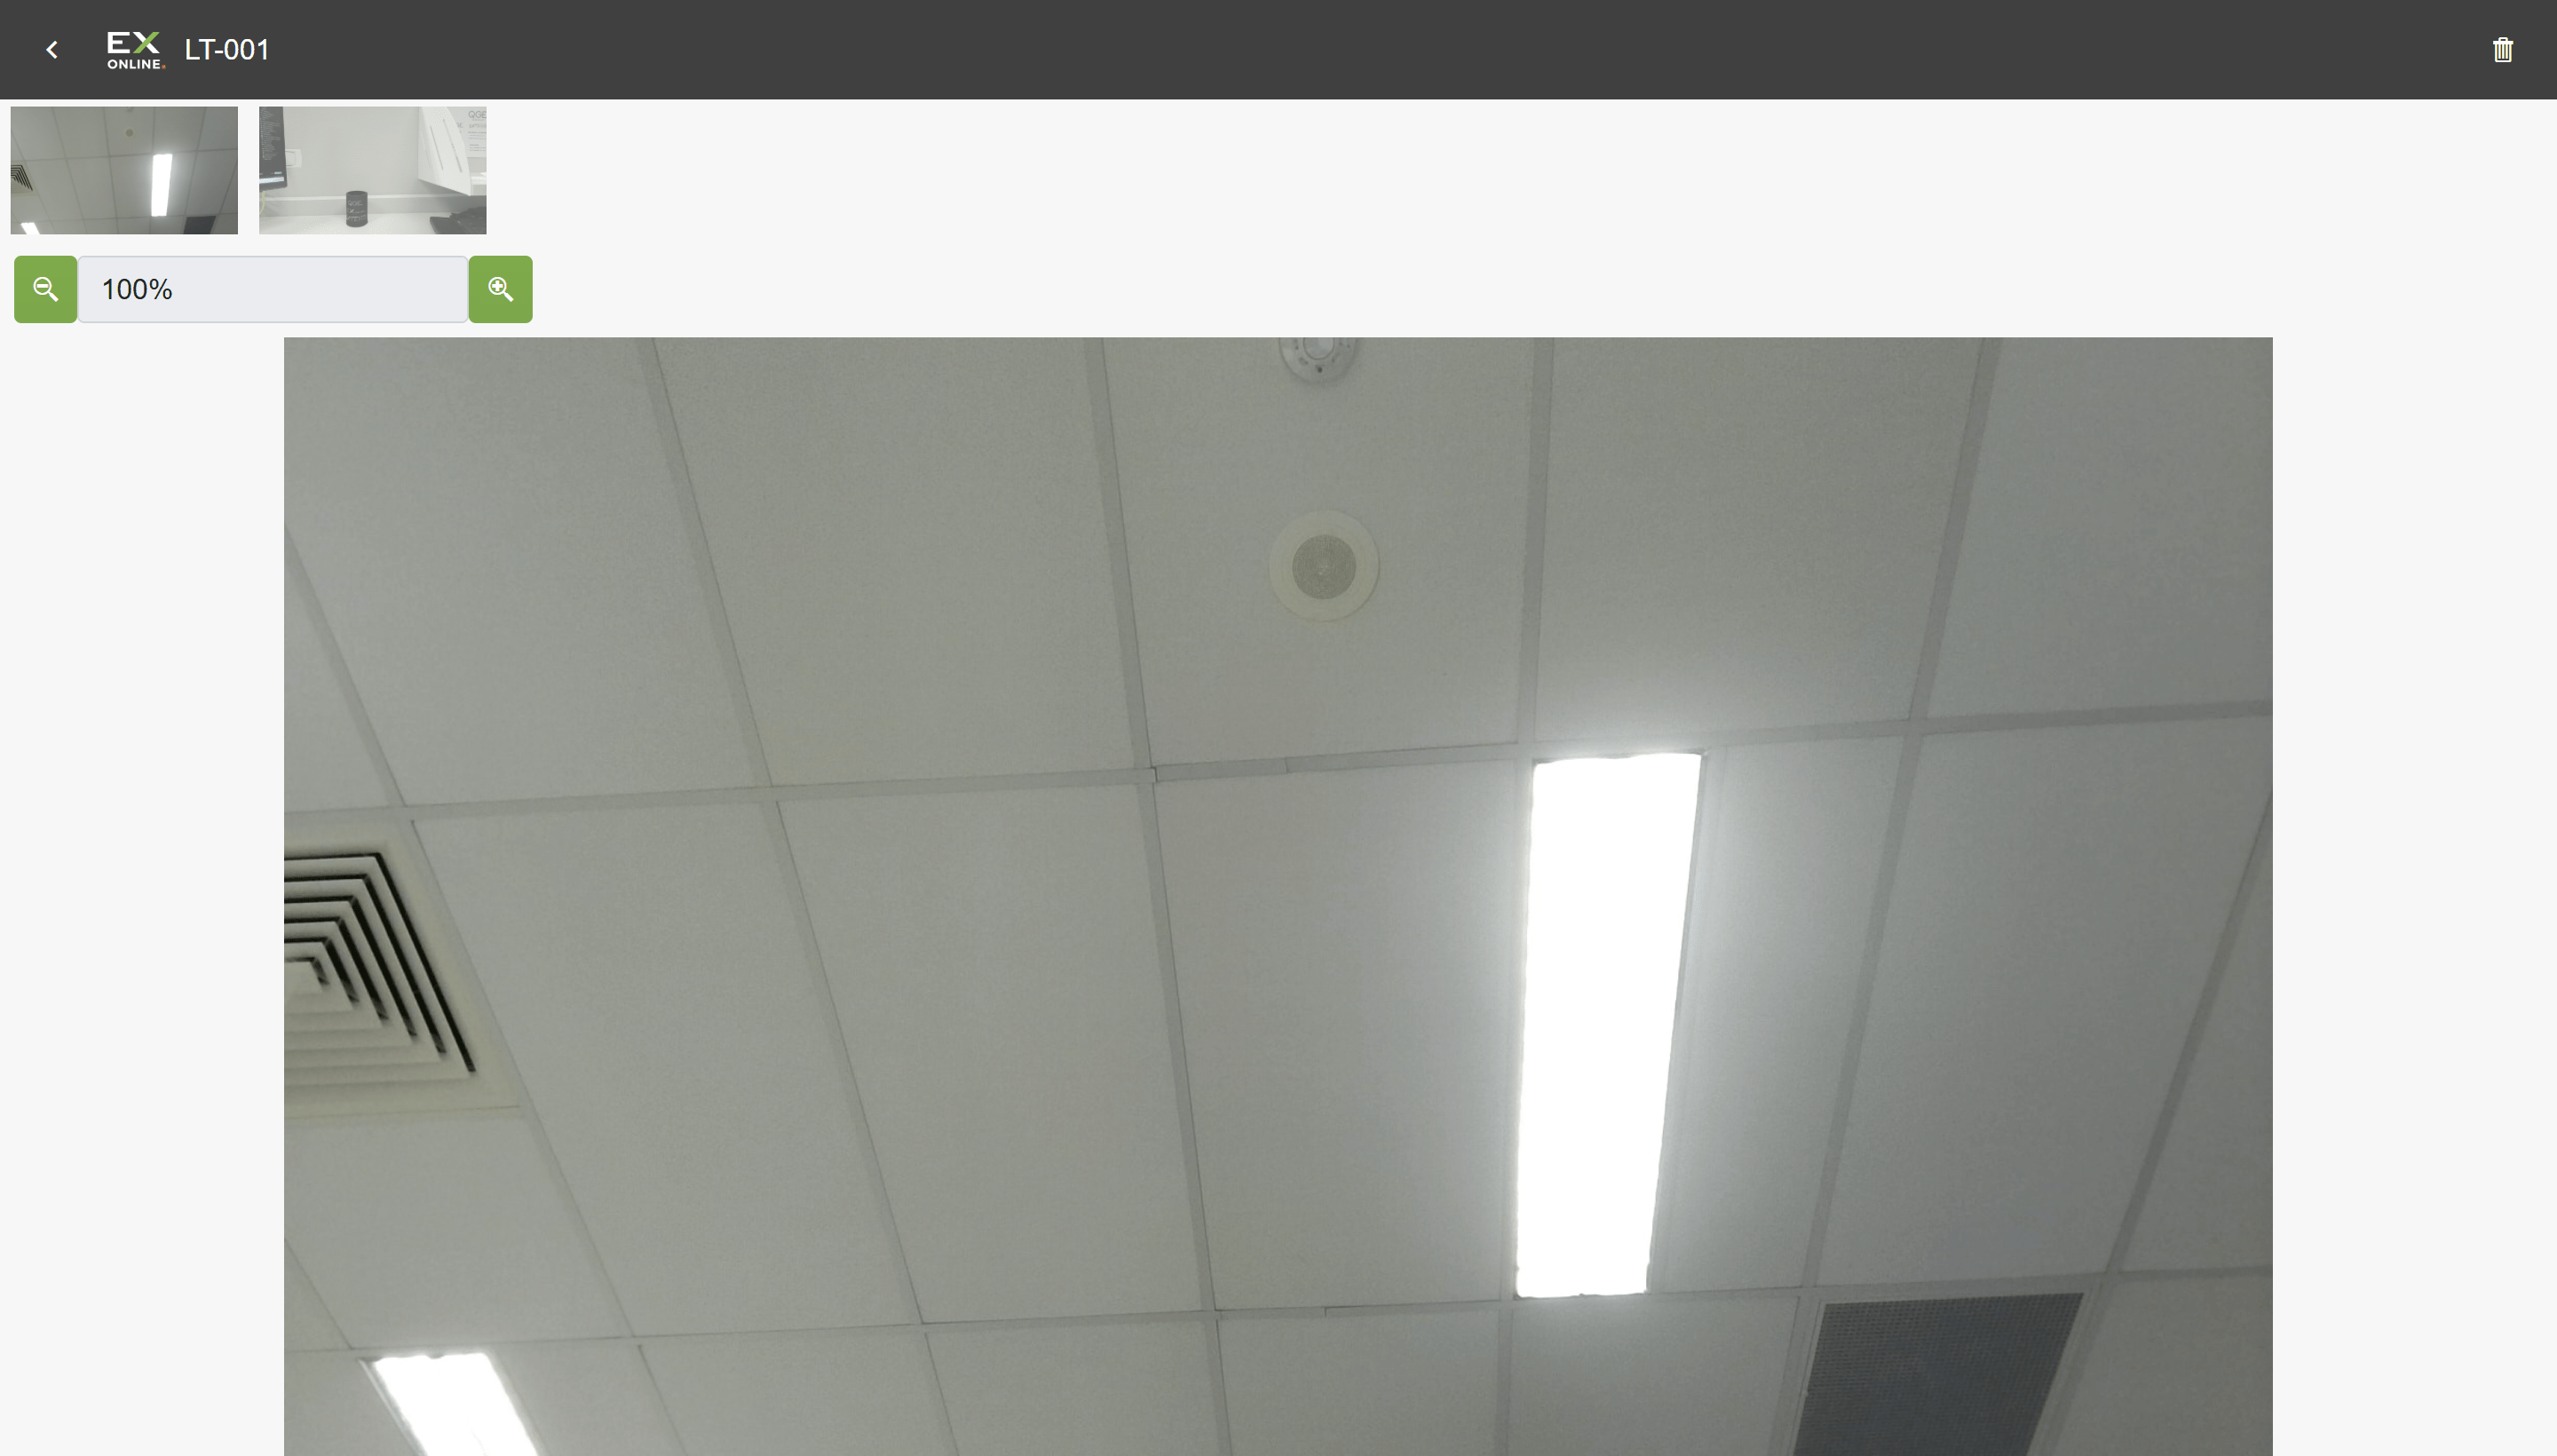
| Control | Description |
|---|---|
| Thumbnails (top) | Click to select a photo. |
| Zoom (magnifying glass buttons) | Zoom in and out of the current photo. |
| Delete (trash icon, top-right) | Removes the selected photo from the item. |
Sign-Off
Section titled “Sign-Off”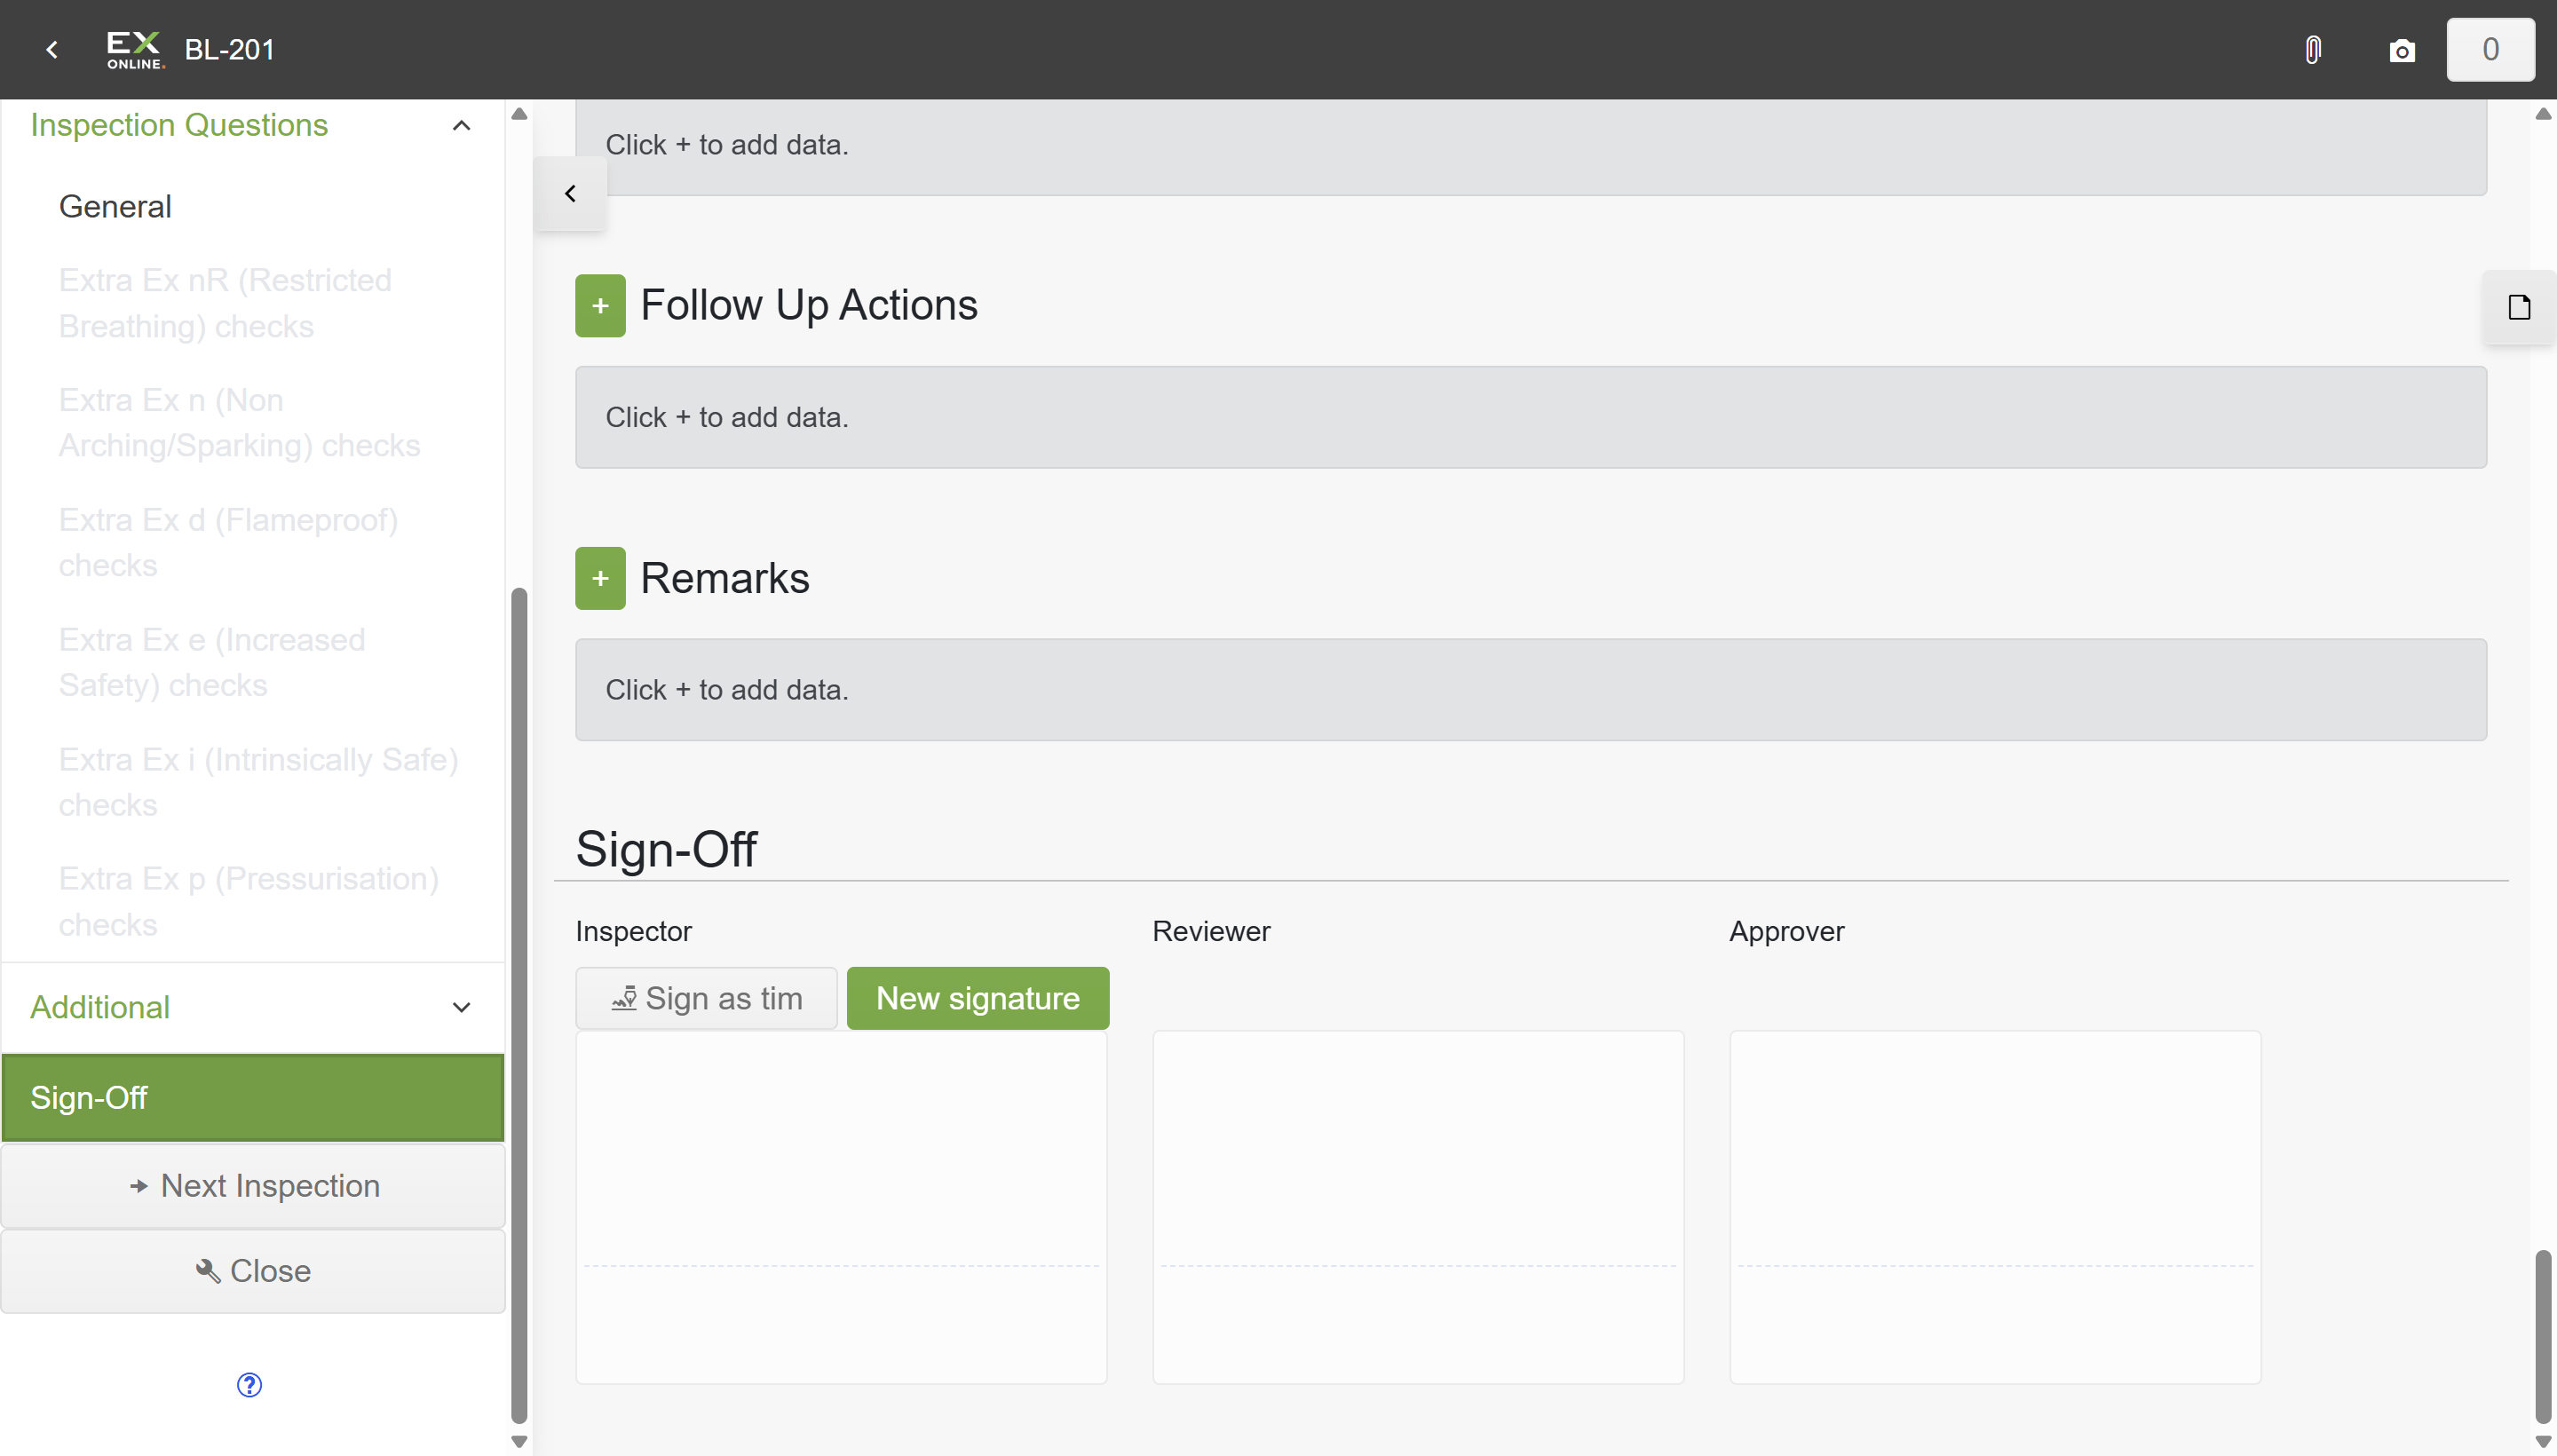
The Sign-Off section has columns for Inspector, Reviewer, and Approver. The New Signature button stores a name and drawn signature; the Sign button finalises the sign-off.
Review Mode
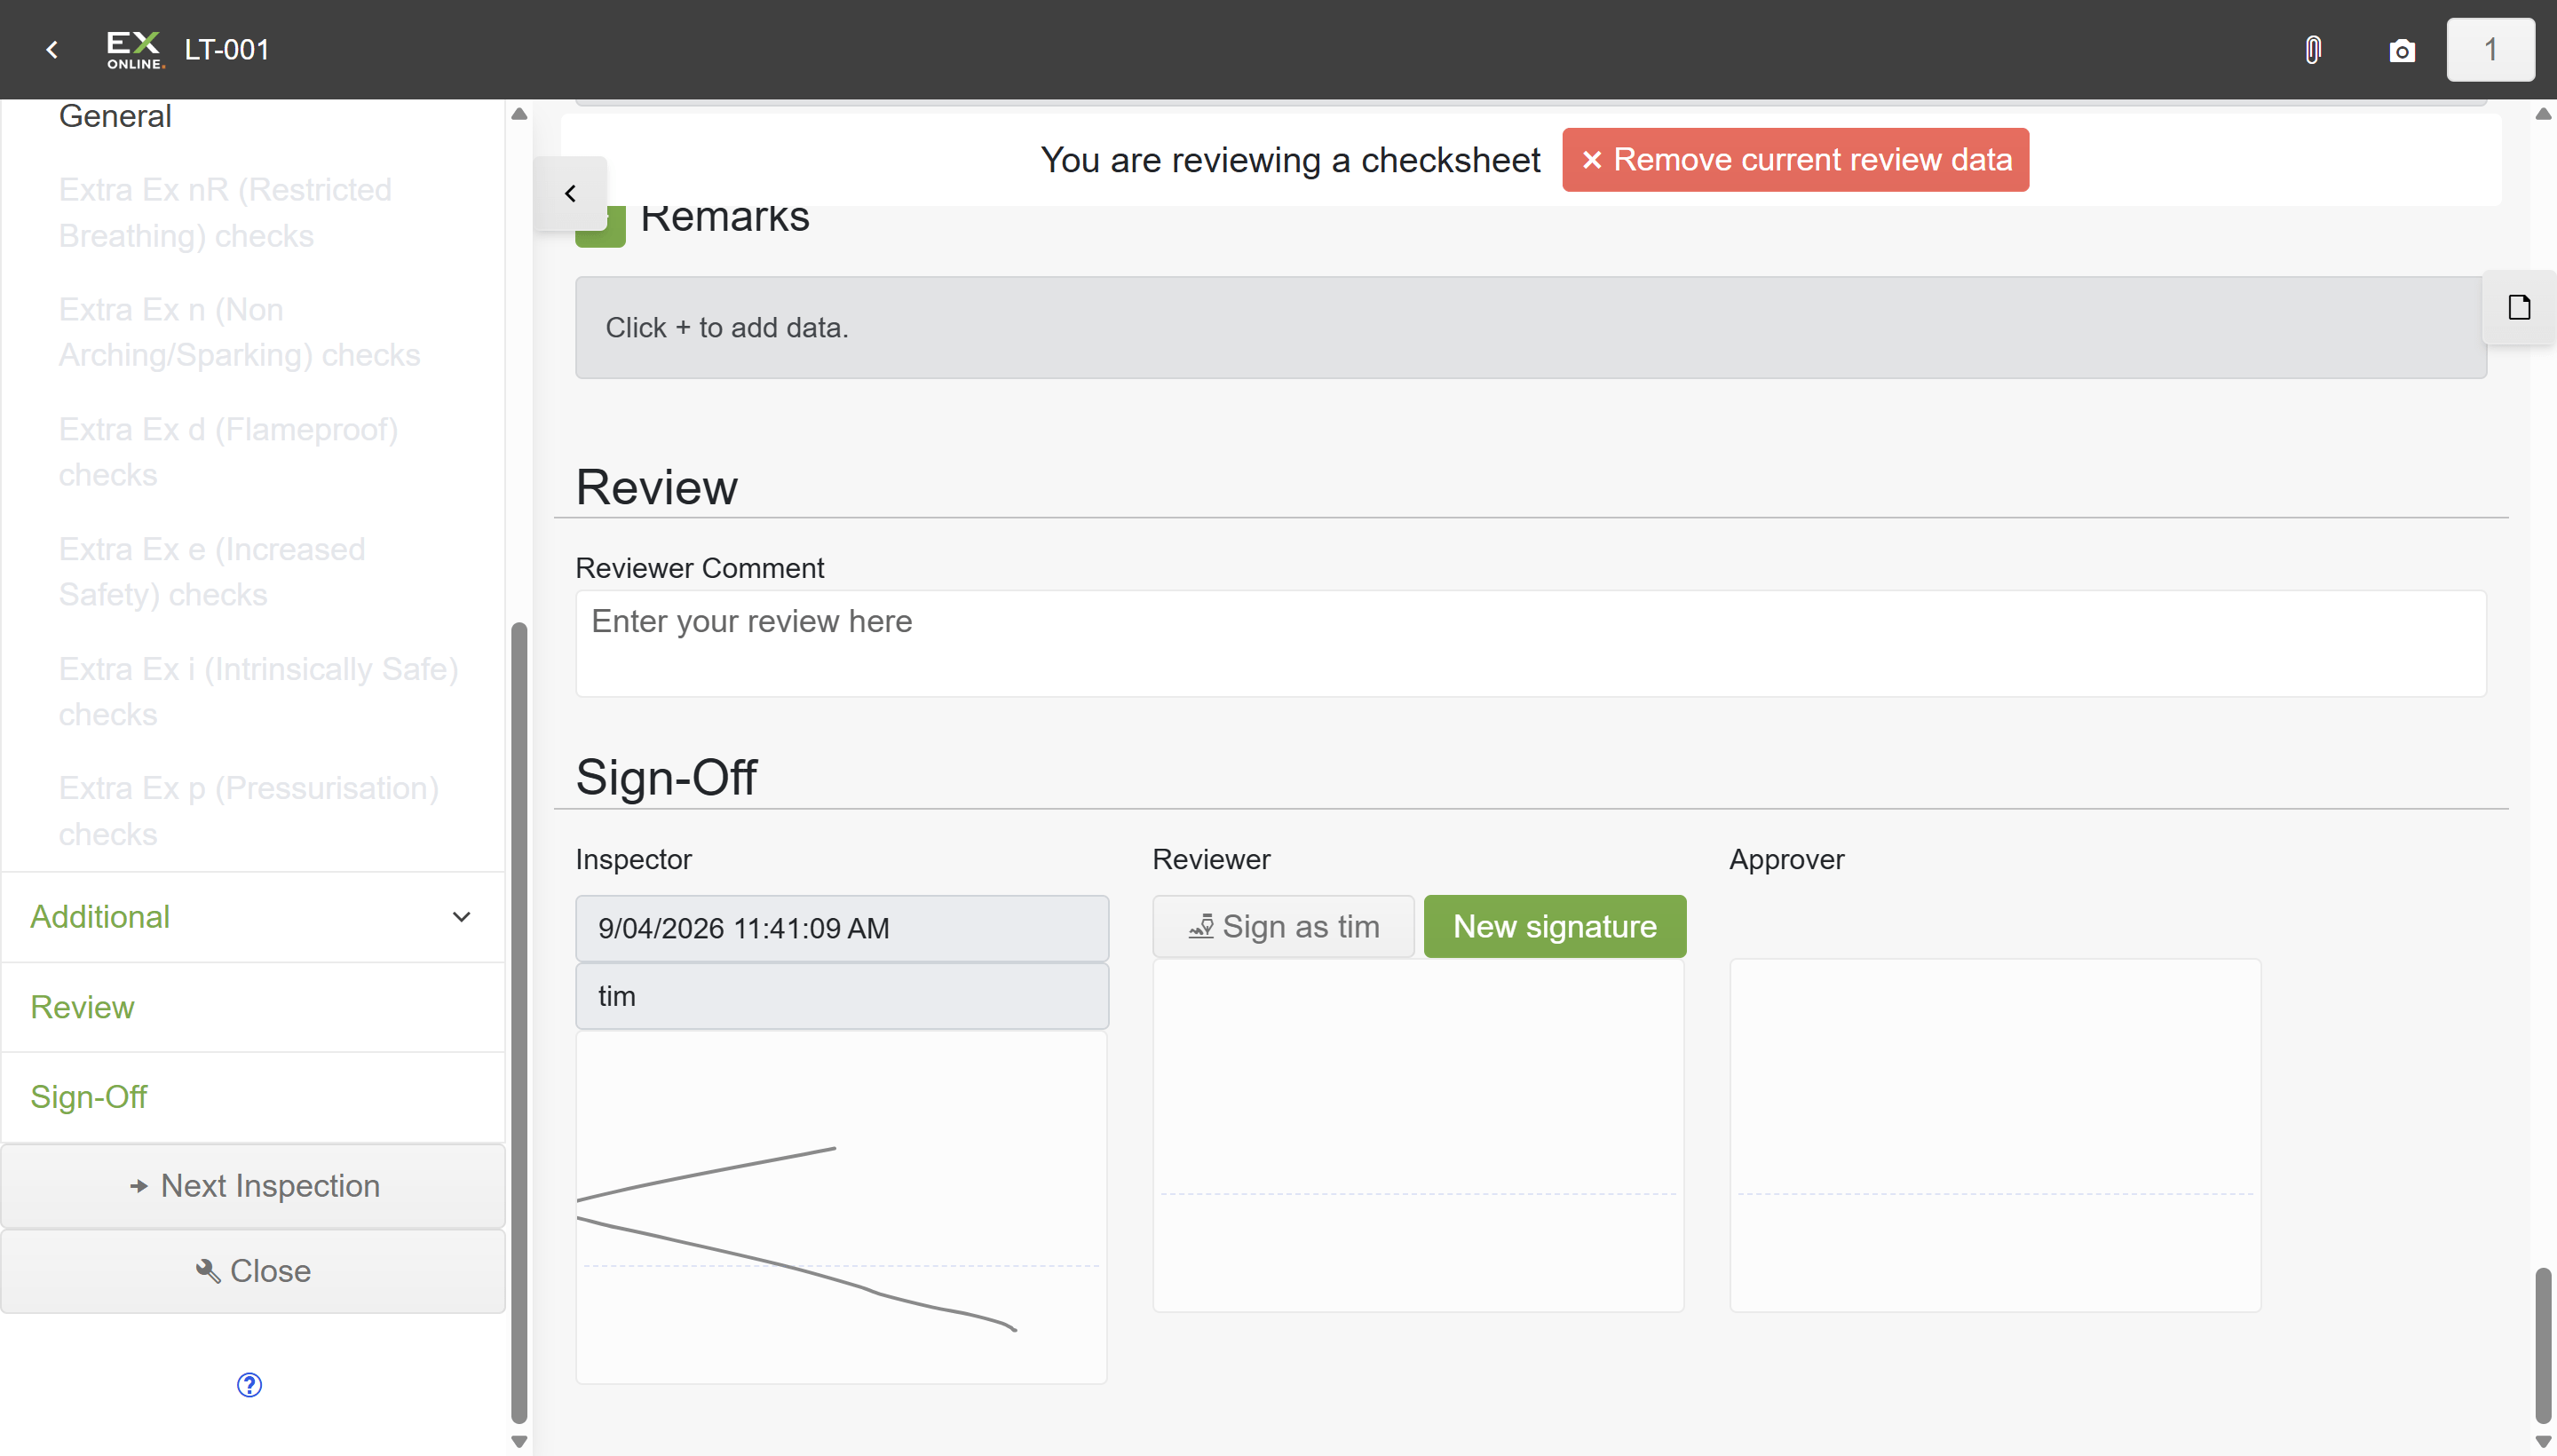
Section titled “Review Mode”After the inspector signs off, the check sheet is locked and an orange banner appears with Clear Signature and Create review buttons. Clicking Create review enters review mode — fields become editable and the reviewer can amend answers, edit equipment data, and add comments.
| Element | Description |
|---|---|
| Orange banner | Displays “You are reviewing a checksheet” while review mode is active. |
| Remove current review data | Discards all review changes and returns the check sheet to its locked state. |
| Reviewer Comment | Free-text field in the Review section of the sidebar for the reviewer’s notes. |
| Sign as [name] | Signs off in the Reviewer or Approver column. The check sheet locks again with the new signature recorded. |
After the reviewer signs, the Create review button reappears so an approver can enter review mode and sign off in the Approver column.
For a step-by-step walkthrough, see Reviewing and Approving Inspections.
Related Topics
Section titled “Related Topics”- Inspections — IWP download, upload, and QR transfer in the Tag Browser
- Filling in the Check Sheet — Step-by-step inspection guide