
Part 3: Upload Results
In this part you upload inspection results — the .iwt file or QR code transfer from Part 2 — back into the Tag Browser and verify the data on the equipment grid.
Open the project on the EQUIPMENT tab — the same grid you used in Part 1. Then follow the section that matches your transfer method.
Upload an .iwt file
Section titled “Upload an .iwt file”Click the Inspection dropdown on the right side of the toolbar and choose Upload.
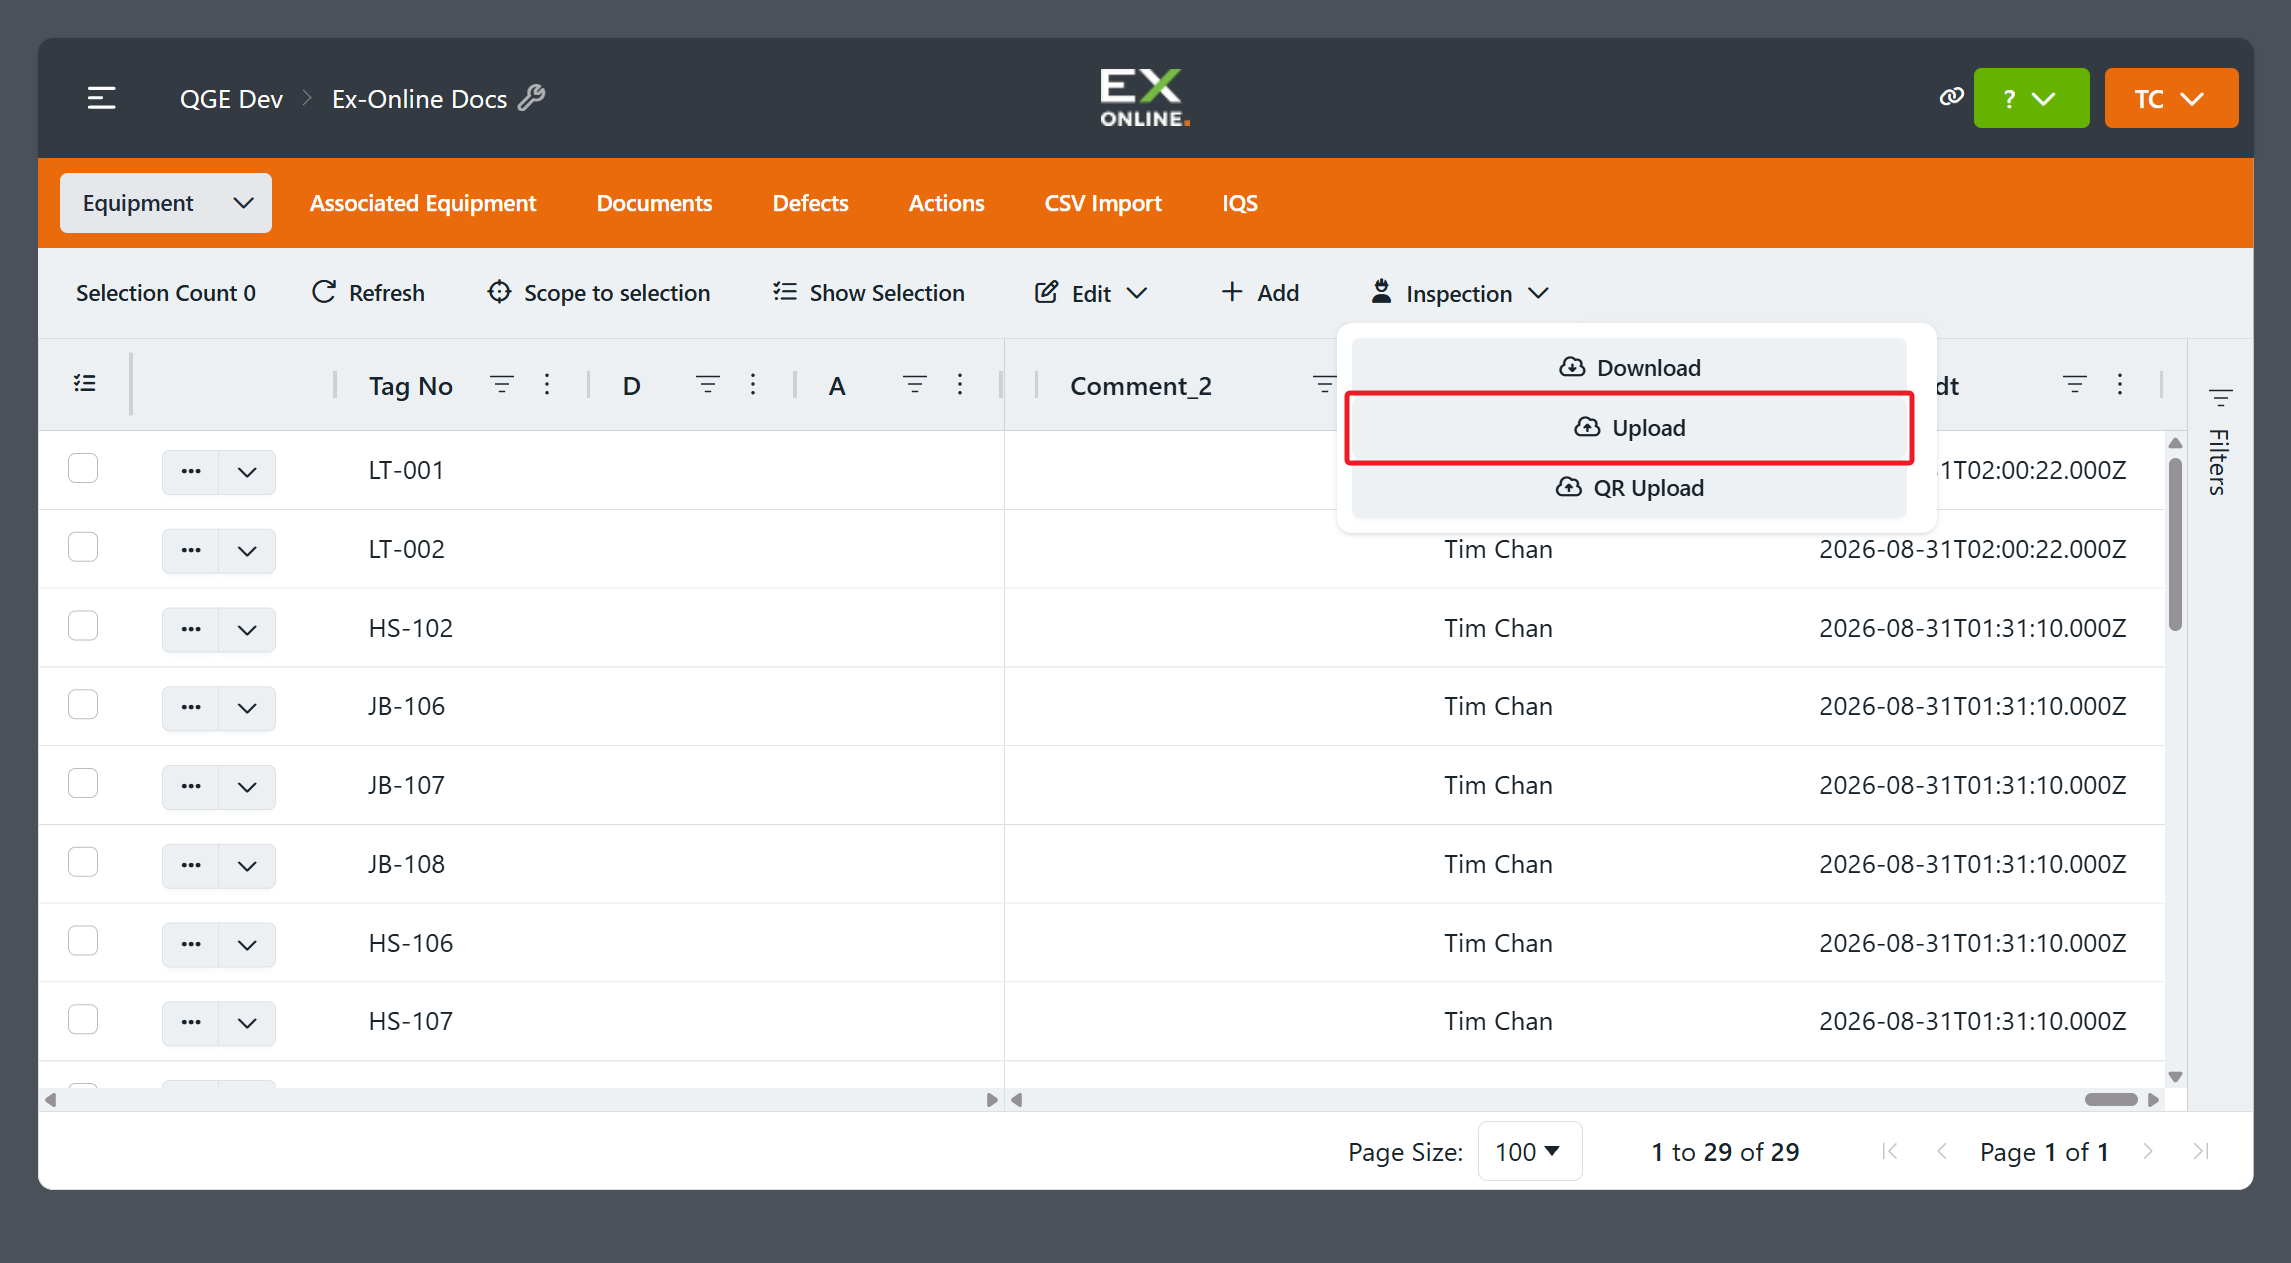
The Inspection Work Pack Upload dialog opens.
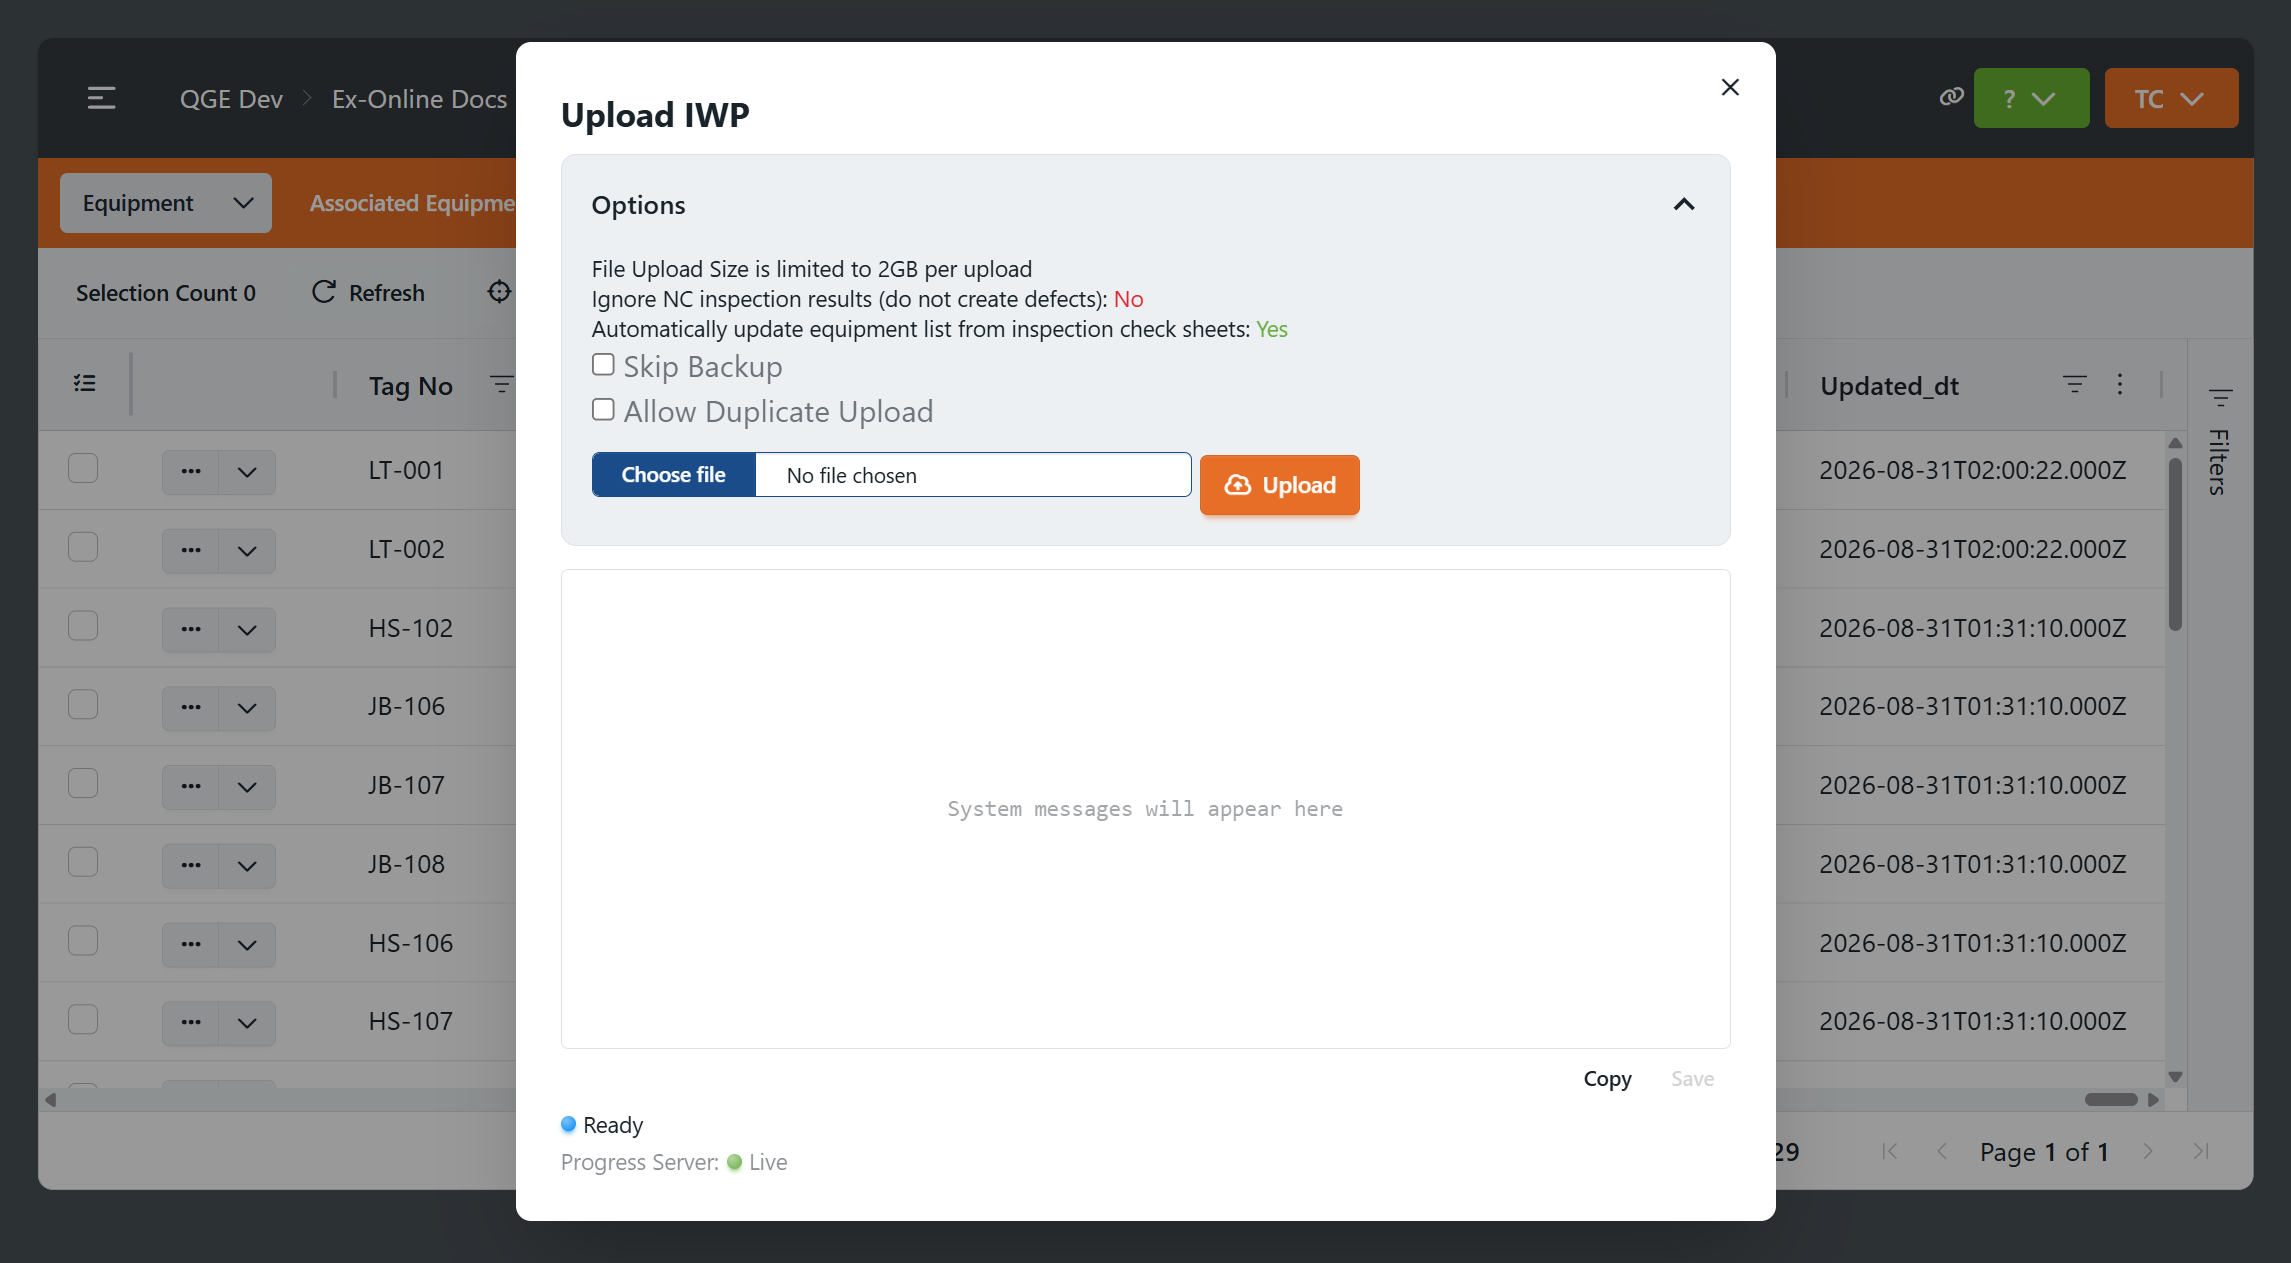
-
Click Choose File and select the
.iwtfile you created in Part 2.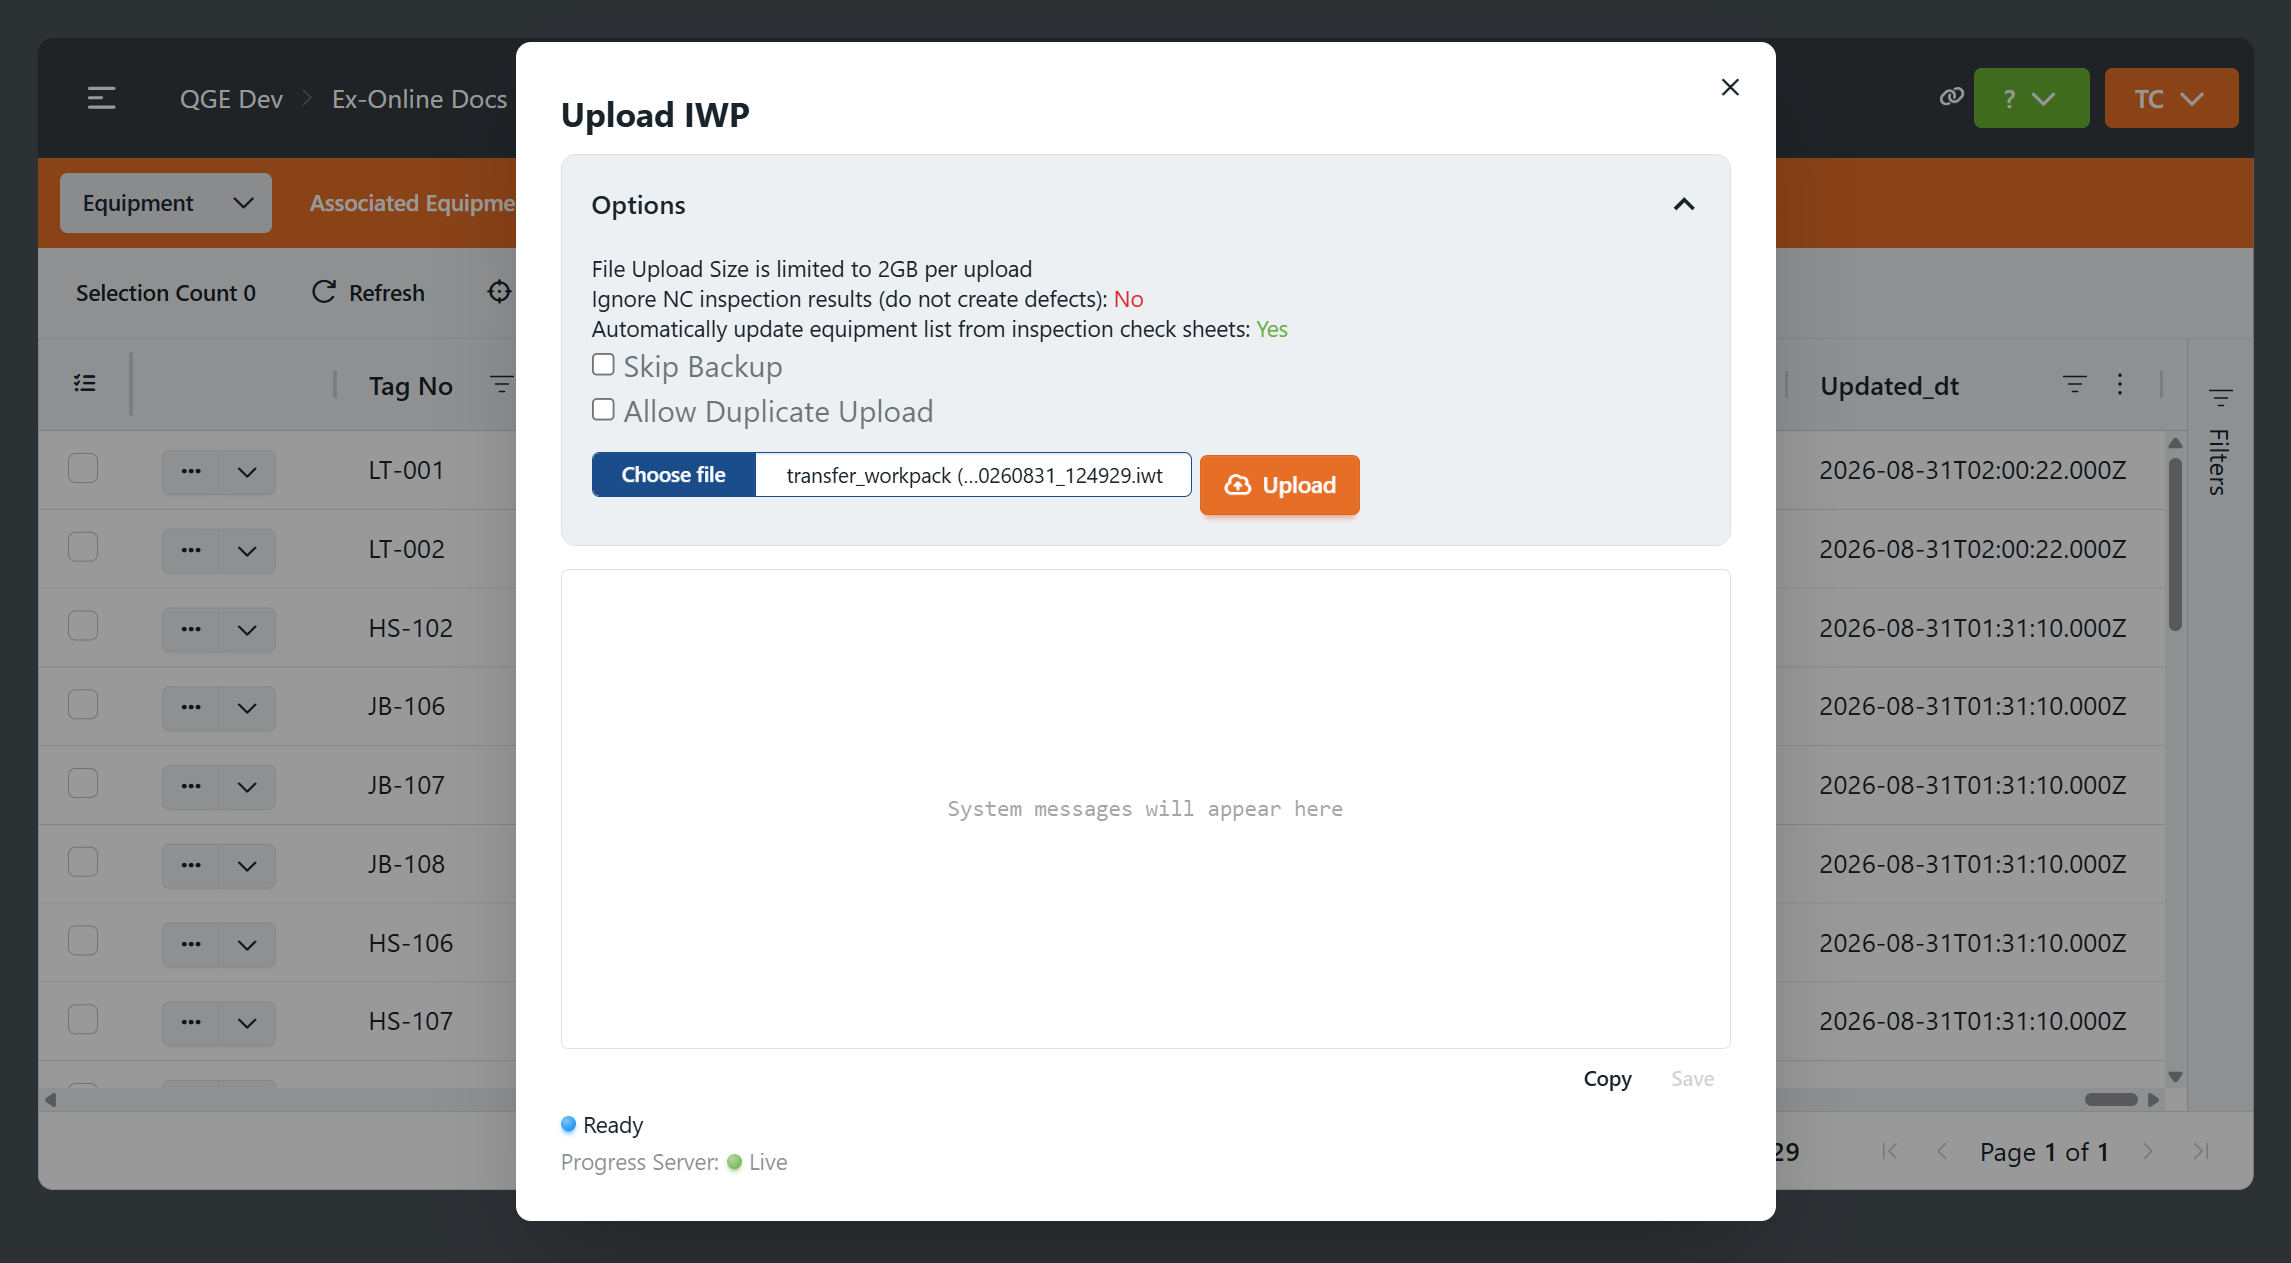
-
Leave the default options as they are — they work for most uploads.
-
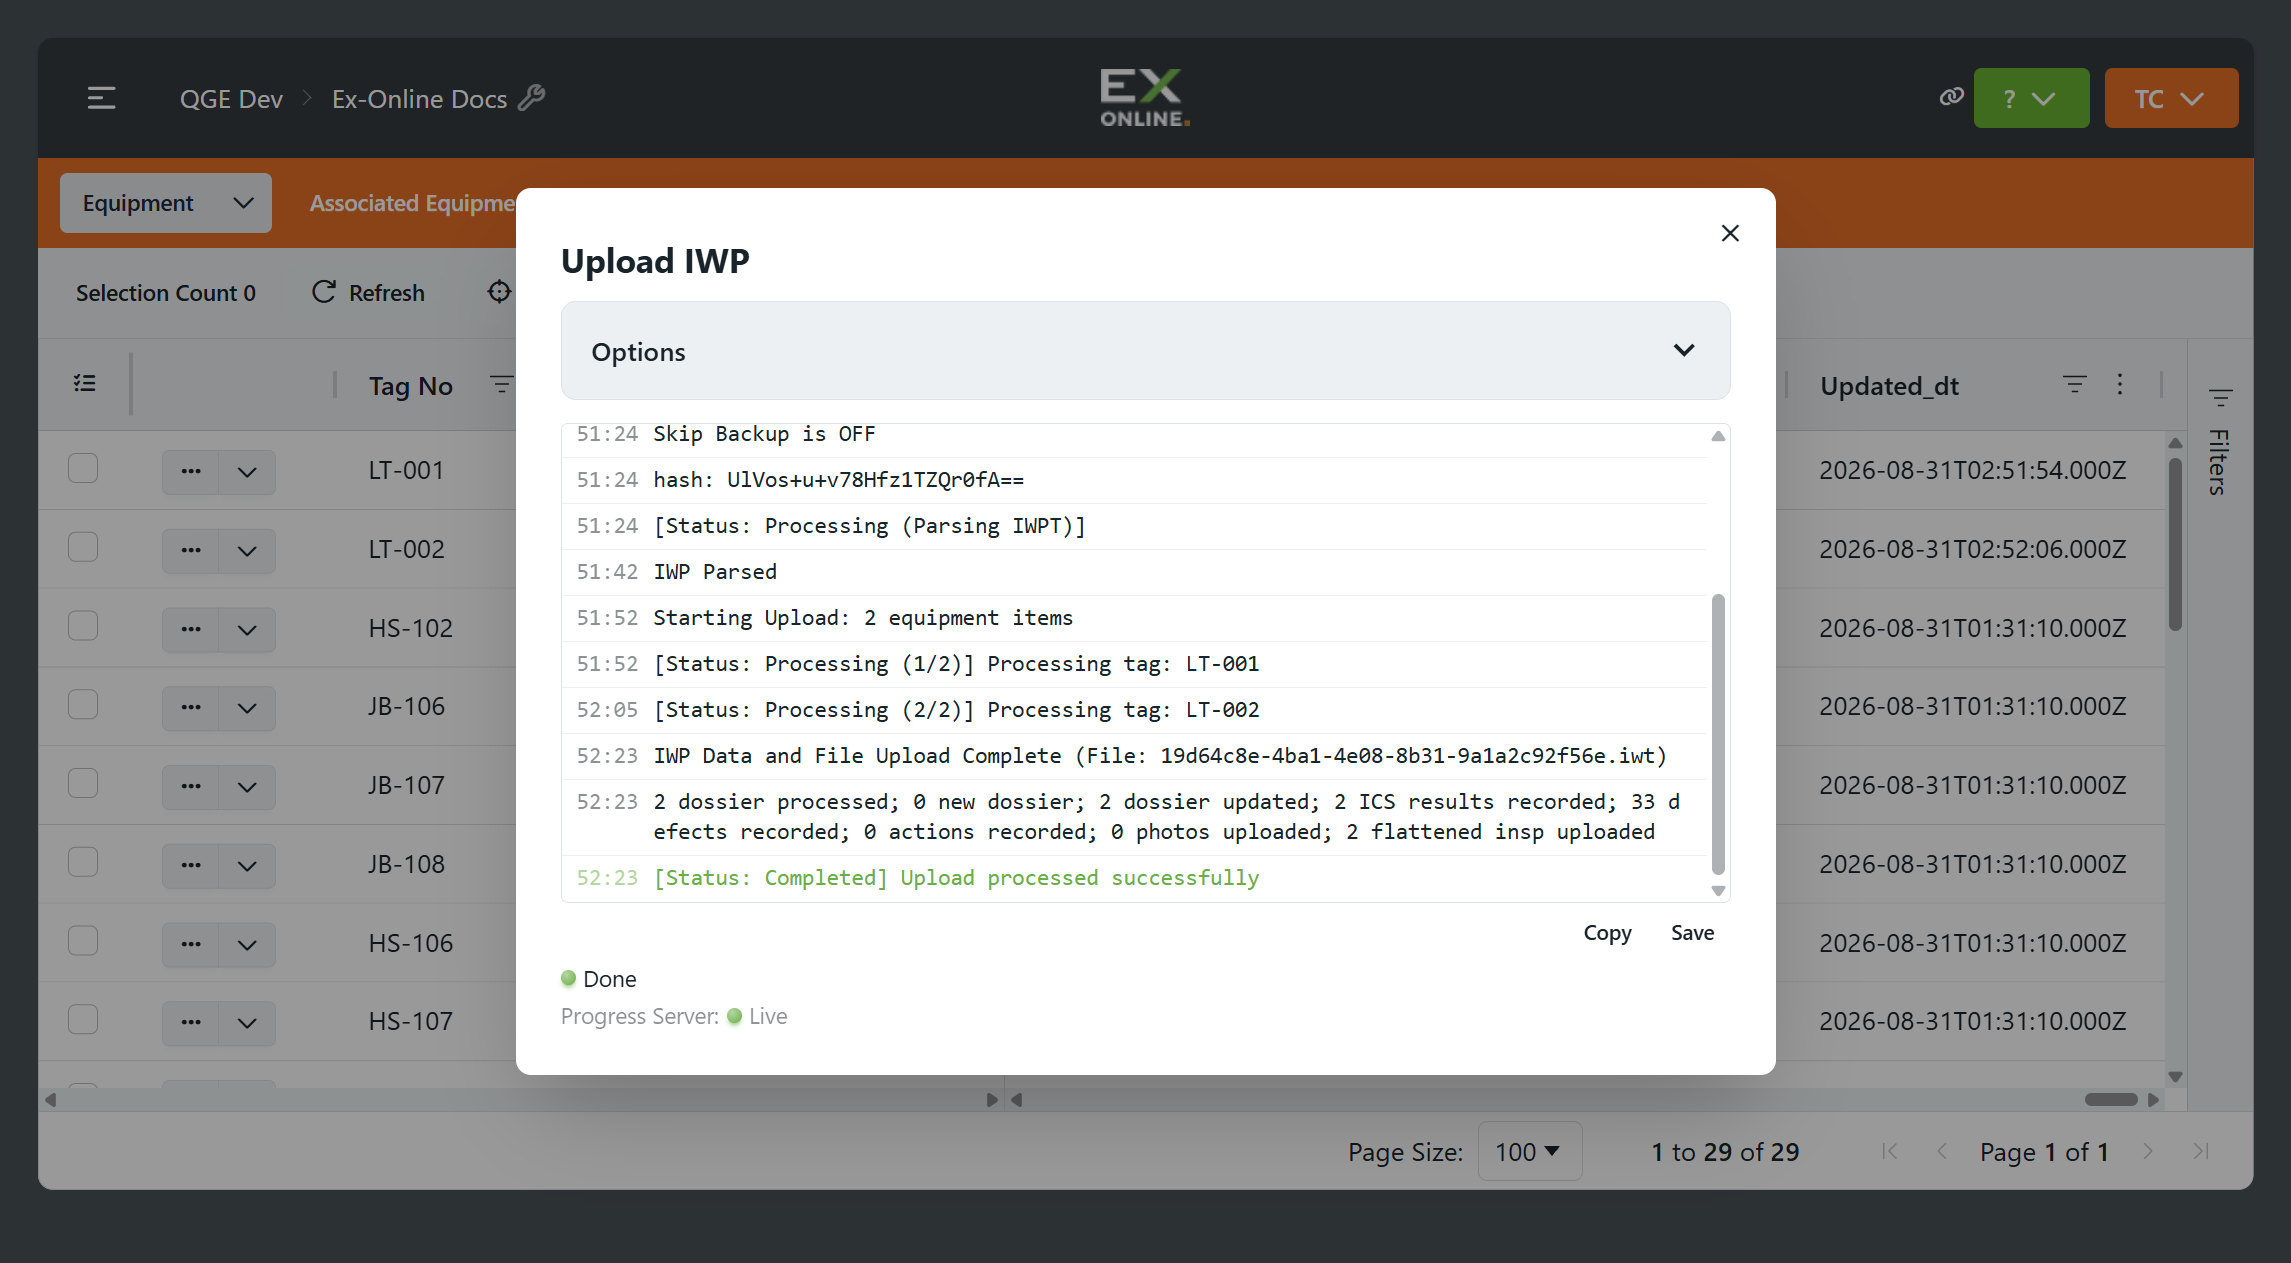
Click Upload and wait until the system messages show Upload processed successfully and the status reads Done.
Upload by QR Code
Section titled “Upload by QR Code”Click the Inspection dropdown and choose QR Upload.
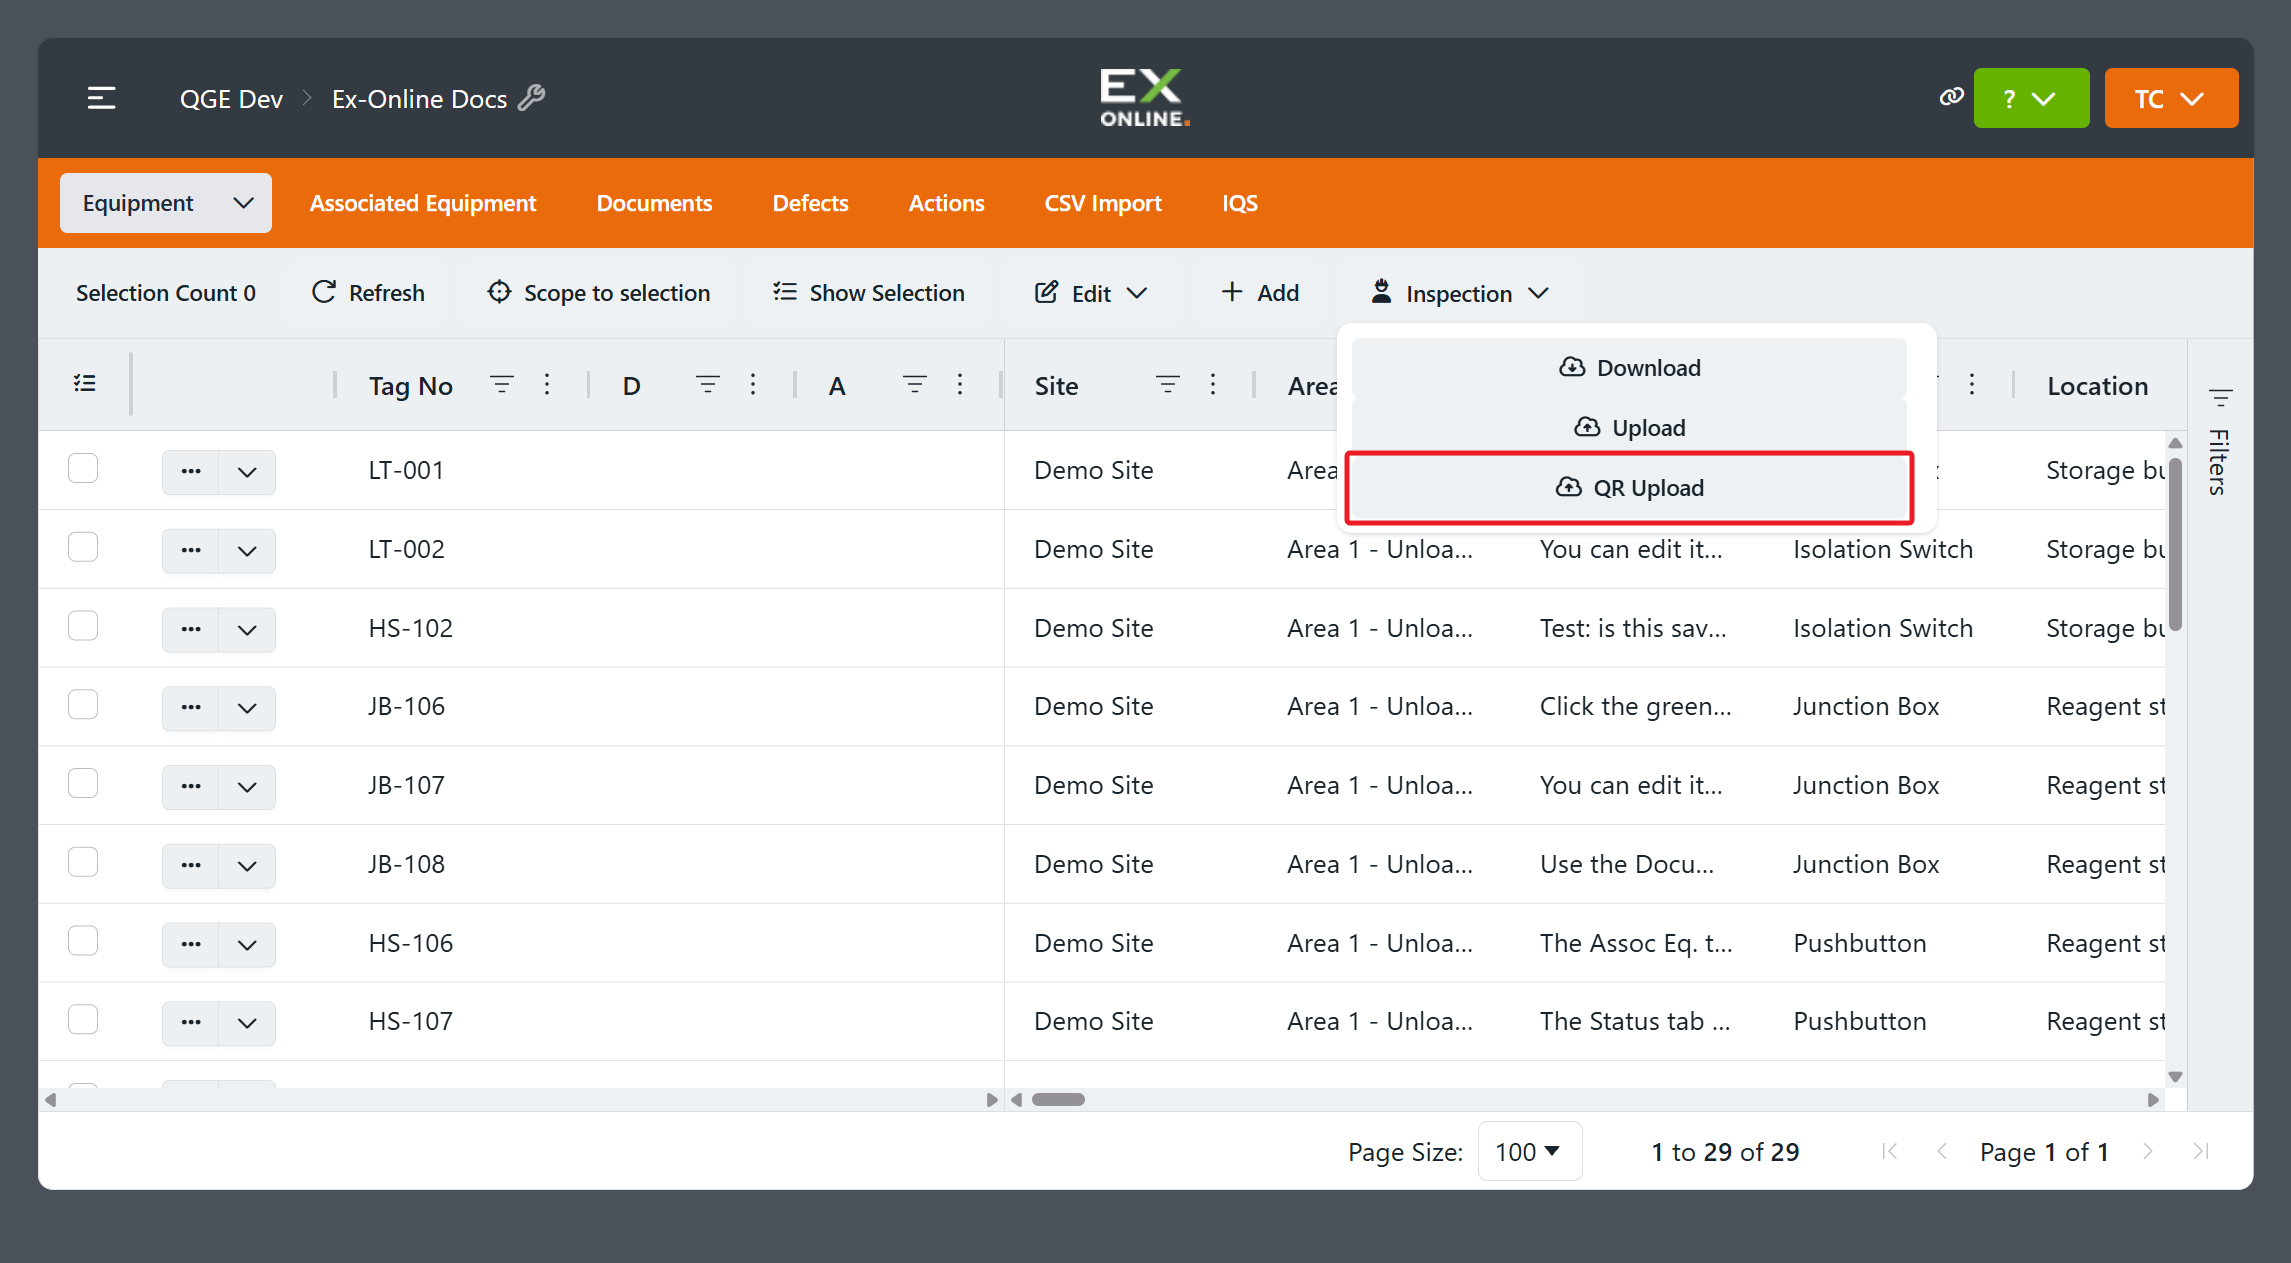
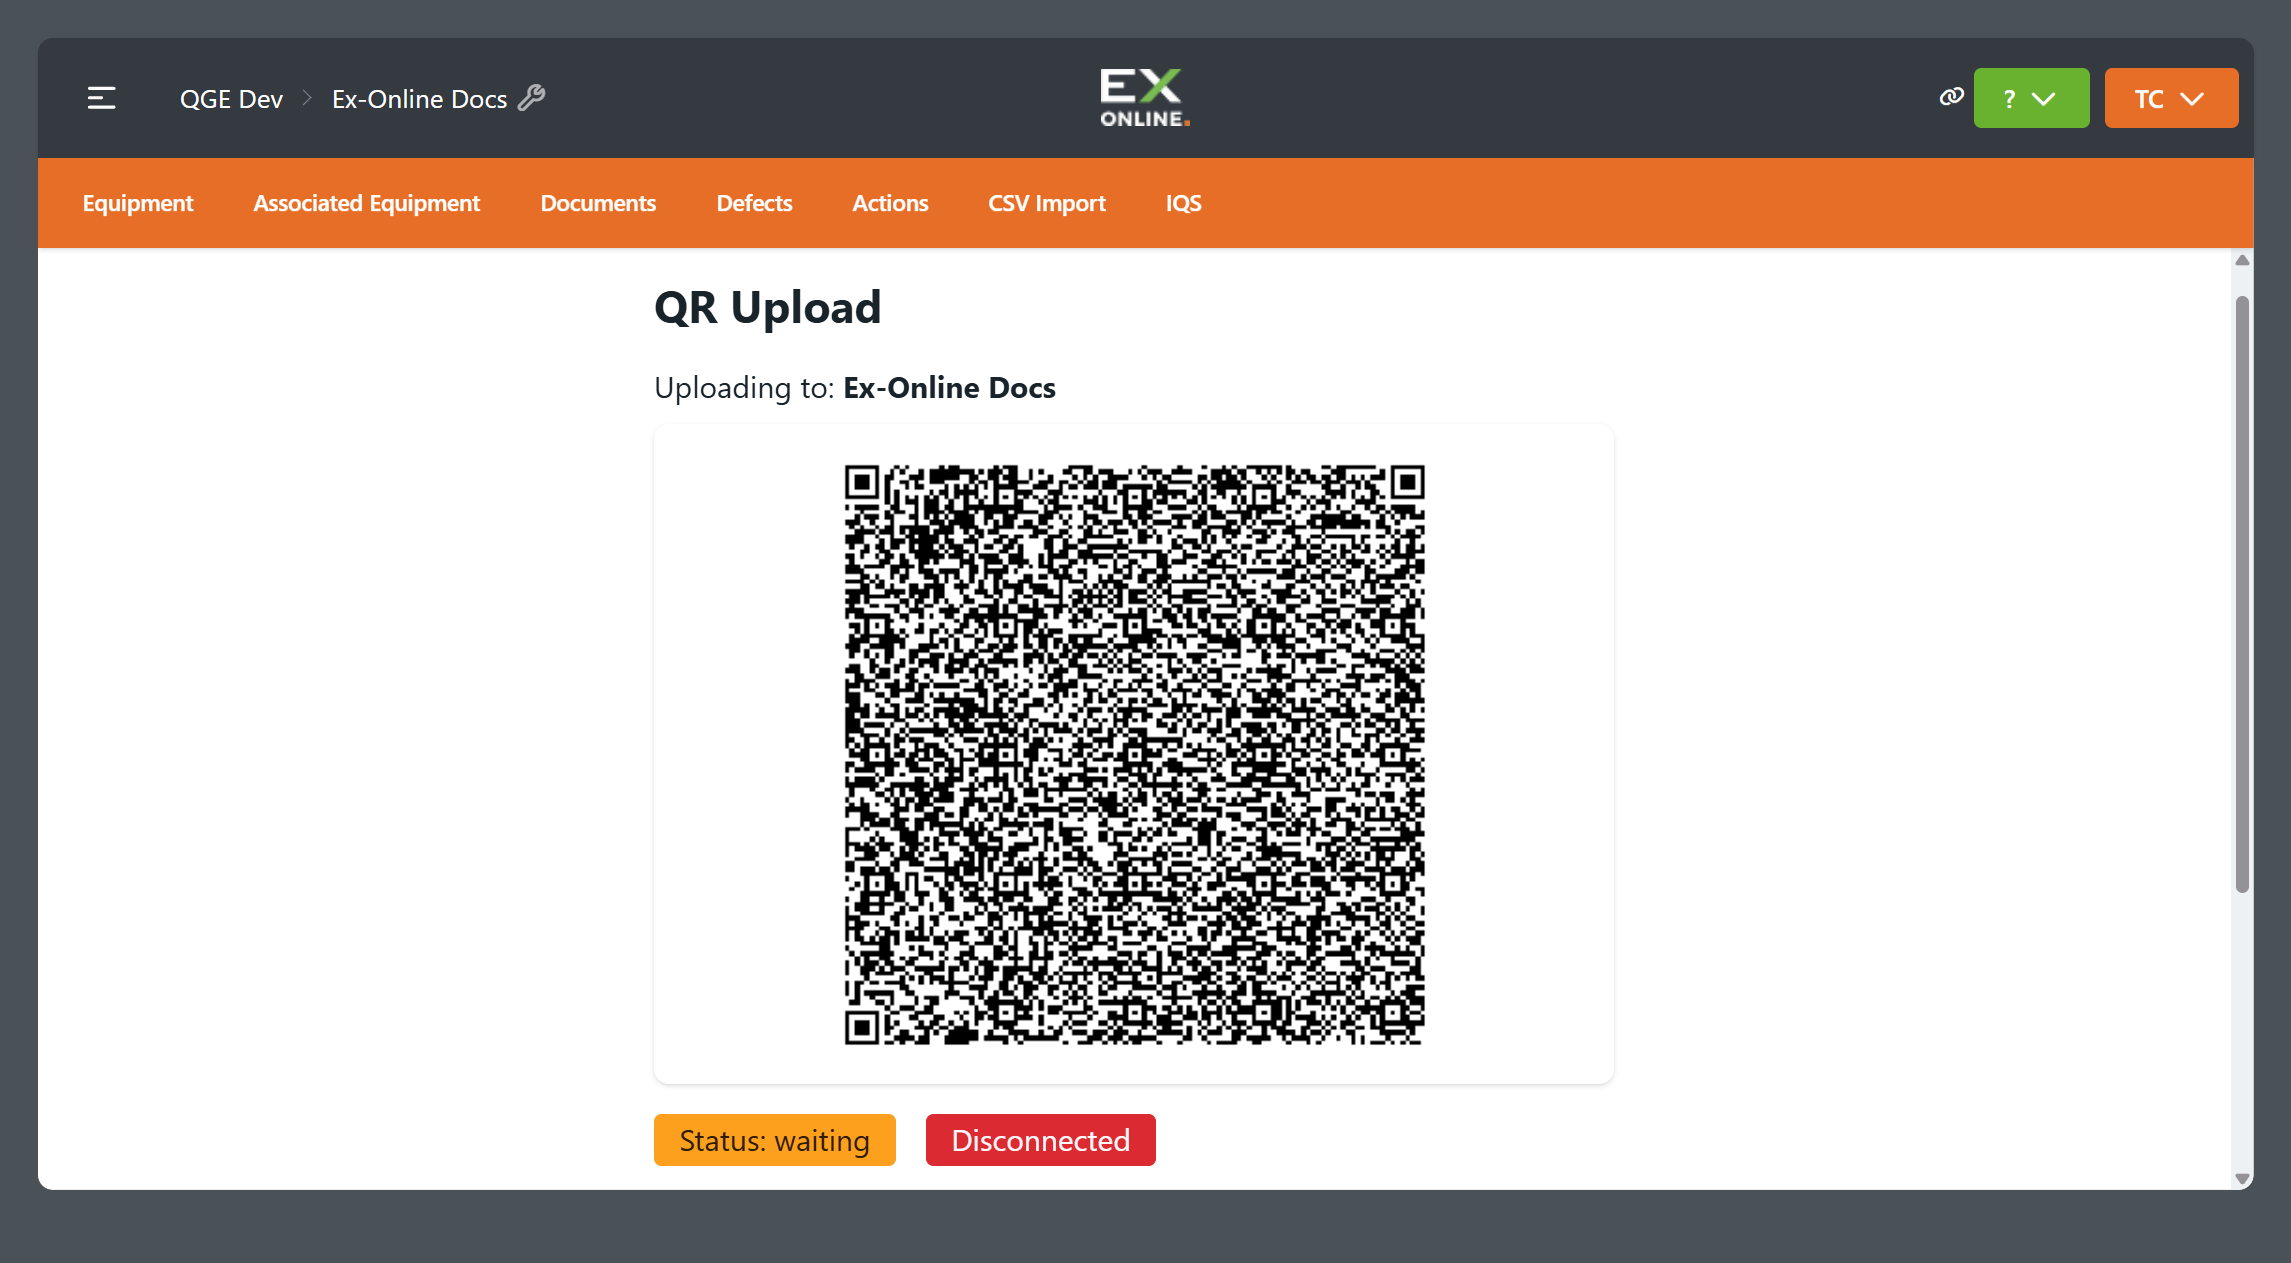
The Tag Browser opens a page with a QR code and an upload URL tied to your project.
-
In the Inspection App, open the sidebar menu and tap Transfer, then choose Upload by QR Code.
-
Scan the QR code shown in the Tag Browser. The app pairs with the Tag Browser and uploads your inspection data directly.
-
Watch the Status line on the QR Upload page — it changes from Waiting for upload to Upload complete when the transfer finishes.
Confirm on the equipment grid
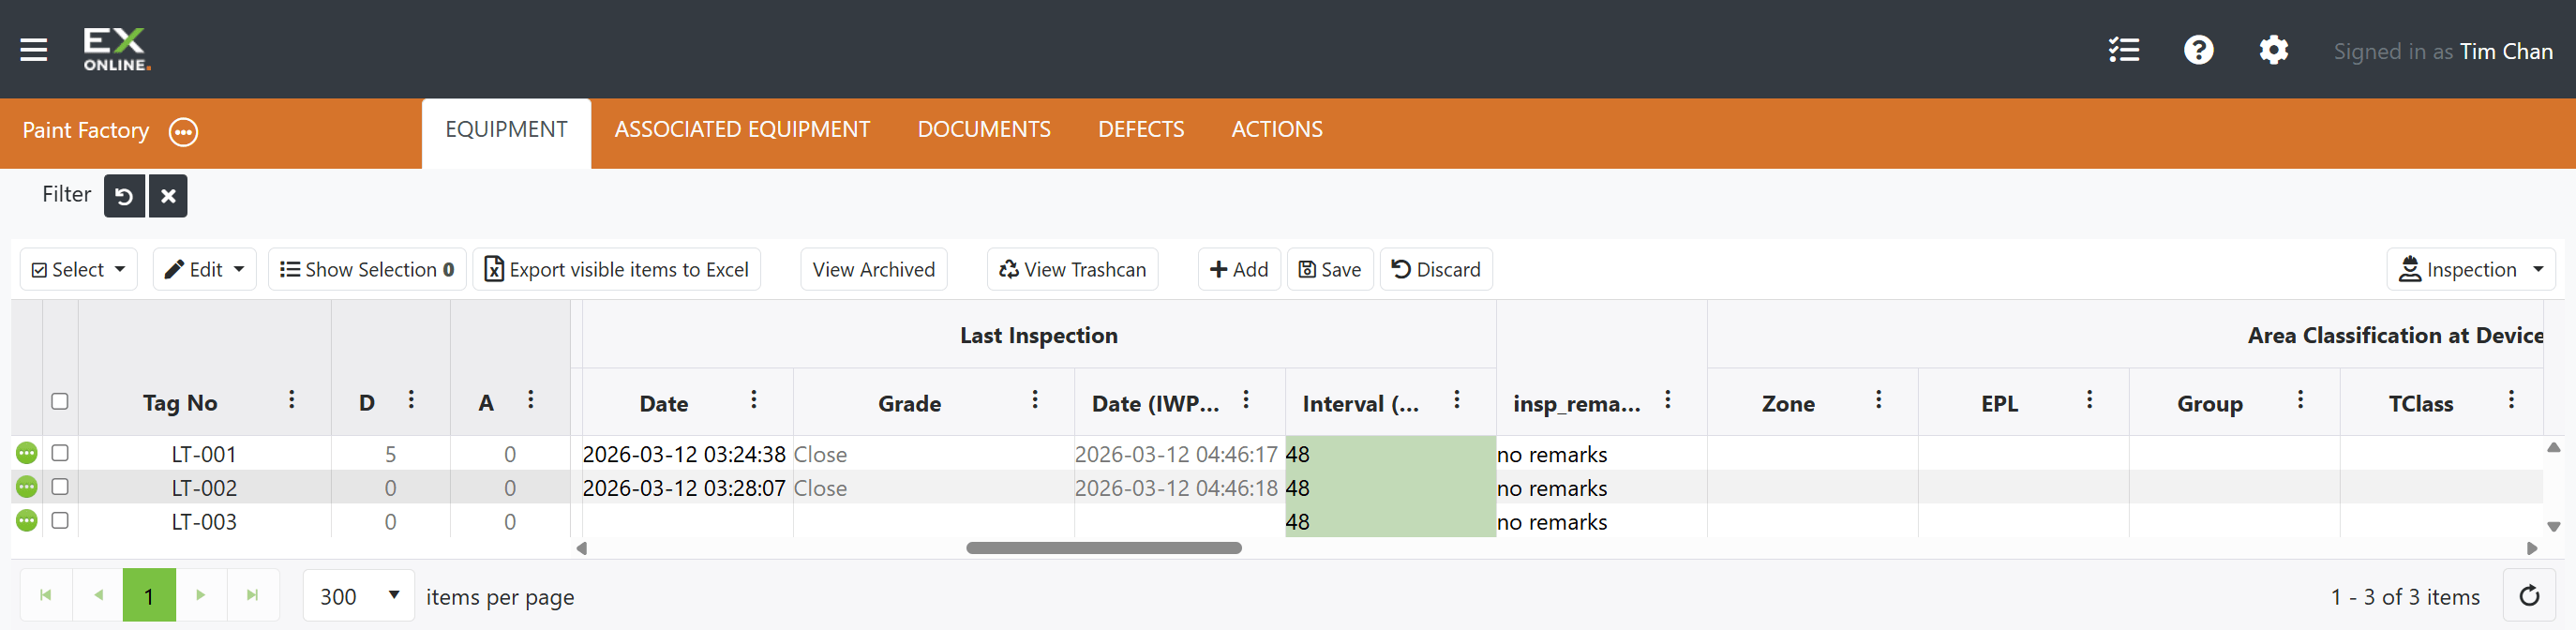
Section titled “Confirm on the equipment grid”Return to the EQUIPMENT grid and check the uploaded inspection data:
- Date — when each item was inspected
- Grade — inspection grade (for example Close, if that matches your Part 1 checksheet settings)
- D (Defects) — count for items with non-conformities from Part 2
Review defects
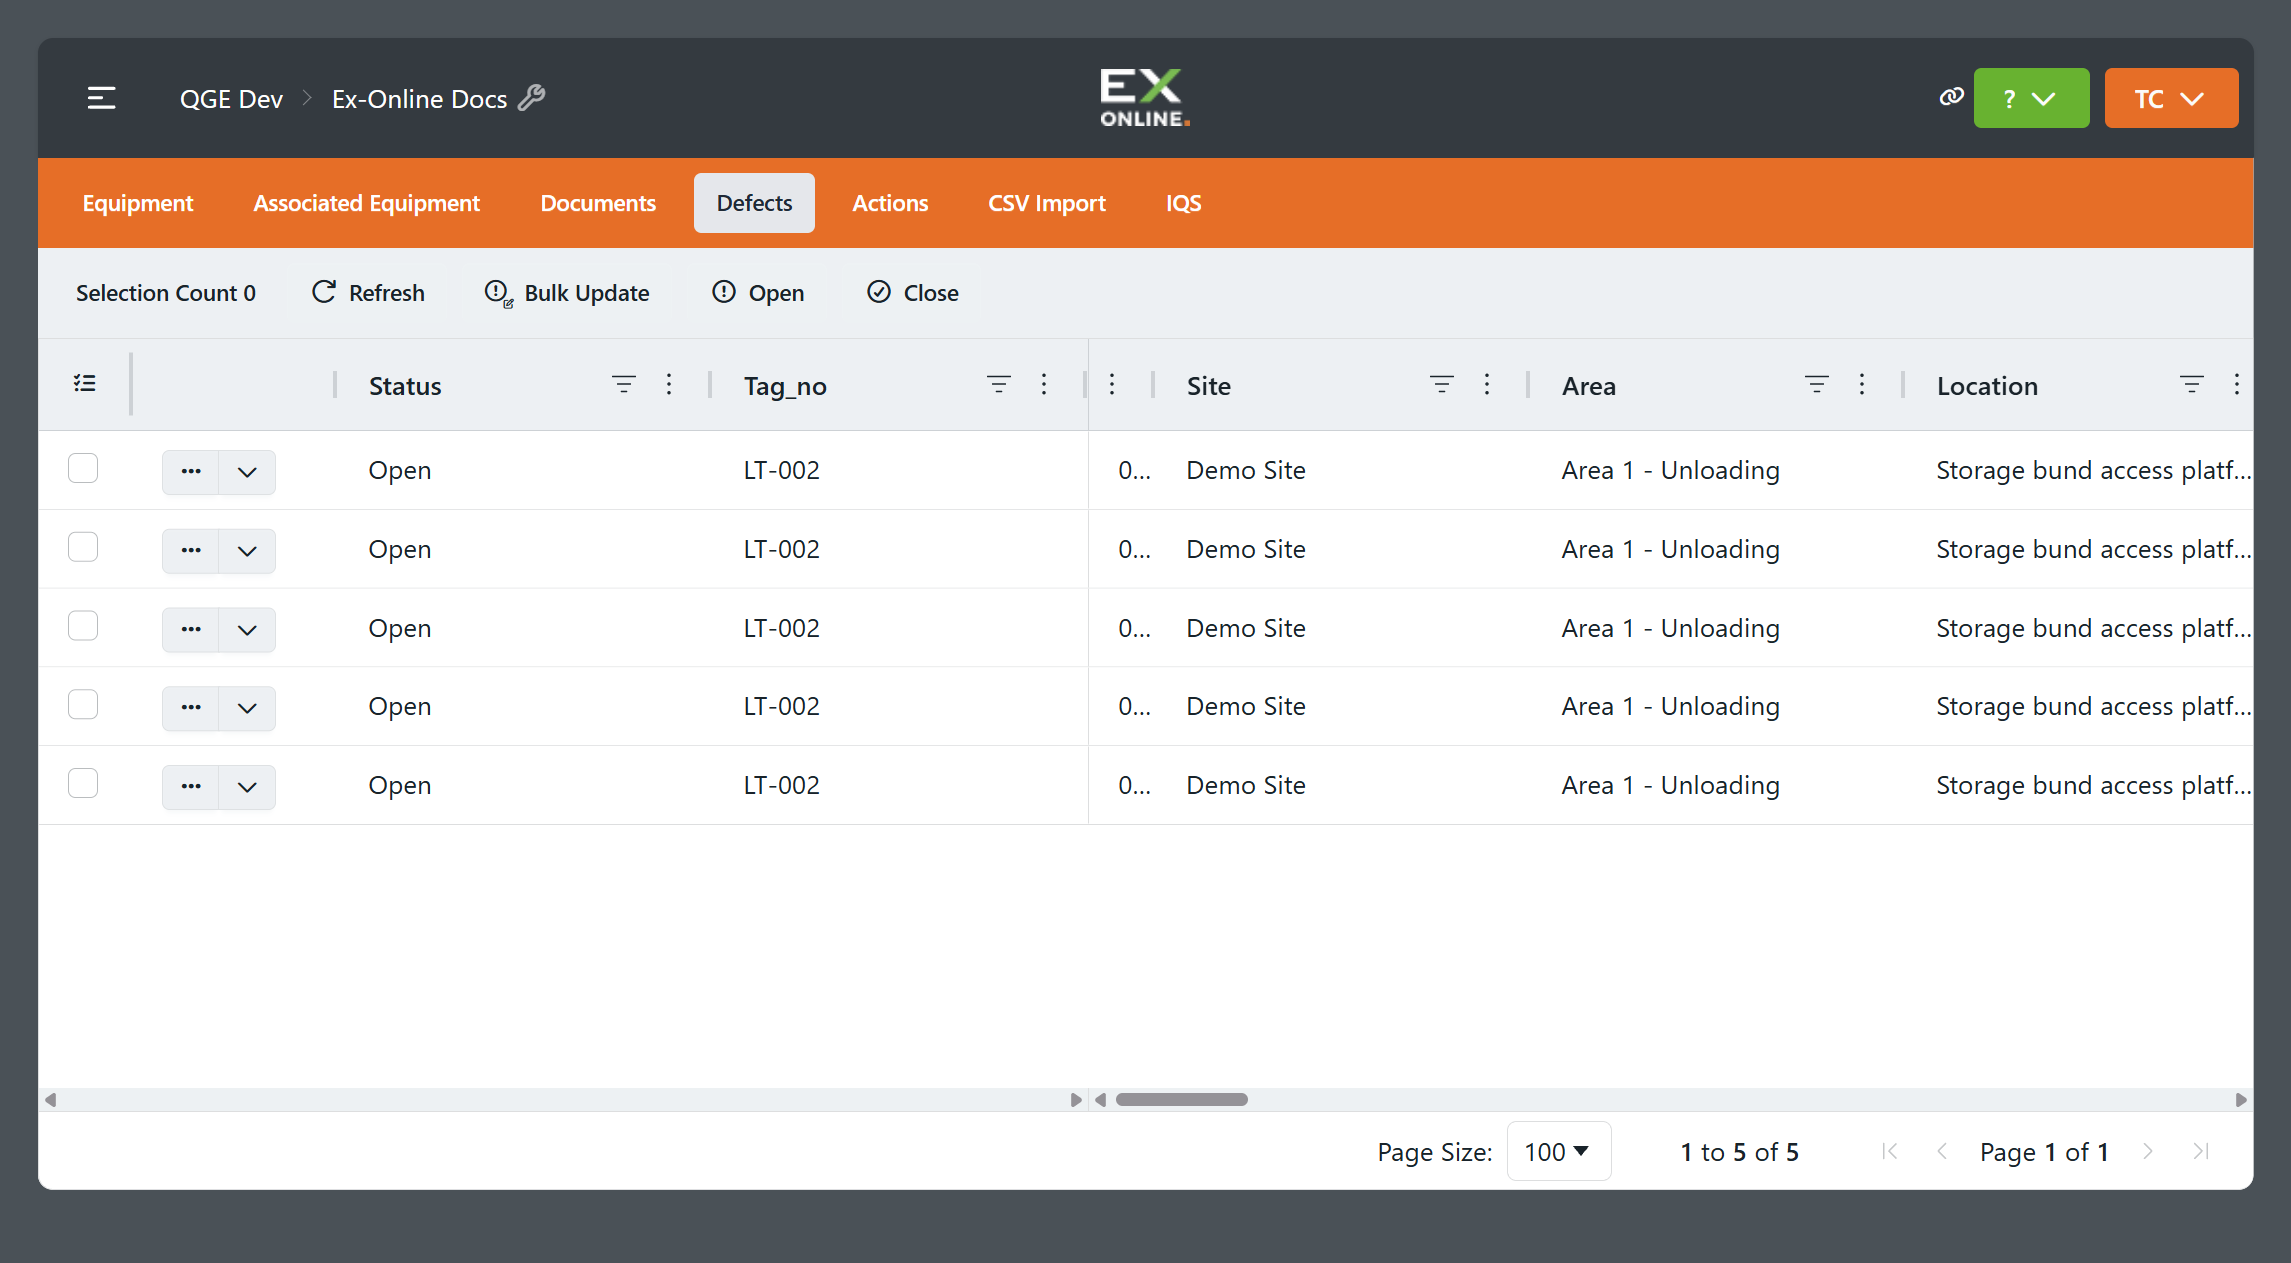
Section titled “Review defects”Switch to the DEFECTS tab on the Project Dashboard to review defects from your uploaded inspection.
The screenshot shows sample data with five Open defects for LT-002. Your records and defect counts will reflect your own inspection findings.
For detail on defects and actions, see Defects and Actions.
You’re done
Section titled “You’re done”You’ve walked the full path: work pack in Part 1, inspection and transfer in Part 2, upload and verification here in Part 3.
Where to go next
- Manage equipment — add, update, and organise project records.
- How-to guides — follow steps for your next task.
- Reference — understand screens, controls, and fields.